There were three parts to creating the final project. But before we even started, we discussed surrealism and and looked at images by various artists. We noticed that many of the paintings created a sense of space and depth by using perspective. So of course we had to discuss what linear perspective is! Then we were able to start.
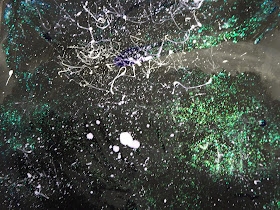
Step 1 was creating the background, and outer space sky. We painted with black ink, and let it dry. Then we painted on some glittery purple paint (it was a free sample I was given at a convention, and the consistency is rather thin and jelly-ish and doesn't cover well at all, but it create a nice effect great over black). We also splatter painted some white tempera paint. When it was dry, metallic and glittery markers and colored pencils were used to add some planets and stars and such.
Step 2 was to create a simple room interior on a separate paper, using one-point perspective. We used the vanishing point and our rulers to create a checkered pattern on the floor, and also to place some doors and windows. The rooms were painted with liquid watercolors, and salt was added as desired o make a funk textural look to the walls and floor. When the paint was dry, some details were added with Sharpie, and the windows and doors were cut open. Some were cut out completely, and others were cut so that they could open and close. The ceilings were completely cut away.
Here we are, ready to cut out our ceilings and doors.
The Sharpie embellishments haven't been added yet.
Step 3 was assembly and magazine collage. The parts were glued together, and students picked images to put in their rooms and skies. I was originally planning to cut a window flap in the skies, and take and print photos of the kids so they could be entering through the window. Thank goodness I didn't tell the kids about this plan, since we ran out of time and never got to it! The pic below shows the work created in steps 1 and 2, ready to be assembled.The pics below are the finished pieces, after the magazine collage was added and everything was glued together. (We used Elmer's Glue-All applied with a paintbrush.) The pic at the top of the post is another of the complete pieces.
I have just 4 kids in the class this fall, which sometimes makes an odd dynamic. I had great expectations for the kids putting things like giant hamburgers or ice cream cones or insects or tubes of toothpaste in the room or in the windows, or a fish flying through the sky, and so on. I made an example with a giant foot coming through a door, and a large hand reaching in a window, as well as a huge eyeball and a lizard, and a chocolate chip cookie. I had loads of magazines - nature, home, and more, and so I was very surprised at the odd choices the kids ultimately made. I've been teaching a long time, and usually kids would have been intrigued by my example but these kids had other ideas, decidedly different from my expectations. But I think they are pretty cool, nevertheless!!!


No comments:
Post a Comment
Due to spam/phishing overload, comments are no longer being accepted on this blog. You can find There's a Dragon in my Art Room on Instagram if you wish to react to this blog or contact me.
Note: Only a member of this blog may post a comment.