Pages

Wednesday, March 27, 2019

NAEA Boston - my 2 workshops

I taught 2 workshops at this year's NAEA convention - Get Deep Relief with Totally Terrific Tooling Foil and Using the Unexpected
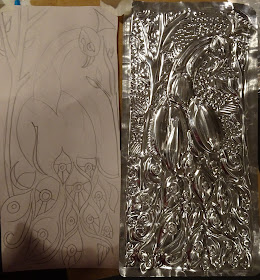
The first, Get Deep Relief with Totally Terrific Tooling Foil, was a 1 hour and 50 minute ticketed studio workshop.  I'm amazed that the attendees were able to complete such fabulous pieces in the time allotted.  The time seemed to fly by very quickly! 
 I believe the attendee who made the adorable sheep (or is it a lamb?) below plans to add color to help identify his eyes.  I think it will be really cool!
Here is the class, learning the basics, and getting started.
The pic below is someone looking at some of my samples.
And a few more fabulous pieces made by attendees.
Some attendees didn't have time to do the 'antiquing' process, using ink and steel wool.  I hope that they will send me pics of their pieces when they are complete!
I'm not going to go into process details here, because they are posted previously on this blog.  You can find my video tutorials for working with tooling foil HERE, and you can find a link to a handout called "Oh What a Relief" on my Document Weblinks tab, HERE.  To see pics from last year's tooling foil workshop at NAEA, go HERE.
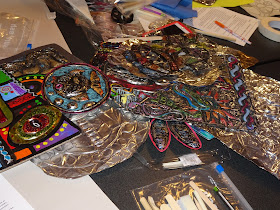
Tons of samples / examples!

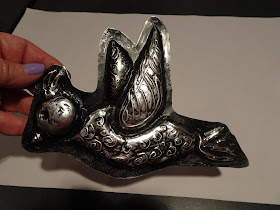
My second workshop, Using the Unexpected, was a slide presentation, where I talked about using materials such as toothpaste for an imitation batik resist (example in the pic below), roofing felt as a painting surface, Sheetrock for relief carving, sand as a textural medium for paint, shaving cream for marbling, and more. 
It was a nice big room with most of the seats filled.  I didn't count, but based on the number of rows of chairs, I think there were about 150 people there!!  To access the handout and a PDF of my slide presentation, you can again find them on my Documents Weblinks tab on this blog, HERE.
I really enjoyed teaching the workshops this year, and I think my attendees were mostly quite happy!  But unfortunately there is always a downside, and I want to share that with you as well.  In my tooling foil workshop, during the hectic closing minutes, some visitors stopped in and looked around, and took some pictures.  I should have chased them out, but I thought perhaps they had friends in the workshop.  Unfortunately, I learned the next day that one of them had stolen the kit of materials from one of my attendees.  How awful!  With 6 or 7 thousand art teachers at the convention, there'd be no way to ever find or identify them. 
Then, the next day, someone placed a recording device on the front table in my workshop, to record my presentation, and forgot to pick it up at the end.  It's usually me that leaves things behind and loses them at conventions, so I feel very badly for the gentleman who was recording my presentation to bring back to the rest of his department.  I hope he is able to recover it!

Thursday, March 21, 2019

NAEA Boston, part one!

I spent the past extended weekend in Boston, at the annual NAEA convention, a gathering of thousands of art teachers from all over the country; actually from all over the world!  So much to share, I'm going to divide it into two posts.  This first post is an overview of the convention experience.  The squirrel pictured above is one of a number of sculptures by Okuda San Miguel, which are stationed along the median of a street in Boston.  Pretty cool, huh?  Getting to see these, as well as the installation Prismatica (part of which is pictured below, right) was one of many fabulous experiences during my days in Boston.
Over the space of four days, I both taught and attended workshops, visited the vendors and tried out new materials, attended an opening night party and danced my feet off, spent time with old friends and new friends, ate fabulous Italian food, seafood, and sushi, attended a fun meet and greet courtesy of the Art Class Curator, saw really cool street art, visited the MFA (Museum of Fine Arts), walked thousands of steps, and took hundreds of pictures. Whew!  It was a busy whirlwind, and I came home exhausted but happy.
(By the way, the silver-haired lady in all of these photographs is me.)
Boston is a lovely city.  My son lives nearby, so I've definitely visited the city a number of times, but still, every time I'm there, I see something new, like this.
The side of that building is flat, by the way.  It's all an illusion. 
And yes, I took a lot of pics, but I did NOT take a lot of photos of people, so the images of people in this post are all borrowed from friends - thanks everyone for doing what I neglected to do!  I hope its OK that I'm using your pics.  Above, yummy dinner at Giacomo's, and below, eating with friends at Legal Harborside.
And at the meet-and-greet.  I wish I took pics of the sushi we ate afterward!
Look at these photos below of artists Janet Echelman (1st pic) and Amy Sherald (2nd pic). I was lucky enough to get to hear them both of these inspiring women speak at the convention.  Do you notice, they seem to have the same pair of glasses?  Maybe I need to get a pair like them!
I'm sure you know who Amy Sherald is, right?  (If you don't, she's the artist who painted the official portrait of Michelle Obama for the National Gallery).  But maybe you don't know about Janet Echelman. Her floating sculptures flying in the air over cities and such are amazing.  I posted about her work when it was in Boston in 2015, referring to it as a psychedelic hairnet in the sky.  You can see that post HERE.  Her talk was engaging and enlightening - I loved hearing how happenstance really changed the direction of her life and art-making in such a fabulous way, and how science and mathematics are such a big part of her art-making process.  Here's a pic from her presentation.
One of the cool things about NAEA conventions is that they usually include the opportunity to visit local museums for free.  I'd been to the MFA before, but I was glad to have the opportunity to return.  Below, some pics of favorite things from the MFA.
This painting below, of the Lincoln children, by Susan Catherine Moore Waters reminds me of the creepy twins from The Shining.  Is it just me, or do you see it too?
This painting below is what this past winter felt like.  Hopefully, now that it is spring, we won't get too much more snow (though some is predicted for Friday).
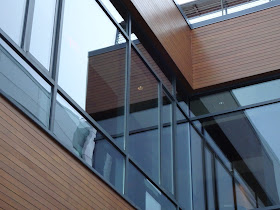
I'm going to juxtapose two paintings from the MFA by Charles Sheeler with photos that I took while in Boston.  Do you see the relationship?  Cool, huh?  I think I need to learn more about Charles Sheeler and his intriguing compositions.
 Just a few more from the MFA...
So much more I could show you, but I've already included enough for you to see this time. In my next post, I'll tell you all about the two workshops I taught - the good and the bad (mostly good!).  I'll close with a pic from my hotel.  Isn't it cool?  I walked past that several times every day!

Saturday, March 9, 2019

Colorful Leafless Trees!

My DragonWing Arts students recently completed these paintings of trees.  We began with this simple method: 
First, draw a land line, dividing ground and sky.  
Second, draw a trunk that extends from land line to top of paper.  
Third, add branches coming from the trunk, extending to the edges of the paper.  More smaller branches could be added coming from these branches.   
Details could be added as desired.  Some of the girls decided they should have branches that were shaped like hearts.  And of course they wanted to add swings, too!  I left these decisions up to them.  
When the drawings were done, painting began.  The kids each selected two colors to use to paint their skies, mixing as desired.  
In the pic on the right below, you can see the the student making use of an 'ugly sponge' when mixing colors.  We use these for keeping paintbrushes clean with minimal water.  The excess paint is wiped off the brush onto the sponge, and the brush can then be dipped into the other color the student is using.  When changing to a completely different pair of colors, the brush is first wiped on the ugly sponge, then washed in the water, and then wiped again on the sponge to remove excess moisture.  The paints stay exceptionally clean with this method!
Then another two colors were selected to paint the ground, and finally, another two colors were used for the tree itself.  White could be used as desired, and other colors were used for various details. 
 
When the paint was dry, some of the kids chose to use black Sharpies to outline and make their colors 'pop'. 
Originally, the plan was to add a few leaves as desired, cutting them from sheets of colored foam, adding vein lines with Sharpies, and gluing onto the trees or ground.  We ran out of time, so the trees stayed leafless!  I think they look great!