Monday, January 28, 2019

Using my Wolf Kahn lesson as inspiration for painting with adults

In my book club, a different person picks a book each month and hosts the group for food, beverages, and discussion.  When we read The Art Forger this past month (which I told you about in my previous blog post, HERE), the host thought the book didn't have a lot of 'meat' for discussion.  Her artist daughter suggested she host the book club as a paint-and-sip.  I'm the only artist in our group of 10 women, so she contacted me, wondering if I thought we could 'forge' the Degas painting that was central to the book.  I said no.
I've never presented at a paint-and-sip, but I've attended one, grudgingly, and I really despised the concept of a group of people all painting matching schlocky paintings.  And I looked closely at Degas paintings, and his layers of subtle color glazes, and I knew that these non-artist ladies would never feel successful trying to imitate his colors, or trying to draw a nude, or a ballerina, or a horse.
So I suggested another approach, and the host agreed, purchased paints and canvases with my guidance, and provided paper plates, rags, and a place to paint.  I provided easels, paintbrushes, and my presumed expertise.  And of course there was wine.
I showed the ladies the paintings of Wolf Kahn, that I had recently used for inspiration for a lesson with my DragonWing Arts students that I posted about HERE.  I explained that we would be loosely using his paintings for our inspiration, to create (or 'forge') our own 'missing masterpieces'.
I explained that they'd begin with big brushes, creating layers of colors for sky, background, middle ground, and foreground.  Each layer would be created by brushing together two or more colors, plus white if desired.  We quickly reviewed the color wheel and I recommended mixing analogous colors but not complementary colors, unless they wanted to create browns and grays.  The color choices were totally up to them.  I explained my Wipe Wash Wipe method for keeping their brushes clean, and they went right to work. 
Their color choices and brush strokes were sometimes bold, sometimes gentle; some color mixes and textures were intentional, and others were a complete surprise.
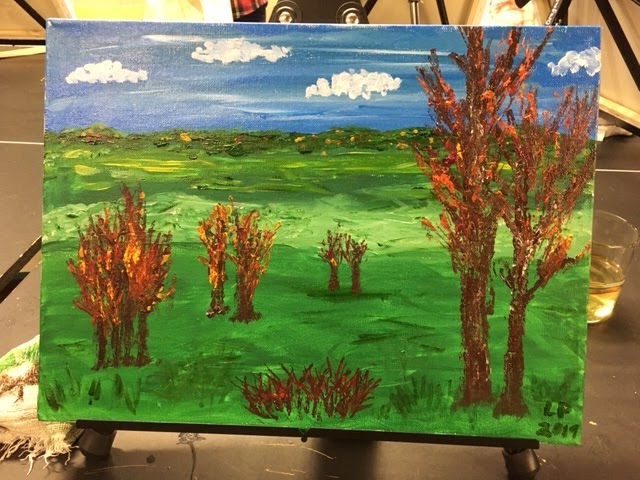
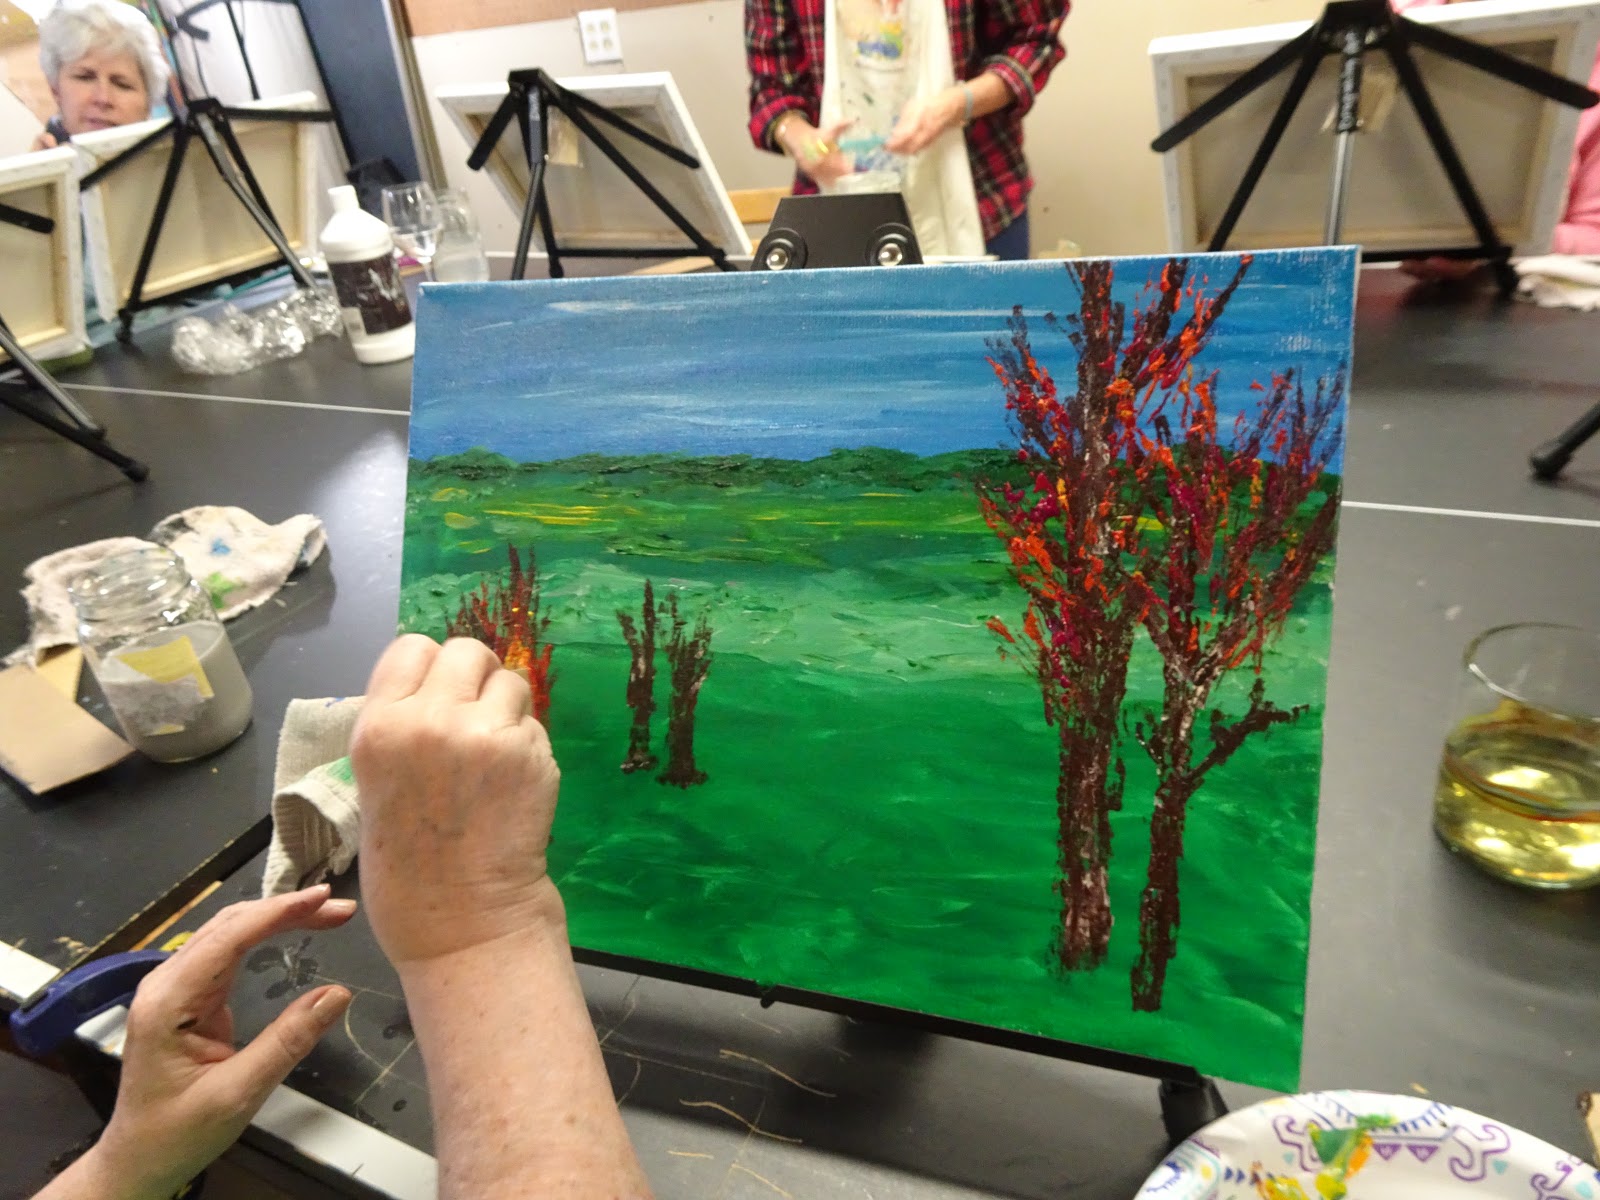
We took a break for some dessert, and let the paint dry a bit, and then returned to paint some trees as desired.  I gave the choice of painting trees with brushes, or using strips of corrugated cardboard with paint on the edges to stamp textured trees, and demonstrated both. We talked about size of the trees to create perspective - smaller for further away, larger for close, and then I totally left it up to them.  And they each approached their trees in a totally unique way.  Nobody tried to copy!!!
Some chose to be very symmetrical, others were not.  Again, the decision was their own.  Do trees grow in rocks on the beach?  Not usually, but why not, for the purpose of the painting below?
The painting below was a view of a local golf course.  The trees are not there, but were added in and I think really make the painting pop!
The ladies were so incredibly successful!  And not only that, they also had a fabulous time, are proud of their paintings (which are each unique), and want to paint again!  Success!

*Just realized, I'm missing photos of a couple of finished paintings.   Oops...  It was not intentional.  :(

Saturday, January 19, 2019

Two Books

I'm an avid reader.  But, while lots of art educators like to read books about pedagogy, and all sorts of stuff related to teaching and education and such, I admit that I do not.  I read for pleasure and escapism; I like a good story.  It can be a novel - pure fiction, maybe a post-apocalyptic or dystopian story, or a well-written piece of magic realism, or perhaps a historical novel based on a real person or situation, or just about anything else, as long as I enjoy the writing.  I also appreciate a well-written memoir.   But today's post is about two books that I've read recently, both related to art.
I first learned about the early 17th century Italian artist Artemisia Gentileschi in a graduate art class on female artists, in the late 70's, while I was a young teacher.  I was compelled by her story and her work, and never forgot her.  (And I must admit, I love the rhythmic sound of her name!) A year or so ago, I was at a library book sale, and came across the book The Passion of Artemisia, by Susan Vreeland, pictured above.  I added it to the pile of books on my dresser and have finally read it.

If you don't know anything about Artemisia, reading this book is a good way to learn her story.  While it is a novel, and therefore fiction, much of it is based on the known facts of life, including her rape by a painting teacher, and the trial of her rapist.  It is well-written and a compelling story, and I highly recommend it.  But if you read it, please remember, it is a novel, which means characters are invented to enhance the story, and portions of her life are edited and simplified.  Still, if it brings to life an artist you might otherwise know nothing about, and makes you want to read more about her, it is worth the time.  And after reading it, you might agree with me that Artemisia Gentileschi was a badass!! 

My book club recently selected The Art Forger by B.A. Shapiro as our month's reading.  It is a novel, based loosely on the true story of the unsolved theft of artwork worth more than $500 million from the Isabella Stewart Gardner Museum in Boston.  The story of the theft is especially intriguing to me because I recently learned that there was a possible connection between this theft and an attempted 1981 heist at the Hyde Collection, here in Glens Falls NY where I live.  (The thieves hijacked a Federal Express truck and then got stuck in traffic, causing them to arrive at the museum after closing time, and ruining their plan.  The beautiful Rembrandt portrait of Christ and other valuable artwork at the museum remained safe, and security was subsequently much improved.)

Anyhow, the book is the story of a young woman who is a struggling artist, and works for a company that makes reproductions of famous works of art.  She is approached to copy a Degas painting that had been stolen in the Gardner Museum theft.  (Remember, this book is a novel; this particular Degas painting is a fictional invention.)  From the book, I learned a bit about art forgery, and about Isabella Stewart Gardner and her museum, so I guess it was a worthwhile read.  But if you read it, don't expect a great piece of literature!  It's an easy read, so its a good book to toss in your bag to read on the beach or in an airplane, but it is not likely to make your top ten list!  I honestly admit I disliked the main character, and found the story very improbable, but I suppose, since I now want to visit the Gardner, it was a worthwhile read.

Have you read either of these two books?   Any other art-related books that are good stories? 

Friday, January 11, 2019

Creating crazy colorful papers for collage

Here's the beginnings of new project with some fun preparatory steps!  Last week, my DragonWing Arts students painted large sheets of paper with black ink, and then painted over it as desired with a glittery paint.  These are going to become the backgrounds for colorful outer space collages.  We will also be splattering them with some white and silver paint, to create galaxies of stars. 
 So this week's task was to create some colorfully textured papers that can be cut into planets, or any other celestial object desired!  We did these several ways, using liquid watercolors and watercolor paper.  The technique used for the papers pictured in the photo at the top of this post was bubble-wrap printing.  The students wet their papers with a big brush, and then painted them with saturated colors.  Then, a piece of bubble wrap was placed on the wet paint, and some cardboard was placed on top to keep it in place as it dried.  Above are the results when dry. Yes, somehow I have purple bubble wrap!  The color has absolutely no function.  It's just pretty!
A similar process was used for the papers below, but instead of bubble wrap, students used crunched up pieces of wax paper and plastic wrap.  I love the color choices they made - there's paper created for an ice planet, and another for a fiery planet, and so on.
Students then saturated another piece of paper with wet watercolors and sprinkled them with salt. We used a mix of table salt and kosher salt.  The results, pictured below, are really lovely. 
 This one looks like it could be the earth!
Here's a couple more gorgeous closeups!
Finally, the students tried out shaving cream printing.  If you've never done this before, it is easy and messy, but its the kind of mess that cleans up easily.  Each student spread out some shaving cream on a tray.  They dripped liquid watercolors into the shaving cream, and swirled the colors with a fork or a pointy wooden stick. 
Then a piece of paper was pressed into the shaving cream, and the paper was squeegeed off afterward to remove excess shaving cream.  We used pop sticks today, but a rectangle of cardboard is also a great squeegee for this method.
 It's going to be fun to use all these papers to make our planets. If we have time, we will try some other techniques for even more planet paper!  Stay tuned...  we are working on a couple of other projects as well, so you won't be seeing the results for a few more weeks.

Saturday, January 5, 2019

Wolf Kahn inspired landscapes!

My DragonWing Arts winter session has begun, with a couple of new students joining the class!  Our theme for the winter is 'Color my World', and we will do projects that beat the winter blues by using lots of colors, with the natural world as our inspiration.
We started with a quick project, inspired by the work of artist Wolf Kahn, to get everyone messy.  The kids liked his cheerful colors, and the simplicity of the lines of his trees.  We didn't seek to copy his work; we instead used it as a motivation and inspiration.  His work often has layers of color, to represent background, foreground, and middle ground.  We created our layers of color with pastel chalks, on both white paper and on gray bogus paper. 
The kids colored with the chalk and then used either their finger, or a paper towel wrapped around their finger, to blend each layer.  We shook excess chalk dust into the garbage can to prevent dust in the air!
 Then, we used the edges of rectangles of cardboard as our painting tools!  (The brushes were for a different project.)
I had a genius inspiration about paint distribution. I wanted to squeeze paint into lines on these foil cookie sheets, so that the kids could dip the long pieces of cardboard.  But I didn't want to have to wash the trays.  I discovered I had some scraps pieces of vinyl contact paper, and I lined each tray with a piece of it.  Here's a pic of the contact paper covered trays.
Because I have just 5 students in the class (and one was absent), I was able to give each student their own tray, so they could select their own colors.  Then the cardboard was dipped in colors and stamped to make trees.  Here we are, stamping away!  You can see the trays with the lines of paint on them in the pic below.  By the way, the paint was tempera.
 There were also shorter pieces of cardboard that the kids could use for branches or bushes. They could even be folded to create foliage.
 One student bent his long cardboard pieces to make trees that bent and twisted.  I think they look pretty cool.
 Here's all the final results on the gray bogus paper.
 Each one is so unique!
And here are the final results on the white paper.
 When everyone was done, and we were out of time, we pulled monoprints off the leftover paints in the trays, and then peeled up the contact paper to discard.  Poof!  The foil trays were clean again!  This pic below is the paint left on the tray.  I'll show you to monoprint another time, since we will be using them for a future project.  I think this looks like an abstract painting!  If it was acrylic, I'd have wanted to save it.  But since it was tempera, I knew it would just crack, so it was discarded. 
And here's how easy it peeled up off the tray.  Any paint on the silver was something that was there from a previous use of the tray.
I was planning to have the kids use the leftover paint to do something like my sample below, but we ran out of time.  Our hands (and one nose and one forehead) were VERY messy with chalk and paint, so cleanup was a priority!
 Below are some samples I made to test out the project before introducing it to my students.  I experimented with using chalk over paint, but in the end I preferred the samples with chalk as background. 
 On the sample below, I added some chalk shadows under the trees when the paint was dry.  I plan to give the students an opportunity to do that to their paintings in the next class, if they'd like. 
It was  a fun project, and when everything is dry and complete, we will probably be 'framing' them with some colored construction paper.  They should look terrific!