A week before Thanksgiving was my annual NY state art teachers' association (NYSATA) convention, and I presented two workshops there! This post is about the first of these workshops,
"Funky Fun with Chalk Pastels".
There were, in my estimation, between 60 and 70 people there - a little crazy for a 50-minute hands-on workshop, but everyone was smiling so I think it was successful! Thank goodness for helpful attendees who helped with materials distribution when way more people showed up than seats in the room! The purpose of the workshop was to explore alternative techniques using chalk pastel, in particular for those who don't care for the dustiness of working in chalk. I shared two techniques, with some extra variations, and I'll explain them all in this blog post.
✵
The first technique is one I've blogged about before,
HERE, in a post called "
Abstract Fun with Chalk Pastels", and
HERE, in a post titled "
Everything's Fine when you've got Jim Dine!" Let me share the details! All the images thus far are from using this technique.
To begin, soak grayish colored bogus paper in a sink or tub full of water for a few minutes. You can see the tub of water behind me on the left side of the pic above.
(Note: The image I'm holding is something from a different process; my green apron is courtesy of Blick!) Bogus paper, if you've never heard of it, is made from recycled paper, is inexpensive, and is very absorbent, kind of like a blotter paper, so it holds up fairly well when wet. You can see the wet color of the paper in the photo below, in the uncolored right-hand corner. Not very pretty. I like to make sure the entire paper is covered with color.
Place the wet paper either directly on a table, or on a plastic table-covering, as pictured above. You do NOT want to put the paper on an absorbent surface, or the paper will dry out too fast!
(Note: it's a good idea to have student names on the paper with Sharpie before soaking. Do that in a prior art class to get the paper ready to use.) Use soft chalk pastels to color on the wet paper. The chalk will turn paint-like on the wet paper, creating bold rich color. Black outlines or details work great on top of the color.
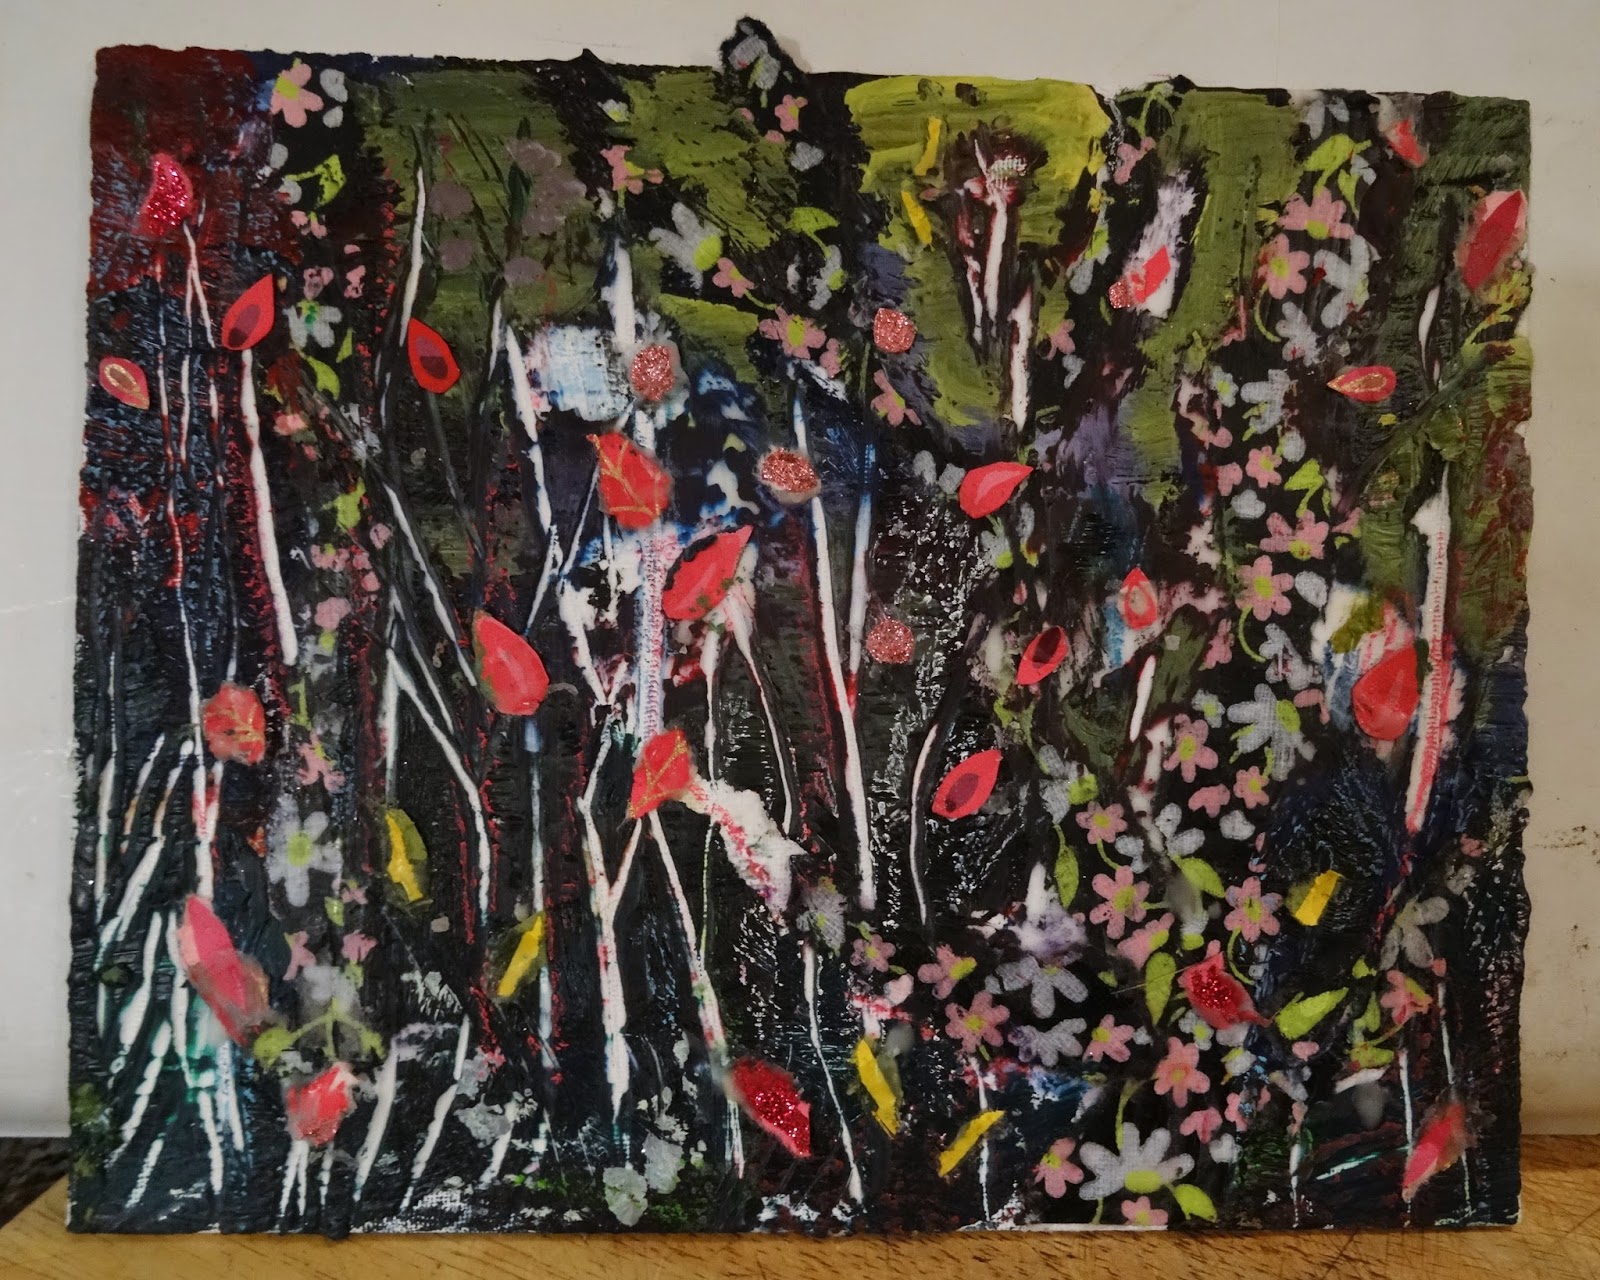
I often use Kandinsky's improvisation paintings as a motivation for this project, playing music and having students respond to the music with non-representational designs and colors, filling the paper. But there's many other options for thematic ideas for the process, besides abstraction.
For example, this lovely winter scene below is something I hadn't ever thought of doing on the wet paper!! But it sure gives me ideas.
Here are more images of work done using this process, by participants in my workshop. There are so many possibilities! Perhaps cakes a la Wayne Thiebaud? Or, as I did once with my students, expressive hearts a la Jim Dine? Or maybe you'd like to emulate the work of Peter Max? Or...?
I should note that when the paper is dry, the chalk will again be chalk-like and need to be "fixed". Instead of spraying with fixative, we gently paint the surface with Mod Podge (any other acrylic gloss medium will work, too). I suggest painting black lines first to seal, and then cleaning the brush to remove any black chalk dust before sealing the other colors. Don't scrub or rub as you paint the medium on; just gently lay it on to keep the colors in place. The artwork will dry shiny and gorgeous, and chalk will no longer rub off on your hands when you touch it! It's a great alternative to smelly sprays that sometimes leave spots, and are a problem to use indoors!
The Mod Podge can be painted on the artwork when dry, or when still wet. It will work successfully either way!
By the way, if you don't want to soak the paper, there's another alternative. You can paint black outlines on the paper with acrylic paint, and when the paint is dry, make sections wet with a paintbrush and water, and color the wet sections with the chalk pastels (or soak the paper, with the dry acrylic black lines on it, as previously described). You can even try dipping the chalk pastel into the water rather than wetting the paper! I didn't have time for the participants to try the black acrylic lines in the workshop, but you can see my DragonWing Arts students doing this process in the image below, and you can see what their work looked like when done, at
THIS FORMER BLOG POST. Make sure you scroll down through the post to see the completed student work.
I think this black outline technique has a lot of possibilities. Look for artists that use strong black outlines, like Keith Haring, or Britto, perhaps, or a many others!
✵
Now, on to the second technique I shared at the workshop for participants to explore. Workshop attendees tried out the really fun technique that I call the "chalk dip". In this technique, the pastel chalk is dipped into tempera paint (we used white during the workshop; any color will work) and then used to draw on construction paper with short firm strokes, dipping again after each stroke. We used a lot of old faded blue paper during the workshop, but any color or black will work. Or, try white with a different paint color! The chalk color will be outlined by the paint color, as seen in the drawings below by workshop participants.
A couple of hints: you'll want to keep some water and paper towels nearby to wipe off the tips of the chalk afterward, to keep them in tiptop shape! I was asked if this technique would work with acrylic paint. Indeed it does, BUT the acrylic paint will ruin the chalk by sealing the tip if it is not completely cleaned off.
Some participants also tried the method successfully on the wet bogus paper (below),
or on black paper (below) with terrific results.
So manly possibilites! A van Gogh lesson, perhaps? Or impressionism? Below is an example of a piece on wet bogus paper by a participant, that incorporates both the soaked paper and chalk dip techniques beautifully! By the way, the chalk dip artwork can/should also be sealed to a gloss with Mod Podge.
This smiling participant below is the teacher who has been teaching in my former job/classroom since I retired! I love that she is still willing to get new ideas from me. It looks like she was rather prolific in the workshop!
✵
Did you know you can also draw with chalk into wet acrylic paint (white works nicely)? Just remember to clean off your chalks thoroughly before the acrylic dries on them! I'm sure there's lots of other crazy techniques you may discover, too!
✵
Perhaps you have tried to draw on black construction paper with white glue, and when the glue was dry, you colored it in with chalk pastels, rubbing to blend as in the swirly artwork in the photo below. The glue lines will dry clear, so you will be left with black outlines.
This can even be done on roofing felt. (Some workshop participants tried this, but unfortunately I have no photos.) Conversely, you can draw with black glue on white paper, and color/rub in chalk. These can also be sealed with Mod Podge! Below, the artwork I am holding up is an example I made years ago, using a burgundy-brownish glue, created by mixing some dye with Elmer's Glue-All. It was too long ago to tell you exactly how I did this, but you can purchase commercially made black glue for a similar effect, which was used in pic resting on my other hand. They were both sealed with Mod Podge. You can also see a smidgen of a piece of black paper with white glue on the bottom of the pile in my hand.
Do you have any other fun techniques using chalk pastels that you'd like to share? If so, I'm sure we'd all love to hear about them!
By the way, if you'd like the rather simple handout from my workshop, you can find a link to it under the "Document Weblinks" tab on the upper right corner of the blog. Or, you can grab the document from the link right here:
Link to 'Funky Fun with Chalk Pastels' handout.