

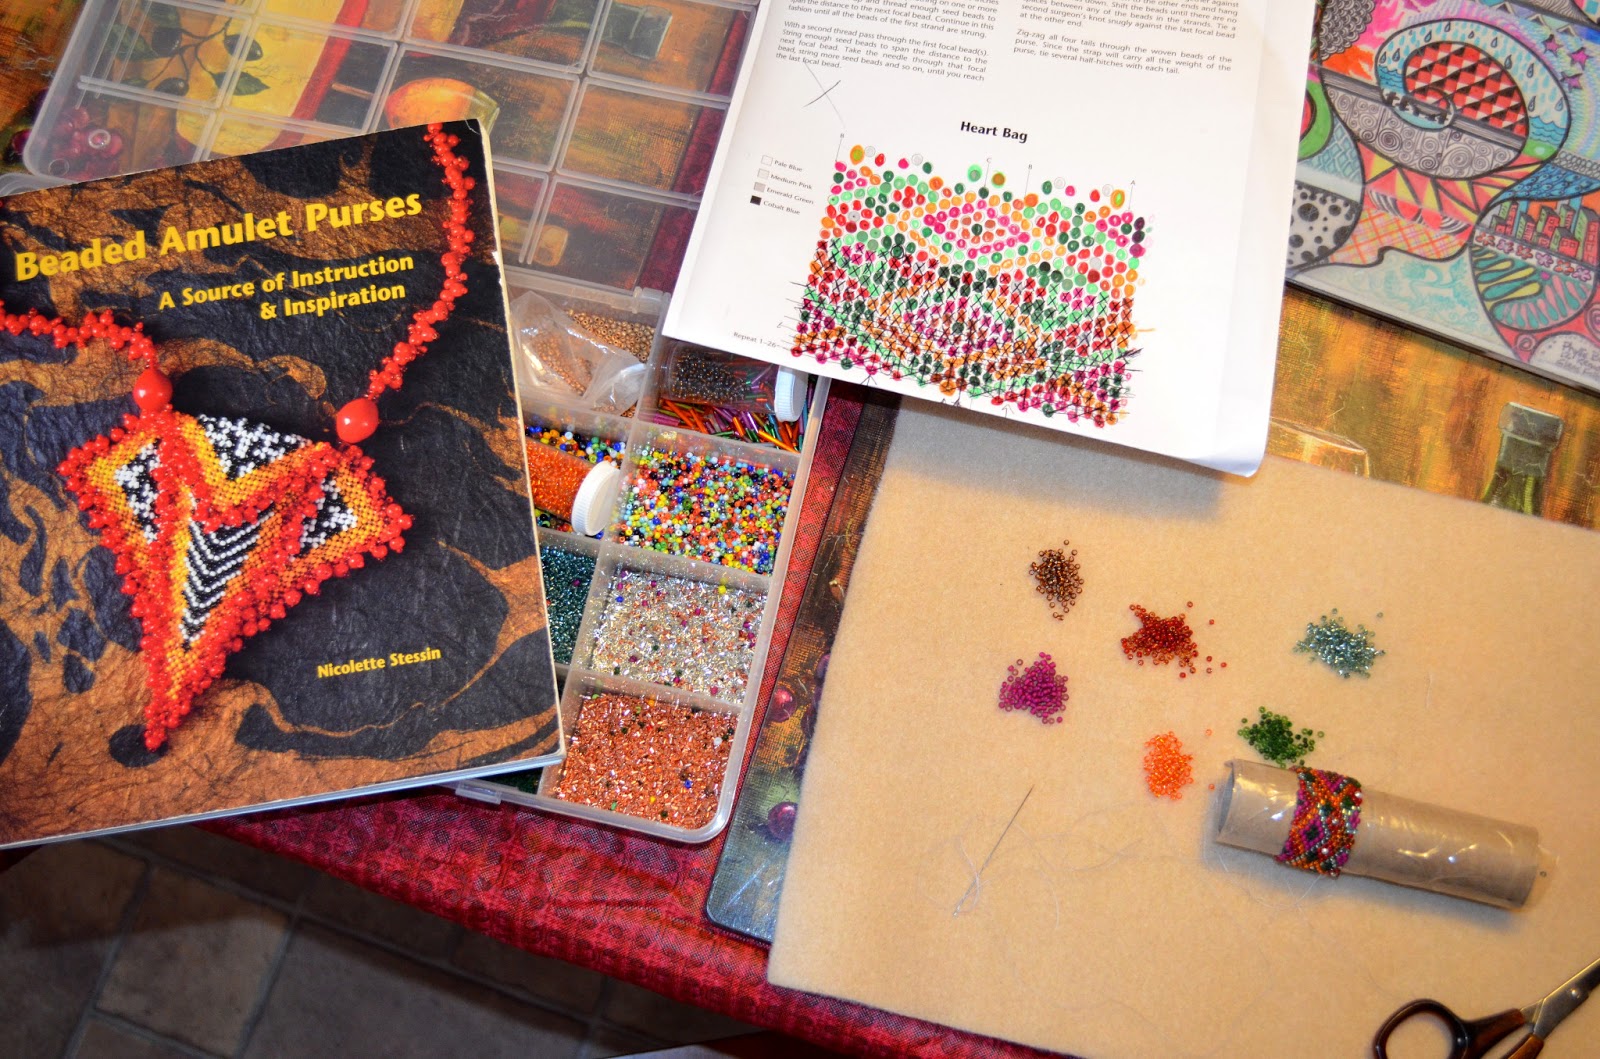
About a year ago I found this cool out-of-print book, Beaded Amulet Purses, (pictured below) while browsing the Strand Bookstore in lower Manhattan. This week I decided it was time to finally try out one of the projects in the book, with my own design of course.
I figured I'd better start out with an easy one, since, while I make jewelry, I had no experience doing something like this. The easiest project in the book had a heart design, which I did not like, so I re-graphed it to the more abstract geometric pattern you see in the finished purse.
Look closely at the purse and you'll find some mistakes in my pattern. (Actually these are mistakes I made weaving, not drawing the pattern; the pattern was correct.) Some of my colors, magenta, dark red, orange, and brown, were so close to each other that I mistakenly used magenta where it should have been red in a couple of places. I made a mistake with using the wrong green once also (there are two greens in my pattern). By the time I discovered these mistakes I was too far past them to change them, so I left them in. Hey, it's handmade, right?

 The weaving was done in a tubular fashion, using a compressed toilet paper roll as a support, using a peyote stitch. (Hey, am I the only one old enough here to wonder where the name of that stitch came from? I hear 'peyote' and I think of the mind-altering drug made famous in a book about shamanism by Carlos Castenada.)
But anyhow. The peyote weaving process was not difficult, but was terribly time consuming, because you can only add one bead at a time, in contrast to bead weaving on a loom, where you add a whole row at a time. With a complicated pattern, I found that I had to cross off each bead on my pattern as I picked it up on my needle. And when it was done, it was SO much smaller than I anticipated. Looking ahead in the book, I think most of the other bags are a little bigger.
By the way - forgive me for any strange formatting. I was trying to rearrange things, and blogger didn't like what I was doing and had another arrangement in mind. Oh well.


The bag in the book had a heart charm hanging off the bottom, but I didn't want to do that. So I gathered what beads I could find to match, and made the strap similar to the instructions and finished it today, sewing on the strap and a little dangle. Here's everything I was using.


Wow your hair is really long now! I would just get it trimmed with some layers to frame your face. How is retirement going? How fun to do some jewelry making. I have no patience for those little beads!
ReplyDeleteThanks, Marcia. Retirement is keeping me surprisingly busy. Not sure how I had time to work!
DeleteAs for the hair - I've got a day to decide...
Love the pouch!! Amazing work.
ReplyDeleteGreat job on the pouch...not suitable for coins? How bout' a $50? LOL
ReplyDeleteNice job on the purse!
ReplyDeleteI like your hair by the way. I think the grown out bangs look great. I have thick hair too and when it gets long it just makes me feel overwhelmed by hair. I know you can relate. So if it were me I would trim it up a bit. Hope that helps can't wait to see what you decide. I'm sure the professionals will be able to suggest something.
I think a cute bob would look great on you. Let the bangs grow out. Super cute pouch!
ReplyDeleteThanks everyone!
ReplyDeleteHair update: I'm letting the bangs continue to grow, and decided I was not ready to commit to a huge change yet. So we lopped off about two inches, so the ends don't so raggedy or straggly. It looks much fuller now, and I look less grungy. And the hair growing out around my face got trimmed and shaped in an angle. My husband didn't even notice it was cut, so I guess the change is subtle. Eventually I'll do something more dramatic, but for now it is still easy to put in a ponytail for the gym or just to get off my face. Thanks for the advice/input!
Love the beaded pouch! How about wearing it with a penny inside for luck?! :)
ReplyDeleteMaybe a penny. Or a love note? Meanwhile, despite the fact that I have NO IDEA really what to do with it, I'm halfway through making a totally different one.
Delete