
Just thought I'd take a moment to share with you how my DragonWing Arts students are doing on their flying pigs!
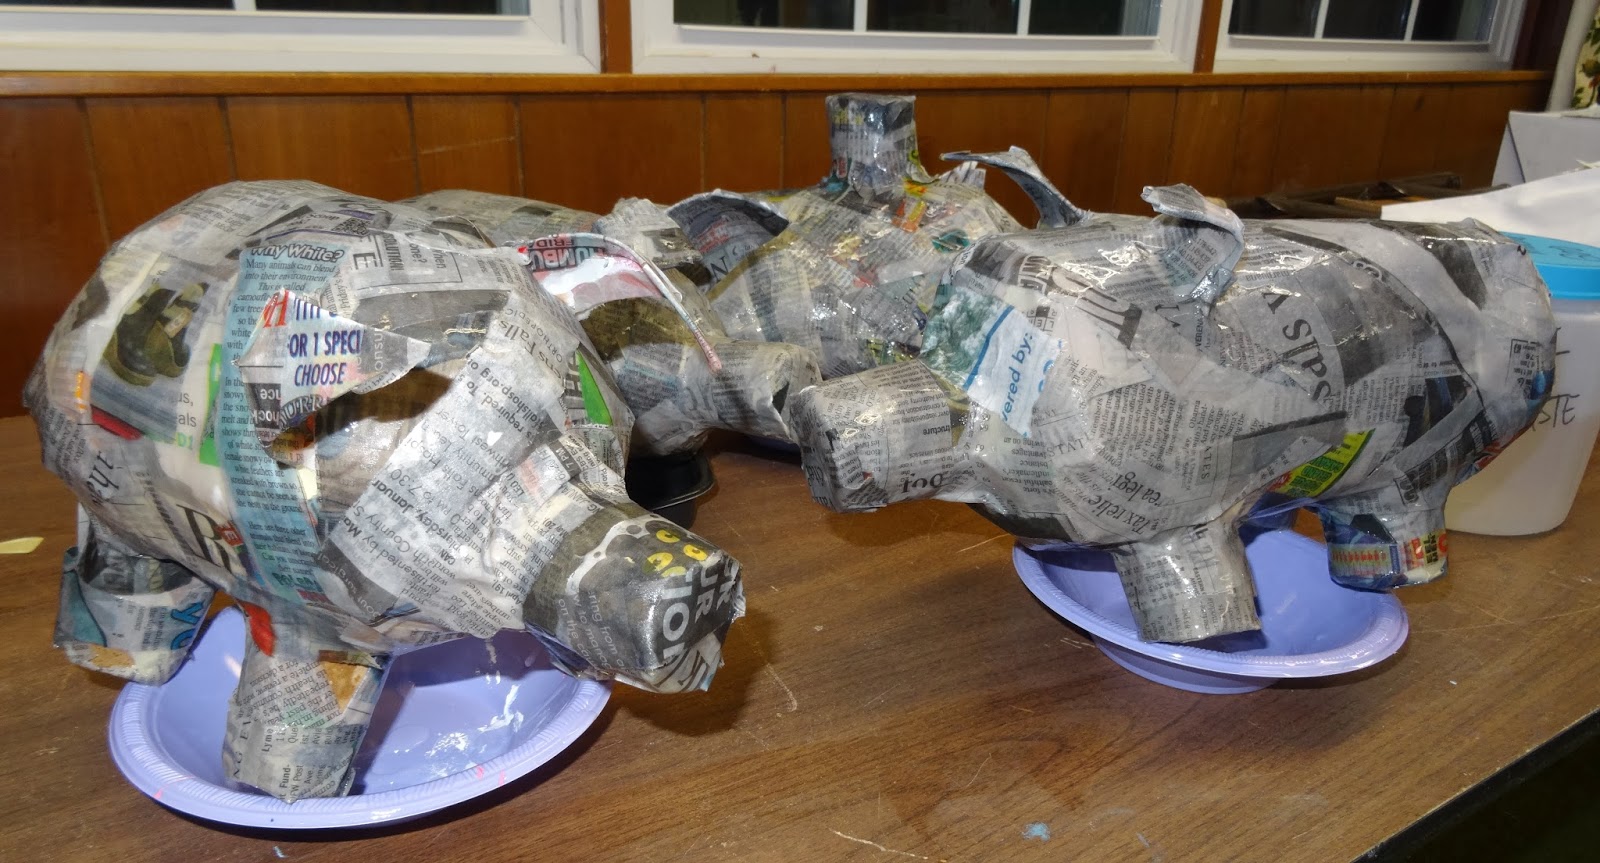
I've mentioned this many many times before on the blog, but if you are a newer reader, you might not realize that I am positively smitten with papier-mache. It's just got SO many possibilities. But since these students are relatively new to me, and since our time is limited, rather than tackle something extreme, I decided to select a project for them that is foolproof easy, tried and true.

Many of you worry about papier-mache dripping all over the place and the mess. I contend that, if done MY way, you'll have better results, it will be ridiculously easy to clean up, and they will dry much faster because you won't be using too much goo.
To make a long story short - do NOT dip the newspaper strips into the goo! I know that's what most of you do - you dip them, and then 'scissor' off the excess with your fingers. Instead, try this: dip your FINGERTIPS into the goo. Then rub it on the palm of your hand. Touch a finger to a newspaper strip to pick it up, and rub it between your palms to saturate with goo. It should look translucent, but not be drippy. (Note the great vocabulary words you can teach: translucent and saturate!) Then put the strip on the project, and give it a massage. Repeat for the next strip; and the next; and the next.... When done for the day, make sure the whole thing is massaged nicely to smooth in rough edges or paper sticking up.
Meanwhile, my students are also beginning a crazy favorite project of mine, 'toothpaste batik'!! Some of you use a similar process using a resist of washable white or blue gel glue. I've tried that and found that it is very challenging to wash out. So we use a mix of white toothpaste and aloe vera lotion that I purchased at the dollar store. I mix it 50/50 for the resist. I'll be posting more about this process (and I've posted about it several times before; you can find six of these the posts via my labels at the bottom of the blog. Just click on the label 'toothpaste batik'.). In the meantime, I've gotten a sample started for the kids, and one of the girls has an abstract design that she has begin. Here's a sneak peak:
 |
| My sample frog, with the resist newly painted on |
Below is a student piece. The design was drawn on paper, traced with Sharpie, and taped to a board. The fabric was taped OVER the paper, so the Sharpie design shows through. This way there are no pencil lines on the fabric to annoy you later! We'll be working on them again on Thursday, so I'll show you more details of the process then, I promise!

Meanwhile, stay warm, everyone!
Thanks for the paper mache tip! I haven't done the toothpaste batik for a while. You've inspired me to give it another go - always a winner!
ReplyDeleteYou are welcome! And I hope if you do the toothpaste batik that you post your results too.,
DeleteFlying Pigs galore! Great to see you still doing paper mache with kids. It's great that you do. And you are teaching them the correct techniques! No paper in the paste! Excellent!
DeleteHope all is well Phyl. Keep up the great work!
Dan, I neglected to give you credit! I absolutely learned the technique from you, from your book The Simple Screamer. I discovered that book at a perfect time in my life, when I'd been teaching high school for a while, but was still relatively new at working with elementary kids. I didn't know what I was doing with papier-mâché, but knew I wanted to provide my little kiddos with the experience. Your techniques helped me SO much! Thank you!!
DeleteBy the way, readers, you should know, I think of Dan the Monster Man as a celebrity, and am always honored when he stops in to my little blog for a visit. If you aren't familiar with his work, which includes the most AMAZING papier-mâché dragons (yes! Dragons!!) you should hop on over to his website and blog and take a look-see!
DeleteI recently discovered liquid starch for paper mache, what do you use?
ReplyDeleteWith kids, I use Art Paste. It comes in a little box and mixes to make 4quarts. Very inexpensive and works well. I know of others who use starch, but I don't feel it is very strong, at least not strong enough for my taste. If I was working with high school kids or doing something myself, I'd use watered down Elmer's Glue-All. It's extremely strong, but more costly and harder on the skin. I don't use any wheat paste, flour paste, or wallpaper paste, as they all will spoil is stored, and also can be a potential problem for anyone with wheat allergies,
ReplyDeleteI have a student with extreme wheat allergies and he can not use the Elmer's Art Paste. Just an FYI! :(
DeleteWow, Kristin! Thanks for sharing that info! What CAN he use? Is the regular Elmer'sGlue-All OK? Is it OK for other kids around him to use the Art Paste? Thank you for the info!
DeleteYeah it's a little strange and frustrating.... So regular glue is fine for him, but the Art Paste 'may contain wheat' so he has to avoid it. He wears gloves just in case of cross contamination b/c I use the Art Paste for the rest of the class, and his mom makes a cornstarch paste which works very well. The kids all know that he has this issue since they've been around him since Kindergarten so they don't make a huge fuss when he has his special paste.
DeleteHe's been in here for years when I've used Art Paste with other classes and I'm sure there is always residual on the sink area, and he's never had problems, but better safe than sorry!
Crazy... Thanks again!
DeleteHi Phyl
ReplyDeleteThanks for spelling out the art paste papier mache steps. I'm encouraged! I hated the drippy mess of the 'scissor' method, both for wheat paste and for art paste. One question - how many layers do you do to get a really hard shell? When I switched to art paste, I noticed it wasn't as rock-hard as wheat paste.
Good question, Rina. You are correct about the strength. My personal preference would be watered Elmer's Glue-All for strength, but it's not as convenient for working with kids. Anyhow, to answer your layers question, it depends what the armature is. Here's where balloons again can be a problem. If you are removing the 'guts' (such as the balloon), then it really needs to be tough! But in the case of these pigs, for example, we are just creating a skin on a relatively solid structure. Ideally I'd do 3 or 4 layers, but honestly, due to time considerations, they will more likely end up with one or two overlapping layers.
DeleteIf you explore some of my older papier-mâché posts, you'll find some 3rd grade masks built on a stuffed paper bag armature. Since we remove the stuffing, these had at least three layers. Also on some larger structures (such as the Laurel Burch cats) we did more layers.
Do you gesso before paining or is that necessary?
ReplyDeleteShanna I like to gesso first for the nice white base coat and for added strength, but it is not necessary. If you are not planning to gesso, do a final cost of paper-mâché with absorbent white paper or paper toweling; you don't want the newspaper print to show through your paint!
DeleteTypo - obviously I meant a final 'coat', not 'cost'!
DeleteThank You so much!! I am a first year art teacher and love to get messy-BUT I want my 6th graders to know the process and have a great piece when all is said and done. Great tips for newbies like me!
ReplyDeleteIt goes without saying - your blog and work is fantastic!
Sharon, good luck with your first year! Please let me know if you need any specific help/advice, especially with papier-mâché, since it is my favorite!
DeleteI'm looking forward to seeing more about this technique! Looks intriguing.
ReplyDelete