Showing posts with label art lesson plans. Show all posts

Wednesday, March 27, 2019

NAEA Boston - my 2 workshops

I taught 2 workshops at this year's NAEA convention - Get Deep Relief with Totally Terrific Tooling Foil and Using the Unexpected. 
The first, Get Deep Relief with Totally Terrific Tooling Foil, was a 1 hour and 50 minute ticketed studio workshop.  I'm amazed that the attendees were able to complete such fabulous pieces in the time allotted.  The time seemed to fly by very quickly! 
 I believe the attendee who made the adorable sheep (or is it a lamb?) below plans to add color to help identify his eyes.  I think it will be really cool!
Here is the class, learning the basics, and getting started.
The pic below is someone looking at some of my samples.
And a few more fabulous pieces made by attendees.
Some attendees didn't have time to do the 'antiquing' process, using ink and steel wool.  I hope that they will send me pics of their pieces when they are complete!
I'm not going to go into process details here, because they are posted previously on this blog.  You can find my video tutorials for working with tooling foil HERE, and you can find a link to a handout called "Oh What a Relief" on my Document Weblinks tab, HERE.  To see pics from last year's tooling foil workshop at NAEA, go HERE.
Tons of samples / examples!

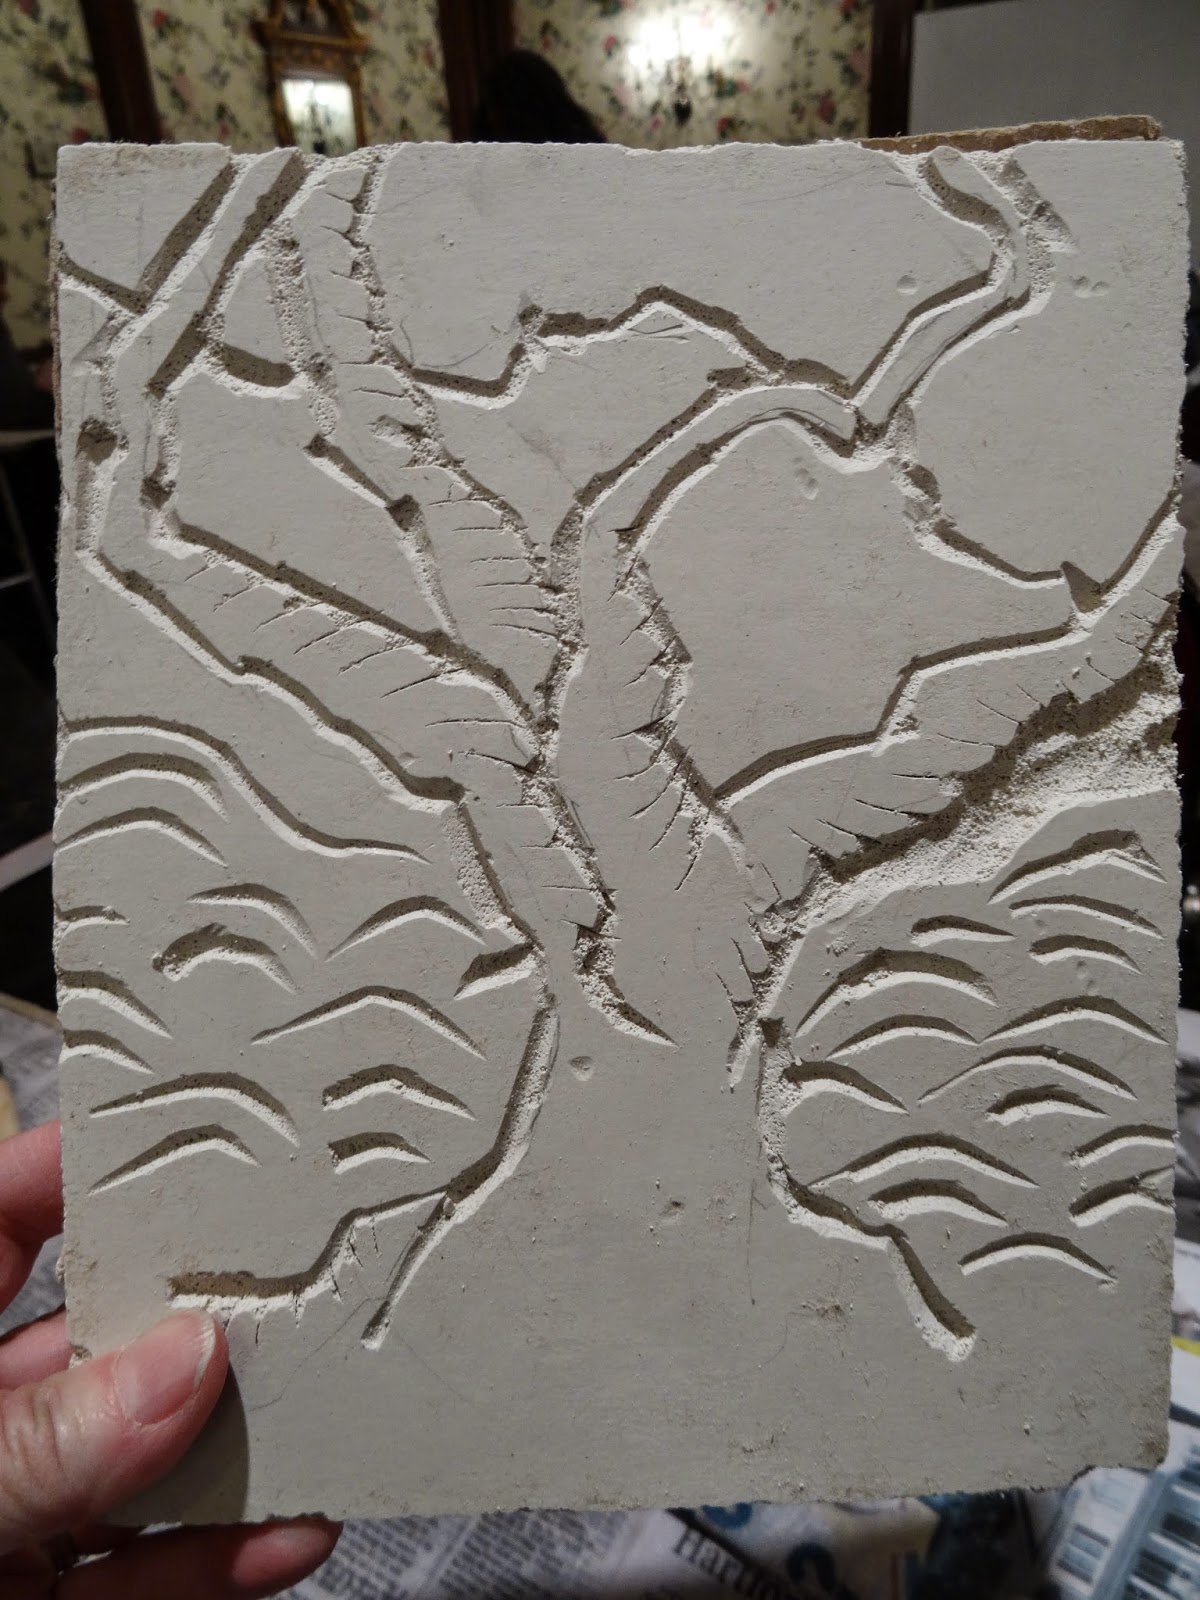
My second workshop, Using the Unexpected, was a slide presentation, where I talked about using materials such as toothpaste for an imitation batik resist (example in the pic below), roofing felt as a painting surface, Sheetrock for relief carving, sand as a textural medium for paint, shaving cream for marbling, and more. 
It was a nice big room with most of the seats filled.  I didn't count, but based on the number of rows of chairs, I think there were about 150 people there!!  To access the handout and a PDF of my slide presentation, you can again find them on my Documents Weblinks tab on this blog, HERE.
I really enjoyed teaching the workshops this year, and I think my attendees were mostly quite happy!  But unfortunately there is always a downside, and I want to share that with you as well.  In my tooling foil workshop, during the hectic closing minutes, some visitors stopped in and looked around, and took some pictures.  I should have chased them out, but I thought perhaps they had friends in the workshop.  Unfortunately, I learned the next day that one of them had stolen the kit of materials from one of my attendees.  How awful!  With 6 or 7 thousand art teachers at the convention, there'd be no way to ever find or identify them. 
Then, the next day, someone placed a recording device on the front table in my workshop, to record my presentation, and forgot to pick it up at the end.  It's usually me that leaves things behind and loses them at conventions, so I feel very badly for the gentleman who was recording my presentation to bring back to the rest of his department.  I hope he is able to recover it!

Wednesday, April 25, 2018

Yet another pet peeve - "can I have your lesson plan?"

For several years, I have willingly and openly used this blog to share projects I've done with my students, including instructions.  And I will continue to do so.  But instructions are not the same thing as lesson plans!
Often, particularly in various Facebook groups, someone will post images of a really cool project they've done.  It is not unexpected that people will get excited and want to know how it was done.  But more often than not, the request is "can you share the lesson plan?"
So today's post is a little reminder about what is and what is NOT a lesson plan.  "How-to" instructions  and lists of materials are NOT lesson plans.  A lesson plan will usually outline objectives, using whatever jargon is appropriate.  It might be that your objectives are written as Essential Questions and Student Outcomes, or Big Ideas, or SWK (student will know) statements, etc.  It might include Anticipatory Sets, Guided Practice, and so on.  You may need to include the Standards being addressed in the lesson.  There are many formats for writing lesson plans; a lot may depend on your education and training, the philosophy of the school district where you teach, and so on.
So, when you see a post of an interesting project by me, or by someone else, and you are intrigued and would like to try it out, think about what you are asking for.  I will gladly give you my instructions, a "how-to", but I will NOT give you my lesson plan, because your lesson plan should be unique to your situation.  Plus, if I give you my lesson plan, I'll feel like I'm doing your job for you.  And I don't want to. 
For example: I recently posted tooling foil samples.  Many people asked me for my lesson plan.  I gladly gave instructions, via some videos, some photos and text, and even a Google doc.  But none of those things were lesson plans.  What might my lesson plan have been?  My lesson objectives are individual to me and my unique needs, according to my teaching philosophy, my schedule, my student body makeup, and so on.  Perhaps my objective is for my students to learn to use tooling foil with appropriate tools to achieve deep relief.  Perhaps there's an expectation for my students to learn the vocabulary of working with tooling foil.  Perhaps the objective is to use the medium of tooling foil to create masks that share various characteristics used in African masks, like symmetry, use of geometric shapes, exaggeration, and decorative pattern.  Perhaps the objective is to discover how tooling foil can be used in a collage, whether as an animal, a robot, or whatever.  Perhaps the objective is to use the foil to explore the tooled metal folk art of various cultures from around the world.  Do you get my point?
And maybe there will be, in your situation, a written companion piece to the art-making project.  Perhaps your lesson plan will include how an objective about completing the piece for display.   Maybe there will be a critique element to your lesson plan.
Lots of times, I see projects that seem to exist for the fun of the project, and nothing more.  In my current business teaching after school art to kids who simply want more art-making time, this is absolutely OK.  If anyone were to ask for my objective, it would simply be for my students to explore various materials, and have a positive art-making experience.  But that might not be enough in your school.
 By the way, if you want some instructions for any of the projects pictured in this post, please feel free to ask.  Just don't ask for my lesson plan!

Sunday, November 30, 2014

My Sheetrock Carving Workshop

 
 A week before Thanksgiving, at my annual state conference, I taught Sheetrock Carving in a 'Friday After Dark' workshop.  These are extended, hands-on after-dinner workshops, from 8:30pm-11:00pm, though my participants didn't actually leave until almost 11:30! When I recently mentioned this workshop in the Facebook Art Teachers group, I received a lot of questions, so I thought I'd give a quickie rundown here of the process.

The two masks at the top of the post, and the landscape and cartouche below are my personal examples, made for lessons done with my 6th grade students in past years.  The two masks above were painted very differently from each other; the one on the left was done with acrylics and is covered with a coating of an acrylic gloss (it might be ModPodge; I'm not sure).  The one on the right was painted with watercolors.  It gives a very interesting and subtle effect, I think.
 
The landscapes were an assignment covering multiple topics: students learned about relief carving, they used perspective to create depth, and they explored working with limited color choice.  The main painting was monochromatic, using values of one color of their choice.  They were allowed to add a pop of the complementary color (in various values) in one or two places in their landscape. The piece shown above was painted with acrylics.  It is a relief carving (as are all these pieces), though unfortunately it is hard to see the relief in the photo. The kids' work on this landscape project was lovely, their color choices were unique, and unfortunately I don't seem to have a single photo of the work.  Nor do I have photos of the students' carved masks. 
 I do, however, have many photos of student cartouche carvings.  You can see them in other posts on this blog, as I've actually posted about Sheetrock carving on this blog several times before.  You can find all the other posts (including one written after a workshop a year ago, and ones with student work from prior years) by following this link.  Meanwhile, here is a sample of student cartouche carvings.
In the workshop, we began by removing the paper surface from the Sheetrock, leaving on the cardboard backing.  To remove the paper, wet the surface with a sponge, let it soak in for a minute, and begin peeling.  Repeat.  You can use your thumbs, or you can use an artgum eraser to help remove the paper.
 Once the surface paper is removed, you are ready to carve.  Students can draw their plans and trace them onto the Sheetrock (once it is dry) with carbon paper, or draw directly with pencil.  Since we did all our work in one evening, participants drew quickly with pencils or proceeded with no pre-drawing at all.
 The workshop participants had some pretty creative ideas!  There was the hammerhead dog (above) and also a mermaid bunny, which you will see pictured later in the post.  What do we use for carving tools?  Preferred tools include a variety of sizes of U and V gouges (we've used both woodcarving tools and old linoleum cutters), sharp liner tools or some other pointy tool, and also heavy duty loop tools.  Because you work with the surface moistened, the tools don't slip as easily as on linoleum, meaning it really is rare that someone gets hurt with a cutting tool.  
On Facebook, people expressed concern about dust.  This is NOT an issue.  We keep the surface of the Sheetrock moist when carving, so no dust is produced.  Yes, it is messy; NO, it is not dusty!! 
Sometimes, the material may crack or break in unintended places.  You can either attempt a repair (mix up a small batch of plaster to patch), or glue any cracks when done.  My students liked the glued cracks, because it helped make their pieces look ancient.  Sometimes, though, an unintended break may necessitate a design adjustment, as in the mouth (above and below).  The artist was quite happy with her solution! Me too; I like the open mouth much better.
When carving was done, workshop participants had a variety of paints to experiment with.  The tree below was painted with acrylic.
 While this flower was painted with watercolor.   I think both pieces are lovely!
 Yes, it's the mermaid bunny! (below, painted with watercolor)
Other techniques we experimented with included painting the peeled surface with a coating of India ink prior to carving, and then carving into it, exposing the white gypsum.  I don't have a photo of the finished piece, but once the carving is done, the exposed white gypsum can then be painted with watercolor, and the whole thing can be sealed with an acrylic gloss if desired. 
  One last thing - if you do embark on carving Sheetrock, make sure it does NOT have fiberglass or some such filament in it, or it will feel like little needles poking into your hands.  All you have to do is hold up the Sheetrock and look at the edges.  You will see tiny clear/white hairlike pieces sticking out from the edge. Look carefully; they are small and almost colorless, but nasty!!  I purchased my Sheetrock at Lowe's in smaller more manageable sheets than the wall-size (maybe 36" square?), and while it was a little more costly to buy that way, it still is a very inexpensive item. 

Wednesday, February 27, 2013

Funky Finger Puppets!

It's funny to me how some posts get so many views, and some have almost never been seen. I think Pinterest plays a huge part in this.  So in my next few posts, I'm going to show you stuff from old posts that many of you have probably never seen, and have had very few views.  I think you will like them!  The finger puppets in this post, were previously posted in May 2010 and June 2012.  By the way, the sun above had a companion moon  finger puppet that unfortunately went home before it was photographed.  (And by the way, the stuff that looks like dirt on the sunshine's face is actually gold glitter-glue.)  So - above, the sun, and Mickey and Minnie Mouse; below, a chef and a waitress!
 The finger puppets were a popular 6th grade project.  Students spent one class making casts of their pointer finger.  First students greased their finger with Vaseline, and then wrapped with plaster bandage.  I love the speed of working with plaster bandage.  Most students were able to create two finger casts in one art class.  If they wanted more, they did them during study hall or lunchtime time.

Below, an astronaut (he had an alien companion that I missed photographing) and the Easter Bunny.
 
In the subsequent art classes, structural features were added with materials such as cereal box cardboard, Styrofoam balls, tin fol, and pipe cleaners, temporarily being attached with a low-temp hot glue gun.  The astronaut's tank was an old marker cap.  Legs and arms were added with a pipe-cleaner wrapped around the back, where it was attached.  After features were glued on, they were covered with plaster bandage (though we sometimes left the pipe-cleaners uncovered as bendable arms). 
 Above is a skateboarder kid, and SpongeBob, and below are a 'disco bunny' and skateboarder Shawn White, in mid-jump. 
 Unfortunately, the Mad Hatter to the right below wasn't finished when I took this picture. 
 
 After the structures were complete, the puppets were painted with acrylics, and embellished with wiggle eyes, fabric, ribbons, lace, feathers, and more.  The kids were very creative about building 'props' for their puppets.  Kids often made puppets in groups - a whole rock band complete with instruments, characters from the Harry Potter movies, Star Wars, or favorite cartoons.  I bet if I was making them now, their would be characters from The Hunger Games, Twilight, and Angry Birds, among other things.  One year, pre-digital photography, a group of kids built a whole wedding, complete with bridal party!  Then they built a little wedding stage for them too.  Somewhere I have photos prints. 
  Below are an unfinished Elvis, and the 5th grade teacher who claims to be his wife! 
Below is an EMT.  Other puppets made but un-photographed over the years include Abe Lincoln, birds, fish, sharks, robots, cheerleaders, all sorts of sports athletes, a king and queen, various Disney princesses, Smurfs, ballerinas, aliens, monsters, penguins, etc.
 
 Below is a view of a box full of my sample puppets, including professor Dumbledore, an eagle, an elephant, a teddy bear, a cat, a frog, a band, and more more more not visible in this photo!
 More... 
 
   Below is a mummy case, complete with hieroglyphics and a mummy inside.  The kids were studying Egypt when this one was built. 

Such fun!!!