Showing posts with label tooling foil. Show all posts

Wednesday, March 27, 2019

NAEA Boston - my 2 workshops

I taught 2 workshops at this year's NAEA convention - Get Deep Relief with Totally Terrific Tooling Foil and Using the Unexpected. 
The first, Get Deep Relief with Totally Terrific Tooling Foil, was a 1 hour and 50 minute ticketed studio workshop.  I'm amazed that the attendees were able to complete such fabulous pieces in the time allotted.  The time seemed to fly by very quickly! 
 I believe the attendee who made the adorable sheep (or is it a lamb?) below plans to add color to help identify his eyes.  I think it will be really cool!
Here is the class, learning the basics, and getting started.
The pic below is someone looking at some of my samples.
And a few more fabulous pieces made by attendees.
Some attendees didn't have time to do the 'antiquing' process, using ink and steel wool.  I hope that they will send me pics of their pieces when they are complete!
I'm not going to go into process details here, because they are posted previously on this blog.  You can find my video tutorials for working with tooling foil HERE, and you can find a link to a handout called "Oh What a Relief" on my Document Weblinks tab, HERE.  To see pics from last year's tooling foil workshop at NAEA, go HERE.
Tons of samples / examples!

My second workshop, Using the Unexpected, was a slide presentation, where I talked about using materials such as toothpaste for an imitation batik resist (example in the pic below), roofing felt as a painting surface, Sheetrock for relief carving, sand as a textural medium for paint, shaving cream for marbling, and more. 
It was a nice big room with most of the seats filled.  I didn't count, but based on the number of rows of chairs, I think there were about 150 people there!!  To access the handout and a PDF of my slide presentation, you can again find them on my Documents Weblinks tab on this blog, HERE.
I really enjoyed teaching the workshops this year, and I think my attendees were mostly quite happy!  But unfortunately there is always a downside, and I want to share that with you as well.  In my tooling foil workshop, during the hectic closing minutes, some visitors stopped in and looked around, and took some pictures.  I should have chased them out, but I thought perhaps they had friends in the workshop.  Unfortunately, I learned the next day that one of them had stolen the kit of materials from one of my attendees.  How awful!  With 6 or 7 thousand art teachers at the convention, there'd be no way to ever find or identify them. 
Then, the next day, someone placed a recording device on the front table in my workshop, to record my presentation, and forgot to pick it up at the end.  It's usually me that leaves things behind and loses them at conventions, so I feel very badly for the gentleman who was recording my presentation to bring back to the rest of his department.  I hope he is able to recover it!

Wednesday, April 4, 2018

A Tale of Two Workshops: Tooling Foil and Bead Weaving

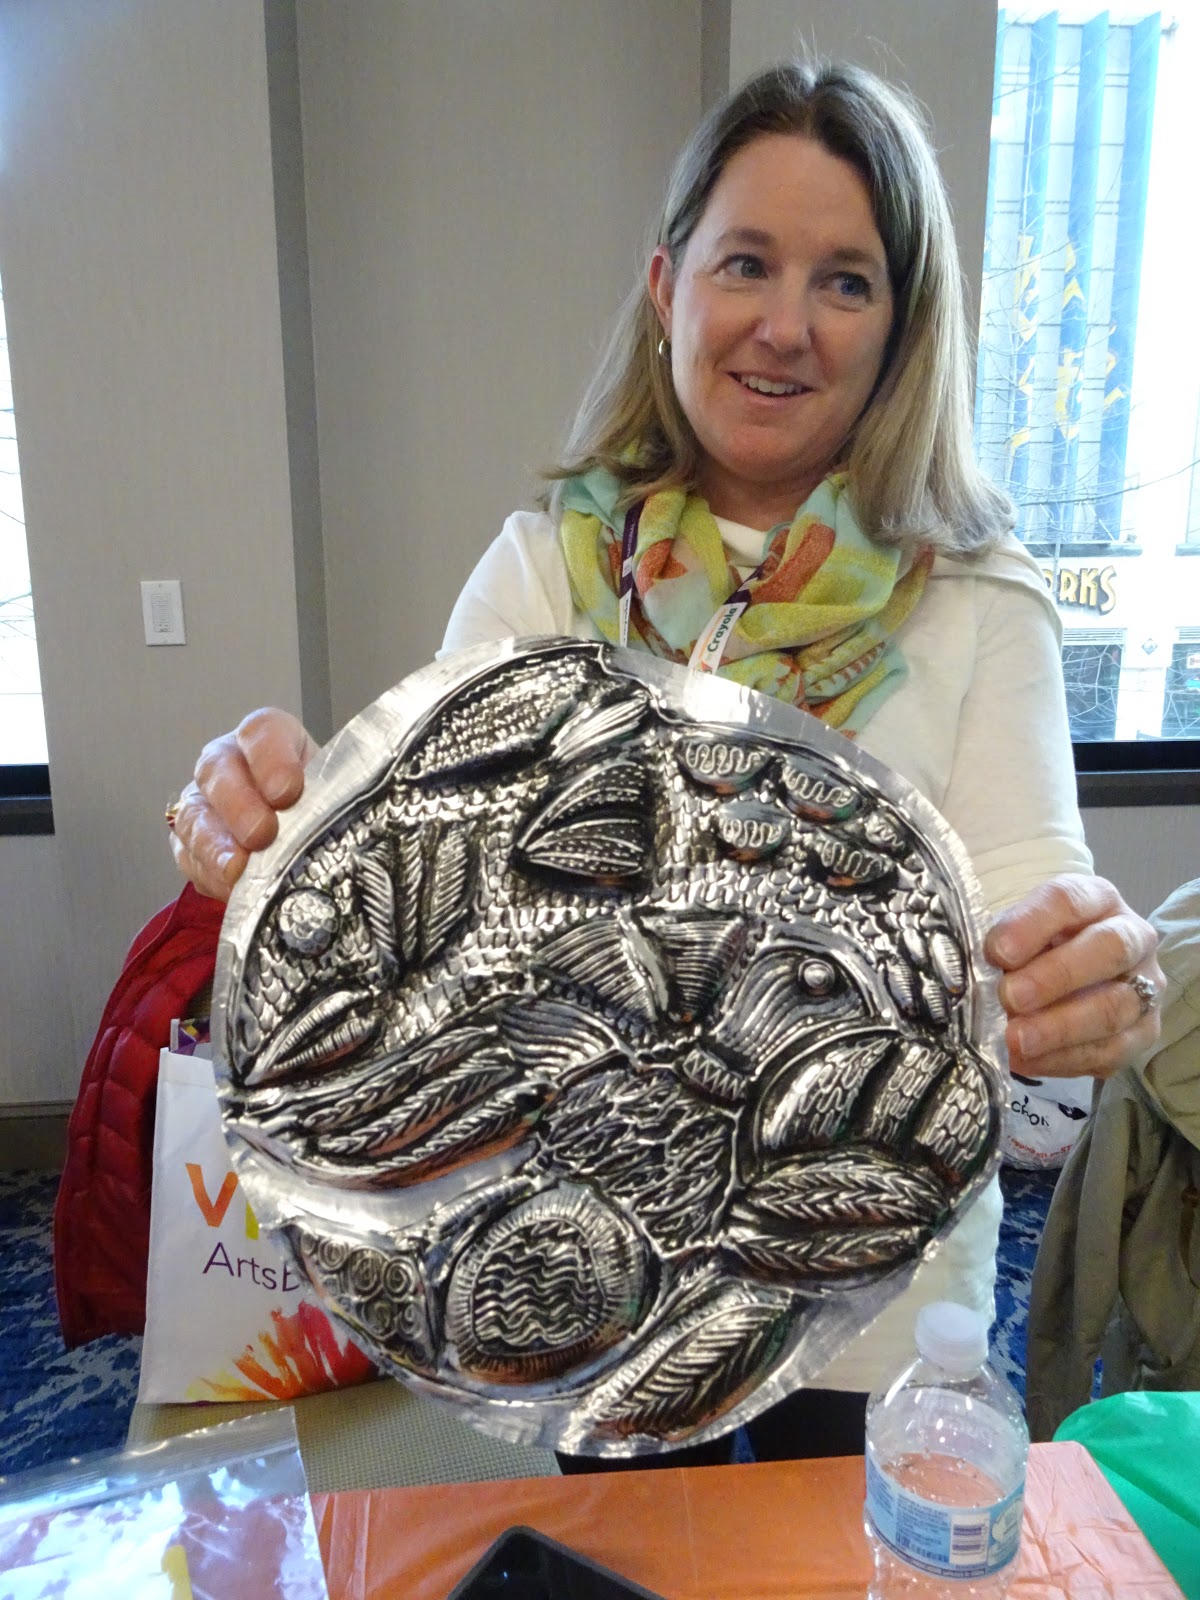
I had the pleasure of teaching 2 studio workshops at the recent NAEA convention.  The first was called Wampum-Inspired Bead Weaving for Modern Times, and the second was Oh What a Relief - Fabulous Tooling Foil! The pic above is a piece made by a participant during the tooling foil workshop.  Nice, huh?  This is me, below, by the way.   I probably should update my profile pic on this blog one of these days.... 
Anyhow, for the most part, I think both workshops were pretty successful.  I'm not going to go into full "how-to" details about the projects here, because I will direct you to them elsewhere on the blog, in previous posts and such, because both are projects I've posted about several times.  Instead, I want to tell you about some stuff that happened in each workshop, one good, one not-so-good.
In the bead weaving workshop, I spoke briefly about the need to be sensitive about cultural appropriation.  I made the point that these are not "wampum belts", but instead are a modern bead weaving INSPIRED by the wampum bead weaving of the Eastern Woodland tribes of Native Americans.

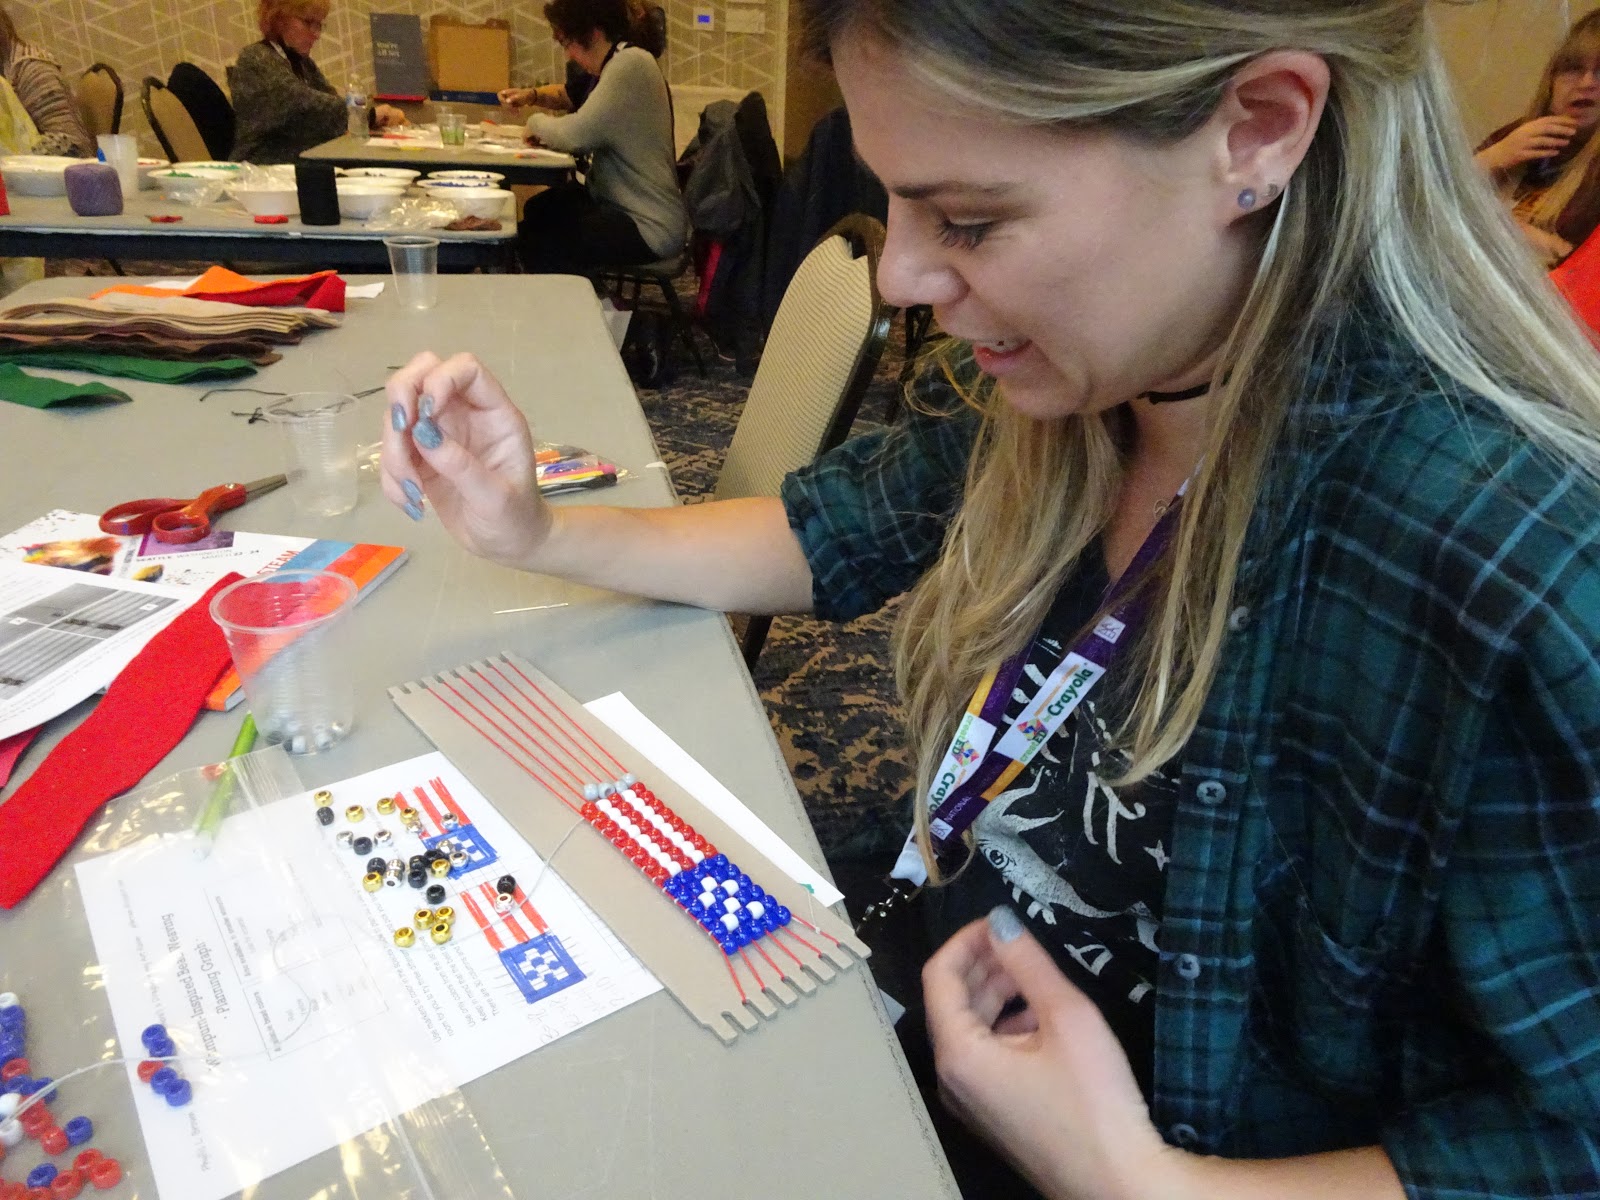
A woman in the class spoke up and said she and her companion (both pictured below) were Eskimos, attending the convention from Alaska.  Pictured on the left, Stacey told me she lives in Shaktoolik and grew up in Shishmaref, and is a member of the Inupiaq tribe. (I just looked up both of these locations on my map app, and wow, these are remote locations!)  She asked if she could use her family design (I hope I'm using the correct terminology here) for her weaving design, and I thought it was a great idea.  You can see, above, her graph planning it out, and her completed project. She used a red string for her weaving, which she said denotes strength.   The woman pictured on the right is DeAnn, and is the Alaska Art Teacher of the Year! The pattern in her weaving is not symbolic.  I was tickled to meet them both, and loved their enthusiasm.  I wish I'd had more time to chat, because Stacey was showing me pics (on her laptop), but unfortunately there were 18 other participants to attend to, and the 1 hour and 50 minutes just flew by!  Later in this post, you'll see some other pics of participants in this workshop, and their creations.
You can find my handout with instructions at THIS LINK.  The planning graph for making these weavings can be found HERE.  Please be respectful about giving credit as appropriate when using my materials.

 As a presenter, I was initially more confident about the tooling foil workshop, because I'd twice previously taught this at my state convention here in NY.  But still, it is, however, a challenging project to learn about and bring to completion in less than two hours.  But many participants did, and were successful.  I love seeing smiles!
For the workshop handout, go to THIS LINK.   For videos on the process, you'll find them in the post LINKED HERE.  Again, please be respectful about my ownership of these documents and videos. 
I had many examples, and offered many suggestions, based on what works best in the material.  So I was not surprised to see the robot (above), and the masks (below), because they are themes well-suited to the medium.  I'd love to see how the unfinished ones turn out!
This piece pictured below really intrigues me, as a study in texture and repetitive pattern. I think when complete, it will be gorgeous. The black ink that is added to 'antique' the piece will really highlight the detail of all the unique textures.  Really lovely!
But I had one thing happen during the workshop that caught me off-guard.  As I said, I offered many ideas, both in visual samples I that I brought, and in images and text included in the handout.  But three people in the workshop, rather than using my ideas and suggestions as a resource to inspire them, instead chose to trace one of my pieces while I was helping people elsewhere in the room.  Nobody asked permission; if they had, I would have responded that they did NOT have permission to trace my work, but were welcome to use the theme of the piece and create their own versions.  If you're a long-time reader of this blog, you probably know that I'm generally opposed to the use of templates and tracers, except for simple geometric shapes (circles...).  So I was certainly surprised to see my own original creations used as templates. In the interest of keeping the atmosphere of the workshop positive, I let it go and didn't say anything at the time.  But I'm sharing it here, to remind you all that copying without permission is NOT OK. 

Here's my friend Emily with me, showing her work in progress in the bead weaving workshop, and also a couple of my samples.
And some more pics from the workshop!
I love how wonderfully colorful this woman below is!
Lots of smiles!
If you want to see student examples from both the bead weaving and tooling foil projects, there's lots and lots on the blog.  Make sure you are viewing the web view of the blog (using your browser - Safari or whatever).  Then you'll be able to see a cloud of 'labels' (tags) at the bottom of the page.  You can search the cloud for words like "tooling foil" or "wampum weaving" and it will bring you to a bunch of older posts on the topic. Another alternative, also on the web view, is to use the "Search this blog" tool on the right side of the blog.  Type in whatever you'd like, and it will help you find it!
 Please let me know if you have any questions on either workshop/process that aren't answered in my handouts or in prior blog posts.  Thanks for visiting, and remember to be respectful of the work of others! 

Wednesday, February 21, 2018

Robot in Perspective - Fun with Tooling Foil!

 A couple of weeks ago, I posted a pic of this robot, on a white background (below), as part of a post HERE, along with a tutorial on using tooling foil to achieve relief.  The tutorial consists of a couple of videos.  I'm new to videos, so they are not fancy, but hopefully they are worth your time if you are new to this material, 36 gauge aluminum tooling foil.  (You can also get copper or brass tooling foil, but it is MUCH more expensive, so not so financially practical for classroom use.)
By the way, the small amount of added color was done with acrylic paint mixed with Mod Podge, after the black 'antiquing' was done with India ink and steel wool.

I knew I didn't want to simply glue him on the white board as shown above, but I was struggling to figure out what environment would be a good fit for him.  So I stuffed all his parts (head, antennas, neck, arms, shoulders, legs, and body - all together 11 pieces) in a baggie that evidently wasn't closed too well.  I brought the bag into my studio, where I promptly dropped it, spilling the pieces onto a canvas laying on the floor.  The canvas was painted with black gesso, and I had drawn lines on it with white chalk.  I saw the  robot pieces on the canvas, and an idea was born!!

I found a scrap piece of foam core, and I painted it with black gesso.  Then I used a ruler and a white colored pencil to draw a perspective room room.  I added a couple of accents of color, also with colored pencil.  And then I glued my robot into the room, using low temperature hot glue. 
I posted a pic of him on Facebook, and he's received a lot of love, and a lot of questions, so in case you are thinking about this as a possible project for your students, here's a few thoughts on how to make it work -
  • Your students should each have a baggie or envelope (with their name on it) to store their pieces. It's up to you how many pieces to make.  Arms and legs could be separated to be jointed at the knee or elbows.  Elbows, knees, hips, etc, could all be separate pieces like my shoulders are.  Make sure all pieces are cut with rounded corners to prevent cuts.
  • Because the pieces are small, keep the design of each piece simple.  
  • If you are using white colored pencil, like me, to do a perspective drawing on a black surface, make sure it is erasable in case of errors.  I liked the texture of the gessoed surface, but that might not be practical for young students.  
  • Of course the drawing doesn't need to be perspective.  That might be too challenging for some students.  How about a city?  A garden?  A mountain landscape? 
  • I glued with low temp hot glue.  Keep in mind that it low temp hot glue dries immediately, so if you are using this, the pieces have to be instantly placed once glue is applied.  With the small pieces, I suggest holding them with tweezers, quickly applying the glue, and placing them as desired.
  • I do NOT recommend high temp hot glue.  While it will also hold well, and you have place your pieces, you are gluing METAL, and it will get HOT!  Probably not a great idea for your students.
  • Other ideas for adhering, if you don't want to use hot glue: E6000 glue should work well, and some tacky glues might also hold.  Look for one that specifically says it will hold metal or other non-porous surfaces.  While I love Elmer's Glue-All, it is best for porous surfaces, like paper, wood, glue, or fabric.  It won't hold the metal foil permanently.  You can also use double stick tapes or other double-sided sticky products.

One last thought - the idea of using multiple small  pieces of tooling foil to create this robot sparked many other ideas.  For example, what about making windows and doors, and adhering them to a drawing of a house.  Or perhaps making tooling foil bugs, and adhering them to a drawing of flowers.  Or parts of a machine, or wheels of a vehicle, or leaves of a tree, or little boats to put on a drawing of a lake.  The material offers so many possibilities, so many ideas!  In the photo above, the the face features were made with a much lighter weight foil, not as effective, I think.  The students who made them were 3rd graders.  Please let me know if you have any questions!!

Wednesday, February 7, 2018

Tooling Foil Tutorial!

 I've been making samples for a workshop I'll be teaching at the upcoming NAEA convention in Seattle, in March.  The workshop is titled "Oh What a Relief - Fabulous Tooling Foil".  So I've been posting pics of my samples in Facebook art teacher groups, and have gotten a lot of questions about technique.  As a result, I'm diving into the world of videos, and have two (very low-tech but hopefully informative) videos to share with you!  But first, here are some of the samples I've been sharing:
I'm still trying to decide on an appropriate background for my silly robot above.  The piece below is a sample idea, designed to be perhaps a mat cover, or a book cover with a place to insert a photo or drawing, or even a frame for a mirror.  Funny how it matches my legs! 
Anyhow, to see how to take a piece of tooling foil (36 gauge aluminum) and create some nice relief in it, it's all in the video below!
The piece below is tooled foil that hasn't yet been treated with ink for 'antiquing'.  The black ink really brings out the details in the design.  I am  waiting to antique as demo in the workshop. 
To find out how to add all the detailed patterns and texture, and how to add the ink for antiquing, it's all in video #2!
So... the tooling is done, and the whole project has been inked.  Next step, as I explained in the video, is to remove some ink with steel wool.  Once that was done, I decided the whole piece would be enhanced with some added color.  Like I said in the video, I'm not a fan of of the look of Sharpies (or other permanent markers) on tooling foil.  So what I've done is mixed a small amount of acrylic paint and Mod Podge together, to make a semi-transparent paint.  I started with some blue.
Here's a closeup of texture that was made by tapping (from the back) with the point of my pointy wooden stick.  The ink surrounds it and looks really cool when you steel wool off the surface.  If I had done the same technique on the flat areas, from the front, the ink would have filled the little indentations making little black dots surrounded by silver color. In other words, the exact opposite!
Then I added some other colors the same way - pink on the eye and frame, a pale orange on the fins, and a mix of pink and orange on the lips. Here's the finished product!
The dragonfly below has been painted, inked, washed, re-inked, and I'm still not happy with it.  I'll be fiddling with it some more, and hopefully creating a background garden for it to be resting in, with possible some bright colored sheet foam or other collage materials.  I'll let you know how it turns out!