Showing posts with label art studio. Show all posts

Wednesday, August 9, 2017

Studio Update including more purge, and a vintage lesson idea!

I've been married almost 30 years.  Which is a hint to when this sample above was made.  (Levine in my maiden name.)  The fact that the paper is heavily water-stained and the text-heavy project is pre-digital is another clue.  Anyhow, the project is one that I did with my students (I think it was either grade 5, 6, or 7), evidently in 1988, as seen below on the bottom of the box, though I got married in February 88, so I am guessing I decided my maiden name was more fun to work with that my married name, Brown.  Or maybe I started the project before the wedding.  It was (obviously) a package design project.  On the right is the top of the box.
Students used careful measurements, parallel lines, and tabs to construct the box templates.  The design work was done flat, and the boxes were assembled.  For the title lettering, we talked about using guidelines, and some basic tips for readability, such as not mixing caps and lower case within a word (consistency), not using yellow for lettering (unless outlined with black), and keeping all letters in one word the same color, unless there's a good reason to do otherwise.  I was much more lenient on the bulk text.  Here's the back of the box.
We looked at real package designs for what elements were important to include, talked about some basic design features for impact, and then we had fun being silly, which you'll understand if you take a moment to click on the pics so you can read the text on each side.
Looking at real  packages was important for the kids to see what colors are commonly used, what types of lettering, how color was used graphically to make an impact, and so on.  If it doesn't grab you right off, you likely will walk right on by.

It's in bad shape, and I'm throwing it out today.  I have to edit what I own and after 30 years, this has got to go.  It takes up space.  Meanwhile....
Also in my discard pile, the gyotaku prints above and below.  Now, I know many of you have tried gyotaku, using rubber fish purchased from an art supply store for printing.  But oh, not me.  These prints are even older than my Levine's Sour Lemonade.

Around 1980, give or take a year, I took a 6-credit graduate Oceanology for Educators class at Project Oceanology in Groton Connecticut.  (I wonder if it is still there.)  It was, I believe, a three week class, living in college dorms, and spending our days mostly on a retired Navy launch that had been converted into a research vessel, in Long Island Sound and the Thames River Estuary, testing stuff like salinity, using equipment like sling hygrometers (I don't exactly remember what that is, but I like the word), and sometimes putting out a trawl net and seeing what we'd catch.  It was a special, unique experience.  Everyone else in the class was either a secondary science teacher, or an elementary teacher with a science concentration, and I was a high school art teacher at the time. This enabled me to ask the stupidest questions without embarrassment, and come up with the craziest ideas.  Like this. 
I had heard of gyotaku (fish printing), so when we got a nice flat flounder in our trawl net, I said "Let's print it!"  For some reason I actually had printing ink, a roller, and some printing paper with me.  Heaven knows why.  Also the markers for added details to the print directly above.  Probably Flair pens.  But anyhow, the fish was slimy, slippery, and flip-flopping everywhere.  We had to sadly 'disable' the fish, to put it nicely, and scrub it down with Dawn to get the slime off so the ink would stick, and then we printed print it.  I suppose if we had the internet back then, I could have found out how to do this without harm to the fish.  But we laughed for hours, and I've saved these two prints all these years and have never done gyotaku again.  Never once as an art lesson.  Once was enough.  And now that I've told you the story, I don't need the prints any more either.  Please don't get on my case about animal cruelty.  It was at least 35 years ago. 

Another artsy thing  happened due to a trawl.  We had caught a squid. The boat captain, Walter (a tall man with fabulous rainbow suspenders and had a burly beard), asked me to come quick and grab paper.  He sliced open the squid, releasing its ink for me to draw with, using it's backbone as an ink pen. Then he proceeded to eat the tentacles raw.  This was WAY before anyone had ever HEARD of sushi!!!!  I don't still have the ink drawing, but I still recall the image of him standing tall above me with tentacles dripping from his mouth.  I also still have, rolled up in the basement, a large oil painting I did of Walter (not with the tentacles, but definitely with the suspenders) that I can't bring myself to discard.  I had a soft spot for Walter and I love the painting.

Back to the studio update, which is what this post was supposed to be about before I found the two projects above.  Here's what it looks like today.  The futon arrives tomorrow. It will go in the empty space in the pic directly below. It looks like it won't fit, but it will.  A bed was there before.  The height of the back will JUST make it.  I've had to move shelving to accommodate the bed opening out.   The rugs will not be piled in the middle of the floor like they are now!
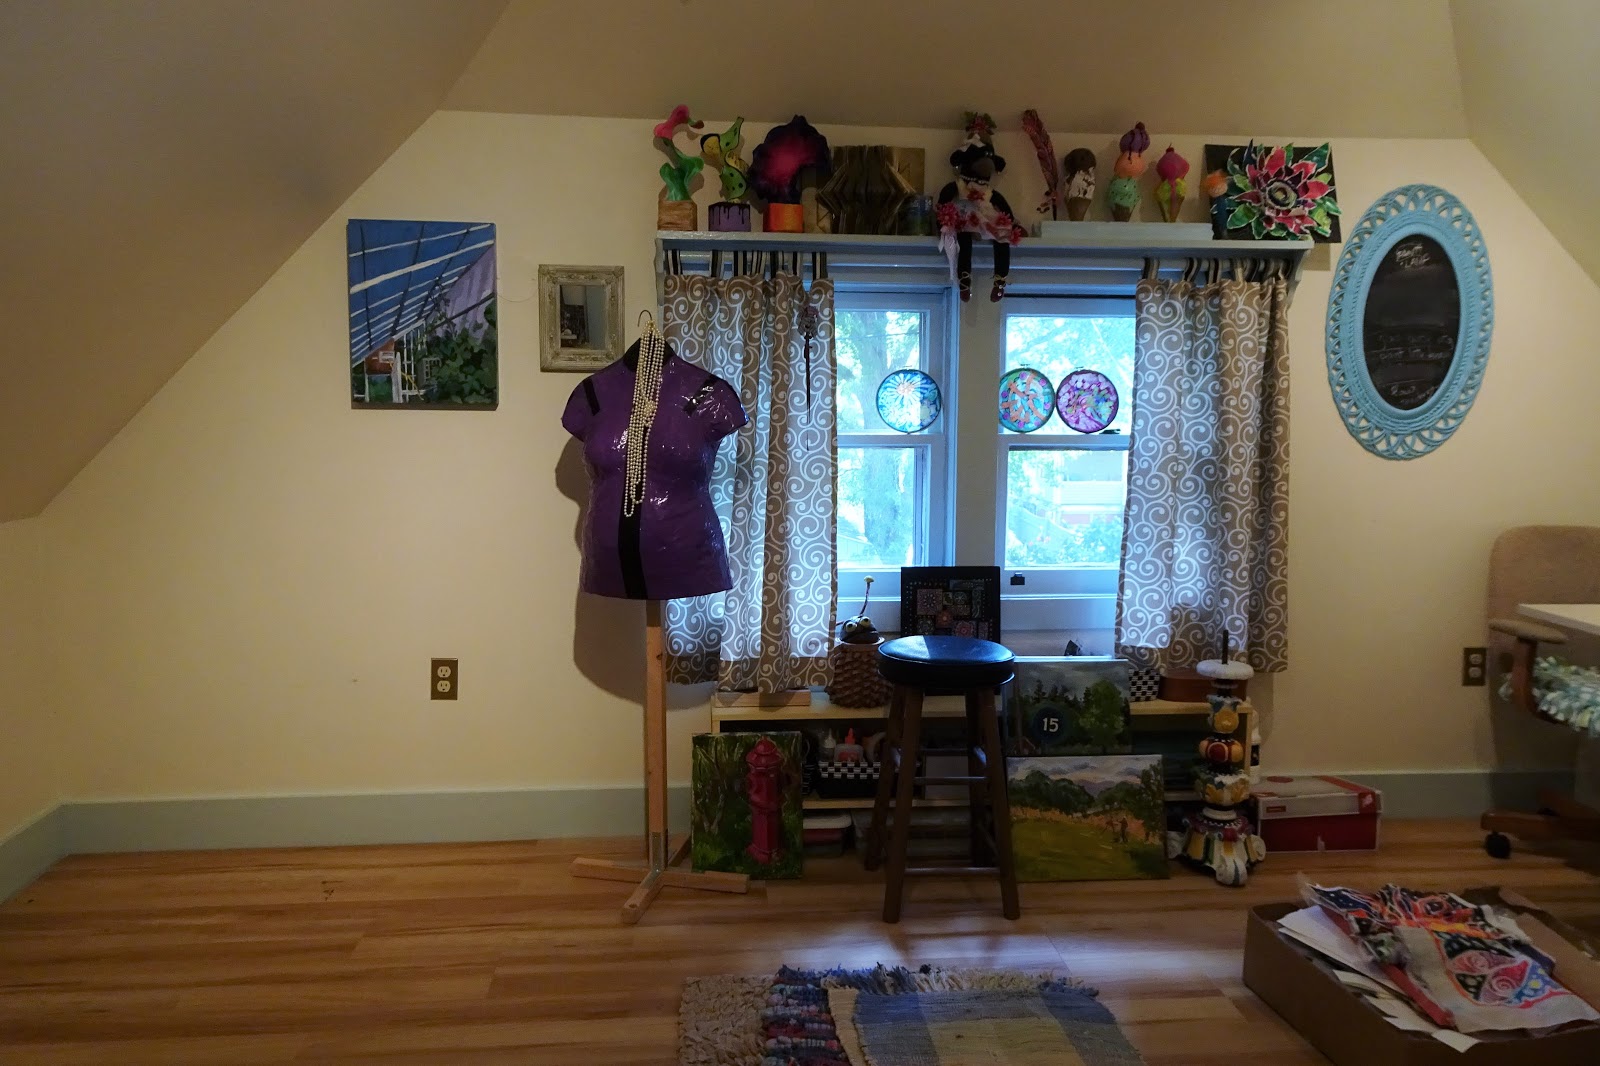
Turn to the right, and here's the window wall, with shelf above and shelving below. 
Here's the opposite end of the room.  You may not believe this, but I cleaned it up today.  The cat likes sleeping on my chair, so the cushion is reversible.  The paper cutter will spend its unused time on the floor under the table.  There's no other choice.  The trash (right-floor) will be emptied tomorrow.
And here's one end of the fourth wall.  The folders that are leaning against the red cart will go under the futon, as will the carton of paper and other stuff, topped with toothpaste batiks, on the lower left. 
Here's a longer look.
And here's the rest of the 4th wall.  The door is temporarily off the hinges to make it easier to bring in the futon.  So you are seeing into a walk-through hallway closet.  Weird old house.  That's a patch of light on the floor, not a sock. 
Here's the floor with the stuff that needs to be emptied, moved, and put away. 
Tucked at the wall behind my table are some of my sewing stuff on the left, and my French easel and outdoor stool for plein air painting.  No other place to put it all. 
A closeup of some very stuffed shelving, and Wendell, the bookworm puppet that I made a long time ago.  He serves no purpose these days but I like him.  I suppose I should find a kid who wants him.
Here he is again.
Below, some of the shelving to the right of the door, including two Laurel Burch papier-mache cats, and a ice bucket diving helmet.  Or maybe it's a cookie jar.  My favorite yard sale find. 
Also a papier-mache daruma, and a photo of me and my boys a dozen years ago while in Alaska. 
Behind my room easel are boxes of large cardboard and tagboard, a giant frame, and  other stuff.  Every space counts.  Behind the cat is a weird candle-holder I made from papier-mache mash. 
And finally, the Ugly Lamp.  Still a lot of painting to do if I'm ever going to finish it.  And then it needs rewiring and a new shade.  Here's an old post link about the lamp. 

Monday, August 7, 2017

Attempting to Purge

My "studio" in my home is my son's former bedroom.  (You can read about the renovation that turned it into an art studio HERE.)  But it is also the only spare room in my crazy little house that has a place to put a bed for a guest.  So the twin bed from his childhood bedroom has remained.  But now.... he is engaged to be married to a wonderful woman, and I realize that the twin bed isn't enough if I want them to visit. So in a couple of days, the twin bed is going out, and a futon is coming in.  While the 'footprint' of the futon isn't much bigger than the twin bed, it needs the space to open, so I've been working on rearranging the tiny art-making space that I have in there. 

In the four years since I did the original renovation from bedroom into studio, a lot has changed.  Somehow, the room has also become my sewing room, so along with art supplies, there's a sewing machine and various paraphernalia related to sewing.  Plus, all the remnants from my  37 years of teaching are stored in the room.  In addition, for two summers I've taken an immersive plein air painting class, cranking out 9 or 10 paintings in the one week class.  A couple of the paintings from last summer have found new homes, but the rest of them, plus all of the paintings from this summer, are in the studio (and being oil paintings, they take FOREVER to dry), along with a box full of stretched canvases, and some incomplete canvases I've been painting in the interim.   Plus I now have a rather large paper cutter that has to be moved every time I want to use the table!  I keep accumulating stuff, and the room keeps getting more and more crowded and is less and less viable as a work space. 

Today I started doing a little cleaning to make room for the futon.  My first line of attack was boxes of examples of projects that I had saved from all my years in the classroom.  I had already given away several papier-mache creations when I retired: a flying pig, an iguana, a fat cat, a goofy 4' tall totem pole, a large frog in a tuxedo jacket, a penguin, a dragonfly, a couple of goofy monsters/creatures, and more.  I had also left behind, with my replacement, several teddy bear chairs, a couple of 36" god's eyes, and more, including mountains of 2-D samples on paper.  Sigh...

Anyhow, here's a few things that I threw away today - a couple of papier-mache vessels:
Some air-dry clay big-mouth fish, painted with acrylics (I had already disposed of a many many other air-dry clay projects, including coil pots, pinch pots, animals, 3-D slab people, "posy pockets" made from slabs, cave paintings on clay slabs, and more.  But somehow I had a hard time parting with these fishies): 
 And these Model Magic bugs, even though I made them in a workshop and never used Model Magic in the classroom and don't even like the stuff:
 I also threw away a mountain of paper examples that filled a large trash bag.  But the room.... it still is so crowded, so cluttered.  What the heck do I do with it all, in a house with zero extra space???  I can't get rid of the oil paints, the acrylic paints, the craft paints, the fabric paints, the roll of canvas, the easels, the drawing pads, the brushes, the drawing tools, the papier-mache supplies, the binders of ideas, the flying pig, the papier-mache ice cream cones and sundaes, the sock monkey named after my grandmother, the papier-mache light bulb maracas, the 2 large Laurel Burch style papier-mache cats, the pile of carved sheet rock, the Barbie Doll dress-making supplies, the half-done sewing projects, Violetta the duct tape dressmaker's dummy, the Ugly Lamp project, the box full of colored glass fragments, the roofing felt relief mask, the carton of mailing tubes, the 10 lb. carton of polyester fiberfill, the dropcloths, the roll of bubble wrap, the random weird sculptural or collage materials.....  

Friday, September 27, 2013

Texture! I've been busy!

Oh, I have so much to share, but this post is going to be about showing off, or sharing, or asking for opinions, or however you want to read it.  I've been busy in my new studio, working on one piece that sat, hated, on the easel for more than a year and was in desperate need of rejuvenation, and another, that came together within a few days because of a strange round piece of heavy cardboard, with a hole in the center, that I brought home with me when I cleaned out my classroom and retired. 

It just so happens that the regional arts council, of which I am a member, is hosting a juried show with the theme of texture and pattern.  When I saw the theme, I realized I just HAD to get my heavily textured pieces complete in time to enter.  As of today, they are both done and ready to bring tomorrow. 

But working here at home, I have nobody to give me honest critiques.  My hubby says "I like it!" or "I think it's great!"  - not exactly constructive criticism.  So I emailed photos to a couple of friends and decided what the heck, I'll enter the exhibit and either they get accepted or they don't.  I'll let you know.

The reason I'm so interested in critique is that they are a real departure from what I've done in the past, and part of me thinks perhaps they are just a glorious mess, particularly the second piece. So, drum-roll please... here they are... poorly photographed, but hopefully you'll get the idea.
"Marsh Dream - Texture Composition #1"  

One more view, to hopefully give you a better sense of the color.
 The media for the piece above is acrylic paint, assorted acrylic mediums, fabric and beads, on Masonite.  Due to the shimmery nature of some of the fabrics and paints used, it's hard to get a good photograph.. 
Here you can see how big it is.  I don't recall the measurements.
And the other piece:
"Woodland Fantasy - Texture Composition #2"
Um, this doesn't look like a kindergartner's thanksgiving turkey, does it?
 
 Close-up of the texture; another one at the top of the post

Sunday, September 8, 2013

Not quite Project Runway!

It was like my own little version of Project Runway in my new art studio today - the only thing I was missing was a dressmaker's dummy and the drama!  (Are you a Project Runway fan like I am?  If so, who do you like so far this year?  Kate? Helen? Or one of the boys? I change my mind every week, it seems.  And what the heck was with Alexandria and those ridiculous pants in this week's show?  Was anyone else surprised that Heidi actually LIKED them and said she'd wear them?  Hideous!!!) 

Anyhow - back to MY one-day sewing project invention (finished product pictured below).  I hadn't really thought about my art studio as a place for my sewing machine, but my husband suggested it and he was right -  it was a wonderful place to work - I had great light, a good worktable, and I didn't need to move everything for dinner!!  I listened to public radio podcasts all afternoon, and refused to make dinner until the sewing project was complete.  Here it is, from my backside:
I neglected to take any before pictures, because this project has been sitting around SO long.  I started with a little black and white patterned tank top that I bought probably three or four years ago, because it was on a TJ Maxx bargain rack and I figured I could 'make it work'.  But the neck was way too low, and the armholes were too big, so I had raised the shoulders, and cut and reshaped the neck.  And it just didn't look right, and it was a little short on the bottom and I didn't like the fit of the armholes either.  Sigh.   And while you can't see it in the crappy photos, the printed fabric is thousands of tiny pleats, going in and out, making it a real challenge to sew.

So it had been at least a year, maybe more, since I touched it.  Last week I bought pieces of silky black fabric and white fabric, and today I went to work.  I traced some sleeves from an old pattern, and then altered the shape a bit.  I sewed in the sleeves and added a trim cuff of black, and then the big challenge - the bottom.  It was originally curved, longer in the front and back, shorter on the sides.  I cut the fabric straight across, very challenging due to those pleats!  I experimented with sewing the pleats shut on the bottom, but that made it too tight, so in the end I stretched out the pleats to sew on the black fabric on the bottom. which gives it a very forgiving-on-the-hips slightly gathered drape.  (Why didn't my husband remind me I had on that dumb headband when he shot the photos?   And no earrings - I am usually NEVER seen without earrings!  But he's no photographer - I had to TELL him to turn the camera to take the picture vertically!)
Anyhow, I'm thrilled with the way the project turned out and I can't wait to wear my silky new shirt!  Not too bad for an afternoon's work!  I hope it holds together - the white and black fabrics seem to fray very easily.  Meanwhile, I have another similar project, also sitting around for years, and hopefully I'll get to that one in the next week. 

So back to the real Project Runway - who do you think is on track to win? 

Saturday, August 31, 2013

My art studio - finally complete!

So the room is done, and I'm going to show you before and after pictures!  (and by the way, the wall color is NOT accurate in the photo above, but I can't seem to get it right in this photo, so..)

What room?  I guess I should explain.  My son will be 25 this winter.  He is 2 years out of college, and lives and works in Boston.  Unfortunately, he doesn't get home too often.  Meanwhile, being retired, I wanted to a place to do some artwork and assorted crafty projects.  I used to use my large classroom tables for a space when I was working on a project.  But I haven't had studio space in my own home since I got married almost 26 years ago.  Other than the kitchen, every single room in our home had wall-to-wall carpeting.  And I really didn't think I could afford  (or even want to) rent studio space outside of my home.

So I had an idea:  I asked my son if I could transform his old bedroom.  He said sure, as long as the bed was still there, and a drawer for some spare clothing. Hurray!  Then hubby, a retired architect, drew up a floor plan of the room.  It has slanty ceilings and he suggested putting in dormer windows for more light and headroom.  But the cost was prohibitive.  Plus I'm more than a foot shorter than him  so the headroom wasn't as much of an issue.  But I moved around little cutouts of the furniture and came up with a plan.

One day, I said "I'm going to Lowe's to get paint samples and flooring samples".  My husband was stunned.  He didn't think I planned to start the renovation immediately.  But I did.  I came home with cans of paint, cans of spray paint for the storage units, and dragged him back with me to look at the flooring and place the order.  His jaw practically hit the floor.  Now?!!?  Anyhow, less than a month later, it is all done!!

Actually, I don't have great before pictures, because by the time I remembered to document the process, I'd already taken down the heavy room-darkening dark brown and black patterned curtains, and my son's pictures were off the walls, the giant Phish poster was off the slanted ceiling, and my stuff was all over the place in boxes.  But at that point half the room looked like this.
 And now it looks like this:
It's hard to tell the colors from these photos, but when we started the work, the room had a beige rug, old tan comforter, light coffee walls, dark brown moldings, and darker brown modular storage units (which I have kept) - the colors were chosen by my son when he was in middle school - mostly browns, tans, and black accents, curtains always closed; very dark; the colors, especially with the slanty ceilings, made the room feel small.Here's the other half of the room.

So the first step (after emptying the room of everything but the bed, an old desk chair, and the cat) was removing the carpet, because you can't have an art studio that is carpeted!
Really?  I have to move?
 We have a helper.
 Padding is removed, and we are down to the plywood sub-floor. 
 Bored with the process.
 Kitty loved the tarp on the bed, whether she was playing under it, or laying on it watching us paint.  I painted all the moldings and the walls, and hubby did the ceiling.  I'm short, he's tall.
After we painted the moldings, and started painting the corners, the new light colors made the former color look like it was salmony-pink!  It was quite bizarre.
Newly painted walls! Moldings, a pale blue, I think called 'lagoon'.  Walls, 'fresh linen'.  My goal was to make the room fresh, light and airy, kind of like an ocean breeze.  I planned to also paint the door, but my husband had another (better) plan.  The door was painted with multiple layers of lumpy paint.  It looked awful.  He removed the door, and removed all the paint, and sanded and oiled it.  You'll see it later.
Then it was time to put in the new floor.  I selected a vinyl plank flooring that we could easily install ourselves.  Or that my husband could.  I really wanted to do the work, but he put on his best macho act and told me he would be doing it himself.  Who am I to argue?  So I went to a movie matinee (The Butler) and lunch with friends to stay away and not be too annoying, and also sewed new curtains and made a little cushion for kitty, and I primed and painted the terrific particle board table I had purchased.   
 Note: my husband did not like the fabric I picked; he thought the tab fabric should have been the whole curtain.  He did not like the molding color I picked; he thought is was too light.  And he didn't agree on my floor selection.  But it was going to be MY room, and I was paying for it, so my choices stuck.  But, when the painting was done, he loved the color of both the walls and the moldings.  (See?  I knew it would work!)  And he agrees the floor is simply fabulous.  But I doubt he's changed his mind about the curtains.  By the way, that's kitty's cushion on my old ch air.  It is two-sided, knotted together around a foam cushion, no sewing at all!  Cool, huh?
And when the floor was done, we carried the storage modules out to the backyard, and I spray-primed and painted them in 4 different colors - pale blue, pale sage, cream, and a soft yellow-gold.  Again, hubby was skeptical, but they turned out just as I had envisioned.  The room was put back together, he reinstalled all the light fixtures (the room has track lighting), the door, and anything else that needed screwing, wiring, or nailing in place.  I bought a new quilt for the bed, some throw rugs, some storage baskets, an loaded everything in.  Here are some views of the completed room, starting with some of the storage modules.  I still have stuff to organize and put away, but I've made a good start.  The two drawers belong to my son's spare clothes!
 The cat-patterned cloth on the bed is a coverlet for kitty, so she doesn't shed all over the nice new stuff.  It will only work if she sleeps on it.   Which of course she won't.
 The gorilla doesn't have a name.  Can you help?
 Here's a good view that shows my beautiful (and waterproof!) floor, and a fun textured (and quite comfy) rug I found in the clearance department of  TJ Maxx.  I bought all the storage basket-y things there too. 
 Yes, there's a little old TV in the corner, on top of a couple more storage modules.  It might come in handy for 'company' from time to time.  The red cart I've had for a while - I use it for my painting supplies and palette when I'm at the easel.  I can't show you the other side of what's on the easel.  It's a monumental mess, sort of a failed textural experiment.  I'm going to try to save it.
 And a poster of a sculpture by Niki de Saint Phalle, that I just adore.  And oh - there's the wonderfully antique looking door that my husband spent two days sanding, and more time still oiling it, and refinishing all the hardware.  Thank you, hubs!!
 Above is a view looking straight into the room, and below is my cute table, and a view of one of the tracks of the track lighting. 
 And a better look at the door.

 The shelf under the window is actually an old bookshelf that was vertical in my son's room.  Hubby sliced off the bottom and installed it for me so I can put stuff on it, in it, and under it.  And here's a cat's eye view of the table. 
 And speaking of cat's eye views, here's the cat on the other side of the closed door, looking for a game.  I willingly obliged. 
I don't know why this last pic posted sideways.  Maybe because the other photos were all shot with my Nikon, and this wasn't?  The pic of me, hubs and son was shot on a vacation trip to Alaska, summer of 2005.  Fabulous time there!!
Anyhow, it's done, and now I have an art studio, my son still has a place to sleep, and it will also function as a guest bedroom in the event of a visitor.  The room feels bigger, lighter, fresher, just like I hoped.  Hopefully in the future I'll be posting what I create in here!  By the way, feel free to ask questions about the strange things on the shelves.  Thanks for sharing the tour of my renovation project!