Saturday, October 26, 2013

Work-in-progress


 My DragonWing Arts students currently have about 4 different projects in progress all at once!  We are having so much fun.  A week ago we painted a bunch of paper with acrylics, and this past week the painted papers were twisted and glued to become a 3-dimensional loom.  The 18x24" painted paper that we previously made, shown below, will be sliced (each child's paper has two different color and pattern schemes) and then woven into the 3D looms.  And then we will embellish!!!
Meanwhile,we have painted these awesome crazy liquid watercolor & salt skies over oil pastel planets (pictures below), for backgrounds we will be using for perspective cities, as I did with my fourth graders before I retired, and posted about, here
 
 Here's one of the cities in progress, by a 3rd grader.  She doesn't have her verticals correct on the buildings, but I don't want to overwhelm her, so I'm letting it go.
  My students are a mix of 3rd and 5th graders, and attend two different schools, and I have discovered a few things.  Not one of them has ever heard the word perspective before in art.  Never.  It doesn't surprise me with the 3rd graders, but it does with the 5th graders.  So I think whatever they are able to do is a pretty good first effort! 

And the students (both 3rd and 5th graders) who attend one school district have told me they have not used paint yet in art this year.  All they use is pencils and markers.  (Don't get me wrong; I like markers and pencils, but kids need to paint!)  And the student who goes to a different school district tells me her teacher tells them exactly what to do and they do it, leaving no room for creativity at all.  And this little girl has a fabulous imagination and loves to draw.  Her mother confirms what she has told me about art class, which was why she was very excited to send her daughter to my program.

I have told the moms who drop them off and pick them up not to worry that they aren't seeing artwork coming home with the kids yet; we are doing multi-step projects and they will have a lot to bring home at the end of our 7 week session.  The moms responded - "Are they having fun?"  The kids' answer - "YES!"  The moms then said that even if they never saw a single work of art come home, they'd be happy, since the kids are enjoying themselves, and since the kids aren't excited about their art classes in school.


I have made a commitment: I see them for an hour and a half, once a week, and at some point during that time each week, there will be painting.  The kids are happy; I am happy. 

So be patient - I promise to show you the end result when these projects are complete.

Saturday, October 19, 2013

Pinwheels for Peace, a belated post

For several years in my school district, my art students participated in the global project called Pinwheels for Peace, under my direction, on the International Day of Peace.  I posted about our participation here and here.  Now that I am retired, I thought it would be fun to get a different group of children involved in this terrific (non-political) activity, which, by the way, was originated by two art teachers. (Aren't we great?!)

I am an active member of our community's small Reform Jewish congregation.  My son attended the Temple's religious school during his youth.  My son is now grown, but as I said, our congregation is small, so I still know  the people involved with the Temple's religious school.  The current principal of the religious school just happens to also be the mom of a group of adorable young triplets, who also just happen to share a birthday with my son, though 19 years apart.  When I proposed the Pinwheels for Peace project to her, she was enthusiastic, and so, during the first religious school class of the school year, the kids learned about the project, discussed the meaning of the word Peace (as defined from the Pinwheels for Peace website: "a state of calm and serenity, with no anxiety, the absence of violence, freedom from conflict or disagreement among people or groups of people")  and decorated their pinwheel paper.  There are only approximately 20 kids in the school, so I brought home the artwork and assembled the pinwheels for the following class.

Here is the youngest class, with their teacher (who happens to be a former religious school classmate of my son!) and a teenage helper.  They are working very hard on their pinwheels.
The two girls in the front of the photo above are two-thirds of the triplets, and the third triplet is this handsome young man below. Besides sharing birthdays with my son, his first name is also the same as my son's!  What a fun coincidence!   Nice coloring job!
 More youngsters, hard at work.
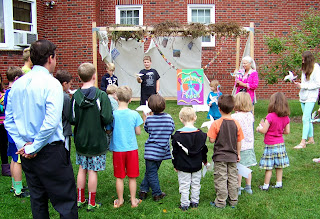
During religious school on Sunday, September 22 (actually a day after the official International Day of Peace), we took the children outside to 'plant' their pinwheels in front of the sukkah, a temporary outdoor structure built as part of the celebration of the Jewish holiday of Sukkot.  Each student stated what Peace meant to him or her as they did their planting.  It was lovely out, but rain was anticipated later in the day, so the pinwheels were taken back inside, and displayed planted in baskets for everyone to see.  Several days later, with better weather, the pinwheels were replanted outdoors, this time near the road to be seen by passersby.
  
Above:  In front of the sukkah, getting ready to 'plant'. 
(That's me in the dark pink, and that's our Rabbi on the left. )
 Above, two young sisters take turns proudly planting their pinwheels.  
Below, one of the triplets enjoys a little time to run with her pinwheel!
 As a matter of fact, all the kids enjoyed running time, watching their pinwheels spin!
 

Next year, we'll do it again; bigger and better!!  I'm looking into materials for making weather-proof pinwheels. 

Saturday, October 12, 2013

I Love Precious Metal Clay!

I first wrote about PMC (precious metal clay) in July, (here's the post link)  when I took a class at the Adirondack Folk School.  At that time, as I said in that post, I had no idea what PMC was all about, so I went in with no preconceived plan.  This time was different.  I had some ideas I wanted to try, and so I went in with a plan.  Which is good, since PMC is real silver, and thus very expensive.

I wanted to experiment with weaving ideas. Sorry this image of the completed earrings posted sideways. 
Here's a close-up (below).  I first rolled out and textured my clay, and then cut it in strips, working quickly as the clay dries fast. I used some water on a paintbrush to slip in between the connections, and then gently pressed them together.  They do not look like exactly what I envisioned, but I still think they are really cool.  I don't know anyone else with woven silver earrings!  I dangled them on a piece of chain because, with my long hair, I kind of liked them having a little 'swing'. 
 Then, still in weaving mode, I wanted to try out my other idea.  The plan was to create a frame with drilled holes all the way around, so I could actually weave inside it, either with threads, or fine wire.  I made these curved top rectangles (maybe an inch and a half long), and in addition to the hole for the ear-wire, I put two holes in the top and bottom (for the warp), and four down each side (for the weft), measuring very carefully.   At least that's what I thought I did.  After they were fired, and I brought them home, I discovered there was, on each earring, one hole on the side that had not drilled through entirely.  This of course undid my original plan for an authentic weaving, with warp and weft.  Instead, I used fine wire and seed beads and weaved in and out in a random pattern, twisting here and there.  Here's the result - the pair, and a close-up of one earring.  By the way, the funky texture was achieved with a texture plate.
 
 Then it was time to make a ring.  You may recall that I was NOT happy with the ring I made last time, so this time I wanted to redeem myself.  Here's a few views of the result:
 
 Sorry - another sideways post - but I wanted to show you the close up of the texture.  This texture, believe it or not, came from a very subtle texture on a tiny strip of wallpaper!  I think it looks like dragon scales. 
 I'm pretty happy with the way it turned out.  A lot of people in the class inserted stones, but they were cubic zirconium and I didn't want to put cheapy stones in a real silver ring. 
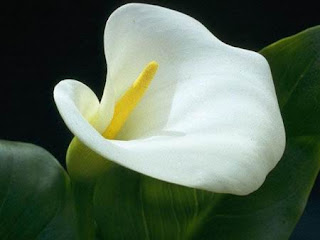
Then I wanted to make some petal earrings.  They are not yet assembled, but I'll show them to you anyhow.  Though unplanned, they ended up looking like a calla lily.  I didn't even realize, when I picked the stripey texture for the inside, how much that would look like the calla llily. 
 
  I want to dangle something down the middle (a pearl? on wire? on beaded thread?) but I have changed my mind a ton of times and need some advice.  They do not have black patina, as does everything else but the waffle weave earrings, and so they are extremely reflective.  A real calla lily has a yellow center, but I don't think that will look good with the silver.  but I just don't know what to do, as whatever I put inside will be strongly reflected by the shiny inside of the petal.  (Sorry the photos aren't focused great - I forgot to include them when I shot the other pics.) On the palm of my hand, you can get the idea of the size.
 They have a lovely texture on the outside, too.  I'll be able to do a wire wrap at the top, or an anchor bead, and then drop something through the inside.  I could decide to forget about calla lily accuracy and do 3 or 4 little pearl drops at different levels.  Opinions, please?  No crystals though - I tried them and didn't like them.

After the  lily earrings, I still had some clay left over, but we were running out of time, so I quickly rolled out some leftover clay and pressed a rubber stamp into it, and then used a circle cutter to make these quick earrings:
 The red beads did not photograph accurately.  They are actually a very dark red, and not at all the cherry red in these photos.  I added the beads when I assembled the earrings at home.  Again, I wanted the earrings to dangle.  The circles are probably about an inch in diameter.
And then - oh no, still another little hunk of clay!  And the woman seated across from me was done, and had a teeny piece left too, and gave it to me.  So, I swear, I made these little earrings below in about 2 minutes.  I rolled the clay, used some star punches for 6 stars, and then rolled again, and used a teardrop punch for 2 teardrops, and with the tiny bit of clay still left, I was able to roll and punch out two more tiny stars. I assembled them quickly with simply dabs of water from a wet paintbrush.  In the nick of time, I dried them with a heat gun, and they were ready for the final firing of the day.  As it turns out, I absolutely love these earrings for an everyday pair, the kind you slip on for a trip to the gym or the farmer's market.  They are maybe an inch or so long.
Then... the crazy irony of all that rushing about - I was cleaning up my workspace and discovered that I still had some totally unused PMC carefully tucked in it's little package.  So I will make something at home (the tools are simple) and bring it to the teacher who says she can fire it for me.  Yay! Not sure what I'll make - perhaps I don't need any more earrings right now?  I'm thinking I may make one bigger piece for either a statement brooch or a necklace, going back to the idea of incorporating woven fiber into a window. Or maybe some tube beads.  Or both...

As you can see, I am smitten with PMC, so down the road you may see me doing some more.  For those of you from NY state, if you attend the NYSATA conference in November, I'll probably have a different pair of PMC earrings swinging from my ears every time you see me (remember, I made another 4 pairs back in July, so that's a LOT of earrings).  Anyhow, if you don't recognize me from my silver hair, just look for the jewelry!

Saturday, October 5, 2013

Back in the saddle

It been a while since I posted about my venture into business, providing art enrichment programs for kids. As a matter of fact, it was a full 9 months ago, in January!  Here's a link to the post: DragonWing Arts. You may recall, this is the logo (that I designed) for my business:

And I am using this dragon (also by me) on some of my stuff.  Both the logo and the dragon are great for adding color as desired.  I'll share my color images another time.  Meanwhile, let me tell you what's happening with my new business!
Since that January post, I had several false starts, and struggled with how to advertise a fledgling business with no money, and how to get my message out.  But now, finally, I'm proud to tell you that DragonWing Arts is officially off the ground.  I am currently running a 7-week session, and will start another one in January.  Yesterday was our first class, and I have 5 rambunctious, energetic girls, a combination of 3rd graders and 5th graders. They were so excited; didn't want to pack up and leave at the end of class!  And their moms who dropped them off and picked them up were so happy that this opportunity was available for them!  The photo below is of some painted paper they made, which will be cut in strips for dimensional weavings we will be making.
Sorry the photo posted sideways... 
By the way, my intent is to run multi-week programs based on a theme.  The theme for these 7 weeks is "Explorations in 3-Dimensions".  Students will be doing some simple sculptural and relief projects, as well as some very basic perspective projects.  I'm planning on really packing a lot into the 7 weeks we have.

I am very lucky and quite thankful that workspace has been provided for me by my Temple.  They have been very gracious about allowing me these rooms rent-free, for now.  And old library (the second and third photos) is our home base, and where we will do pretty much anything other than painting.  There is an ugly old carpet on the floor, but still, it is a carpet and I don't want to have to dropcloth the floor.  Across the hall is a kindergarten/1st grade room, and for now we are using that for the painting room (the first photo).  The tables and chairs are kind of small and low.
The kids are manipulating papier-mache mash (shredded paper mixed with Art Paste and Elmer's Glue-All) to do some relief work.  Here's some freshly mixed mash in the photo below.  This is the same stuff I used for my cave-painting rocks that I posted about here and here and here and here.
I showed them this tree I made with the mash, originally planning they would all make trees, but because I did not know these kids and their skill levels, I decided it was best to let them totally choose what their relief would be, as we get to know each other.  I can zoom in on their specific needs and capabilities as I get to know them better.
Above you can see some of what they chose to do.  They are not done.  The top center one, unfinished, will be very interesting but I'll wait till it's done to explain it to you.  The bottom right piece will say ART, with a giant paintbrush.  Due to a scheduling conflict, their next class will be in two weeks, which seems like a long time but will help their work dry thoroughly.

Meanwhile, I'm using leftovers of the mash to make latkes, for the trophy for the 3rd annual Latke Fest at Temple Beth El.  Chanukah is early this year!!!! You can see my previous trophy constructions here and here.  I'm thinking this year's trophy will include a plate with a stack of 18 latkes piled precariously high, with some sour cream and applesauce on top.  In Hebrew, the word chai (not the tea!) means life, and also represents the number 18, so it is a significant number.  By the way, if you weren't familiar with the word chai, the 'ch' is a gutteral sound, not a typical 'ch' sound as in chips or Cheerios.  It is part of the word l'chaim, which means 'to life'.  L'chaim is commonly used as a drinking toast.  If my stack of 18 latkes isn't ridiculously high enough, I may just  make 18 more.  I want the trophy to be outrageous and silly.  Here's a few of the newly made papier-mache latkes.  They will take a while to dry out.

Tuesday, October 1, 2013

My Beaded Dragonfly!

my completed dragonfly
Early in August, I took a one-day class at the Adirondack Folk School in Lake Luzerne.  The class was called 'Bead Embroidery: Freestyle Jewelry Design' and I had absolutely no idea what I was getting into (or I might not have taken the class!!)

True to form, my first project was kinda big.  I don't seem to understand the concept of baby steps; I always jump into new artsy-craftsy stuff fully committed, and this time was no different; I went whole hog!  Once the teacher explained what we would be doing, I decided I wanted to make a beaded dragonfly brooch.  Dozens of hours (no exaggeration) and almost two months later, it is done, but not without some detours.

As the dragonfly got close to completion, I realized it was too big for a brooch.  I'm not a big person, and this thing pinned on my sweater would bump into my shoulder rather awkwardly.  So I decided to make a purse for it.  (By the way, I googled free patterns for purses and bags, and came up with so many!  I need to remember to search for sewing patterns on line for free.)  So I took the almost-done dragonfly and off I went to JoAnn's to buy fabric for the purse.  Somewhere in the store, the dragonfly slipped out of my shopping cart, onto the floor.  I picked it up and didn't notice right away that one of the beautiful bead eyes had cracked and half of it was missing.  When I made the discovery, I searched and searched but could not locate the missing bead half.  I paid for my fabric and sat in my car and cried.  By the time I got home, I was calmed down, and emailed the teacher, who called me that evening to tell me she had two more of those beads.  She explained to me how to remove the leftover part of the bead, and how I could use tweezers and gently move the bead netting I had sewn around the eye and tuck the new bead inside just like the old one.   I followed her instructions and finished the project.  The new eye has a slightly larger hole, so the tiny bead that sits in the center sunk deeper inside, but it isn't very noticeable.  I sewed this cute little turquoise and black purse and stitched on the dragonfly.  Here it is, DONE!  Actually, after I took this photo, I sewed a Velcro closure on the bag and stitched a black button over it, on the central downward curve.
my dragonfly bag

Below you see the inside of the bag, and the dragonfly before I cut it out and edged it with stitched beads.  I picked out the funky fun fabric for the inside of the bag, but I didn't think about the fact that I needed to stitch right through it in order to put on the dragonfly in a way that it can be removed if I ever want.  So the inside isn't quite so pretty any more, but hey, nobody will actually see it, right?