Showing posts with label line design. Show all posts

Wednesday, October 20, 2010

A Little Art Room Religion

In the beginning, the universe was blank paper. And some kindergartners. And the paint was black.

On the first day, the art teacher provideth the kindergartners with the black paint and the blank paper, and creation began. And the K's created lines - zigzags, curls, waves, straight and dotted lines. And the K's looked upon their lines and were pleased.


On the second day, the art teacher provided the K's with hues of red, yellow, and blue. And the K's painted, and washed, wiped, and washed their brushes some more. And they looked upon their creations and found they were good.


And in the 25th minute of the second day, a paintbrush was dipped accidentally in both the red and the blue without washing. And then there was purple. And the K's looked with awe upon the purple creation, and other brushes were double-dipped as well. And ochre, and brown, and green were created, and the universe filled with color. And the art teacher and the K's looked upon the colors and were pleased. And there was joy upon all their faces, and happiness in the art room. And the K's sponged the tables and the art room sparkled. And it was good.


On the third day, the art teacher stapled the colorful creations on the bulletin board and looked upon the colorful universe and found it complete.
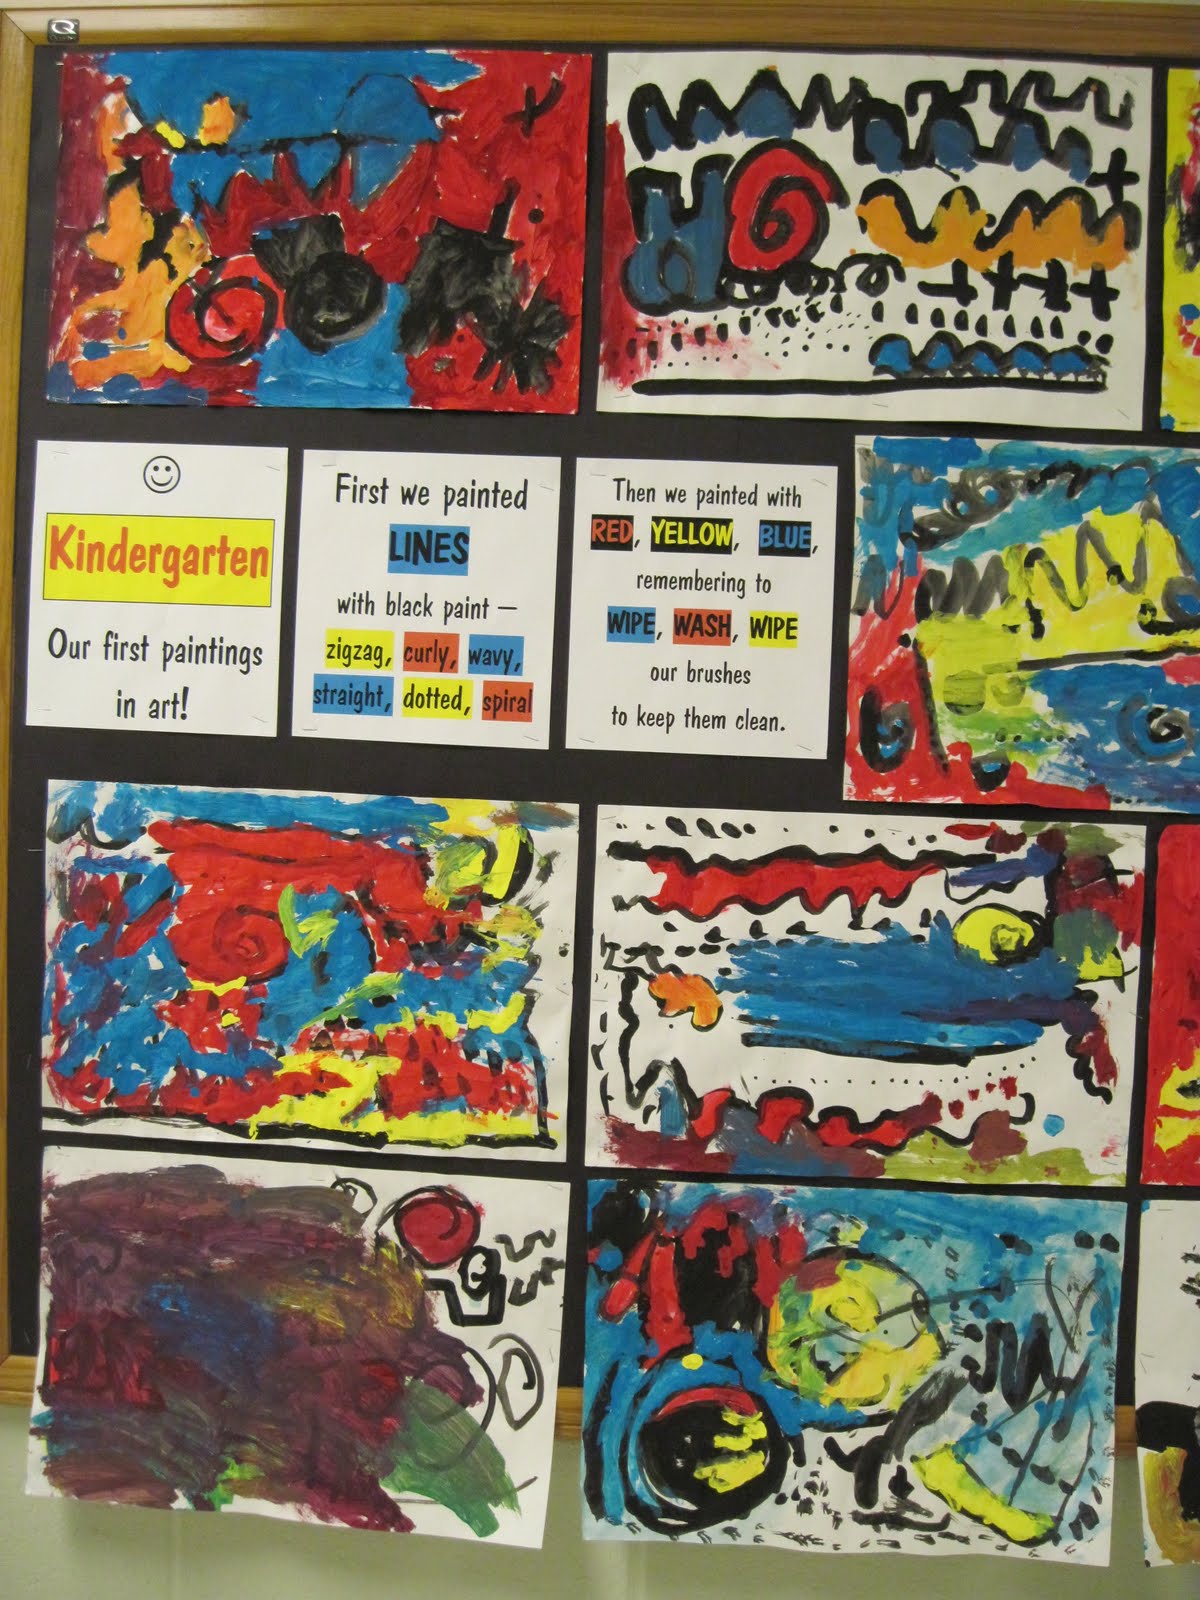

And passersby looked with awe upon all that had been created. And saw that it was good.

And on the 3rd night, the art teacher rested, and checked email, and watched Survivor, and blogged. And it was good.

My thanks to http://mrspicassosartroom.blogspot.com/2010/10/primary-lines.html for the origins of this lesson idea, and my apologies to the Old Testament.

Wednesday, June 9, 2010

HodgePodge, ModPodge, whatever....


It's been a crazy few days in the art room. While Alice is now falling down her rabbit hole, there's still the Queen of Hearts and Tweedledee and Tweedledum to add, and some kids are barely done cutting and gluing their books, as with the music-themed book center above.
Meanwhile the 4th graders tried out an awesome lesson courtesy of "Art With Mr. E", and first graders did adorable collages (more of both of these further below).
In their rush to finish their altered books, the 6th graders keep mistaking the name of ModPodge for the word hodgepodge (as in "Mrs. Brown, can you re-fill my hodgepodge?") which is so funny, because so many of their books ARE a hodgepodge at this point.
So the rest of this post is also a hodgepodge.
First, another altered book-in-progress... Yesterday, Hannah brought in a bag of roots and leaves to add to her altered book (above). Today, I think I had over 30 of my 6th graders in my room during their "study hall" trying to scramble to finish their books. The folded ones got done more quickly, but the painted and collaged books need time to dry in between pages, and we're rapidly running out of school year. (This is definitely a fall project next time, not spring.)


And now, first grade collages. Kiddos cut up folded-paper prints that they made in a prior art class, and also added various scraps found in "mystery bags" to make these adorable collages of bugs and critters. Lots of fun and enthusiasm!

Meanwhile, a few days ago I promised to post these paintings, done by my 5th graders while being taught by my super student teacher. It was a challenging project, mixing pointilism and an introduction to the concept of linear perspective to create these city and country scenes. The kids were VERY proud of their completed paintings.

And finally, this project (above) that was posted a couple of weeks ago Mr. E, and subsequently posted on a few other blogs, has been a real hit with my 4th graders. So easy, but teaching lots of concepts:
The kids used line to create a rhythmic design. I then had the kids use a different analagous color combination (or family) for each "tunnel" or "tornado". The kids loved looking at the color wheel and their colored pencils to find families that were related. Finally, they had to use value to create a sense of volume or space. So many concepts all at once!

Monday, May 10, 2010

Batik with Toothpaste??!!! What Fun! - by gr.5


Yes, these gorgeous 5th grade paintings, done back in the fall, are actually imitation "batiks" that were created using a resist of toothpaste mixed with Aloe Vera lotion (which I bought in the $1 store). No melted wax! According to the kids: Best Project EVER!!! And an unexpected bonus - while you are working, your art room will smell minty fresh :-)

We used design elements found in Victorian architecture for design motivation for these "batiks". Here's how you do it:

  • First, tape muslin to a scrap of mat board. Either draw lightly with pencil on the fabric, or draw with a Sharpie on a piece of paper and put it under the fabric before taping.
  • Mix together toothpaste and aloe vera in an empty glue bottle (hint: you'll want to clearly label the bottles to avoid mixups). Shake 'em up like crazy. Then trace over your drawing with the resist mix, and leave to dry overnight.

  • Paint over the entire image with tempera - but do NOT use washable tempera. More concentrated or better quality tempera will result in richer color. Don't use white. Again, leave to dry thorougly.


  • Put in sink and let water run over it to begin to loosen paint.
  • Rub gently as the stream of water removes all the resist, and excess paint.
  • Place on clean side of matboard to dry.If desired, touch up or add details with Sharpies.


Voila! All done!

I know many of you, especially in the south, are winding down your school year, so you may want to check back in the fall when my students will create a new batch of this crazy-fun technique. Meanwhile, here in NY, school's in session till almost the end of June. Still lots of teaching time left!