Saturday, February 1, 2014

Shameless Self-Promotion!!

Hey, friends, I swore I'd never do this, but, I guess we all have the right to change our minds now and again, right?  The Art of Education is taking nominations for the Art Ed Blogger of the Year, and I'm looking for your support.  I'd like to at least make it into the Top 10 this year, for the first time.  I feel like it is my turn!

Since I started blogging over 3-1/2 years ago, I've written 587 posts, amassed 971 followers, introduced crazy projects like relief carving in Sheetrock and imitation batik with toothpaste and hand cream, and explained the ins-and-outs of making papier-mâché easy-peasy.  I've shared my own photos of student artwork, of the beautiful region where I live, of my crazy personal projects, and occasionally my family.  I've talked about workshops I've taught, and conferences I've attended.  I've initiated interesting conversations on a variety of topics, from the merits of cursive writing to doodling vs Zentangles and much much more.  As of this writing, I've had 810,923 page views!!!

My current goal is to reach the 1000 follower mark, and receiving this recognition would surely help.  I am a retired teacher, as of 1-1/2 years ago, but that hasn't diminished my involvement in the global community of art educators.  Will you give me your support?  

Make your nominations at http://www.theartofed.com/2014/01/27/nominations-now-open-2013-art-ed-blog-of-the-year/  You will need to include a link to this blog, and the reason for your nomination. 

Uh oh.  Just discovered the nominations were due by Jan 31, which here on the east coast ended 41 minutes ago.  Maybe it's still worth a try?   Anyhow, here's a cartoon for your viewing pleasure:

Or maybe I'll receive an award like this when hell freezes over.  Here's one of my frozen bedroom windows.

Monday, January 27, 2014

Papier-mache has begun!


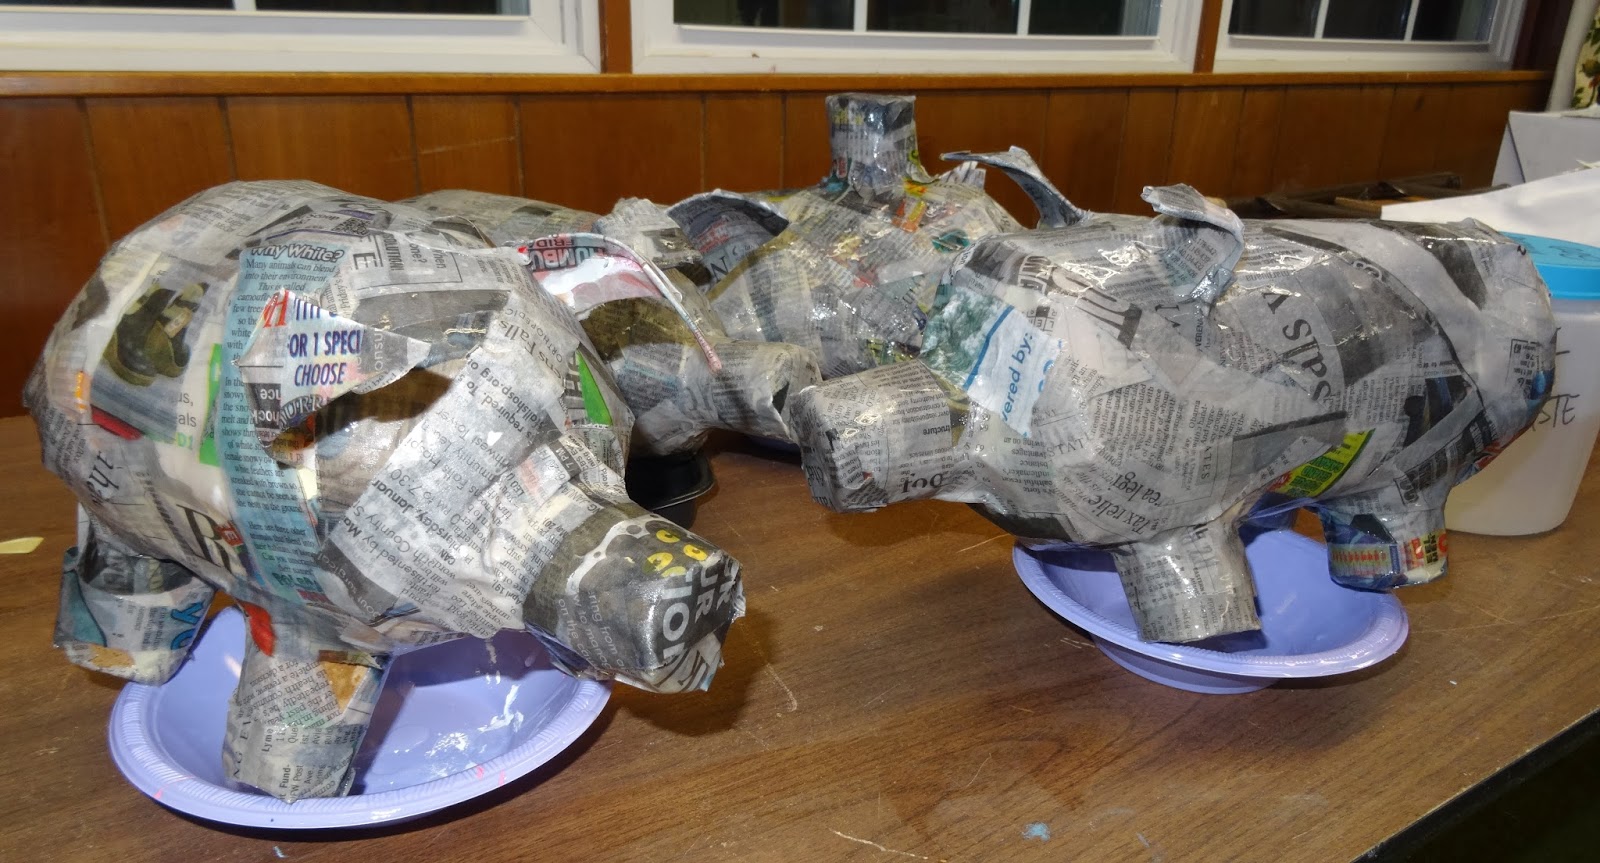
Just thought I'd take a moment to share with you how my DragonWing Arts students are doing on their flying pigs!

I've mentioned this many many times before on the blog, but if you are a newer reader, you might not realize that I am positively smitten with papier-mache.  It's just got SO many possibilities.  But since these students are relatively new to me, and since our time is limited, rather than tackle something extreme, I decided to select a project for them that is foolproof easy, tried and true.
 

Many of you worry about papier-mache dripping all over the place and the mess.  I contend that, if done MY way, you'll have better results, it will be ridiculously easy to clean up, and they will dry much faster because you won't be using too much goo.

To make a long story short - do NOT dip the newspaper strips into the goo!  I know that's what most of you do - you dip them, and then 'scissor' off the excess with your fingers.  Instead, try this:  dip your FINGERTIPS into the goo.  Then rub it on the palm of your hand.  Touch a finger to a newspaper strip to pick it up, and rub it between your palms to saturate with goo.  It should look translucent, but not be drippy.  (Note the great vocabulary words you can teach: translucent and saturate!)  Then put the strip on the project, and give it a massage.  Repeat for the next strip; and the next; and the next....    When done for the day, make sure the whole thing is massaged nicely to smooth in rough edges or paper sticking up. 

Meanwhile, my students are also beginning a crazy favorite project of mine, 'toothpaste batik'!!  Some of you use a similar process using a resist of washable white or blue gel glue.  I've tried that and found that it is very challenging to wash out.  So we use a mix of white toothpaste and aloe vera lotion that I purchased at the dollar store.   I mix it 50/50 for the resist.  I'll be posting more about this process (and I've posted about it several times before; you can find six of these the posts via my labels at the bottom of the blog.  Just click on the label 'toothpaste batik'.).  In the meantime, I've gotten a sample started for the kids, and one of the girls has an abstract design that she has begin. Here's a sneak peak:
My sample frog, with the resist newly painted on
 Below is a student piece.  The design was drawn on paper, traced with Sharpie, and taped to a board.  The fabric was taped OVER the paper, so the Sharpie design shows through.  This way there are no pencil lines on the fabric to annoy you later! We'll be working on them again on Thursday, so I'll show you more details of the process then, I promise!  
Meanwhile, stay warm, everyone!