Showing posts with label precious metal clay. Show all posts

Friday, June 24, 2016

PMC at Double H

I spent the day today as a volunteer in the Arts and Crafts building at the Double H Ranch, a camp for children with life-threatening illnesses, located, just 20 minutes from my home, in Lake Luzerne in the beautiful Adirondack Park of NY state.
Perhaps you've noticed the name Paul Newman on the camp sign above.  Well, Double H Ranch was the second of Newman's "Hole in the Wall" camps; Double H came about via a collaboration between Paul Newman and local philanthropist Charles R. Wood.  The lovely little lake you see in the other picture above is Lake Vanare.
 I first explored PMC (precious metal clay) three years ago at the Adirondack Folk School in Lake Luzerne, and I blogged about it here, and here; I've subsequently taken more classes in specific techniques, including hollow forms, and also bracelets and enameled PMC, which I didn't write about on the blog.  So it's no secret that I'm smitten with PMC!

Each summer, my PMC teacher packs up her entire studio of tools and textures, dehydrator, kiln, and more, and spends several days throughout the summer working with the kids at Double H to make themselves unique silver jewelry mementos.  Today was the first time I was able to join her as a volunteer, and it was also my first time at the camp.  We worked with older campers today, girls of  I'm guessing around 14 years old.  The necklaces pictured below and at the top of the post were made by a couple of girls I worked with.
The heart/date necklace pictured directly above, and the one with the triangle and circle at at the top of the post (some sort of secret personal meaning to the symbolism!) were both done by creating the image first on a piece of scratch foam, and then pressing rolled out PMC clay into the design on the foam, to create a raised image.  The paw prints and dragonfly were stencils that had been cut into textured wallpaper (the girls were all from the Bear cabin, so paw prints were a popular motif today).

After the girls finished making their pieces, and went to lunch and then rest period, we filed the rough edges, drilled holes, and went to lunch while the pieces fired.  When we returned, we went to work adding patinas as desired, polishing, adding jump rings, and hanging the pendants onto necklace cords.  I hope the girls are happy with their finished pieces!  I think they are awesome!!  Below, a few pieces from a different table of girls, who chose not to have patinas added to their work. 
 I unfortunately did not photograph the rest of the pieces made by the 15 girls who came today.  The variety was spectacular, from rings with stones, and charms with flowers, to Double H emblems, and all sorts of other interesting designs and shapes.  It was a terrific day.  Here's a few more camp pics:
 By the way, about a year and a half ago, Robert Irvine and the Food Channel's Restaurant Impossible came to Double H and did a makeover of the kitchen and dining area at the camp!  It was an exciting time, and an enormous amount of kitchen equipment as well as waterfront equipment (pedal boats and more) was donated to the camp as part of this awesome makeover!  
 One last thing - I will admit that I went to the camp today with some trepidation.  I did not know what kinds of kids I'd be encountering.  I have a tendency to get very caught up in sad stories and can be emotional about the trials that kids shouldn't have to deal with, and was worried I might get upset by tragedy.  But, the truth is, other than a couple of wheelchairs and a visible hearing aid, the medical challenges faced by these kids were not visible.  The girls I worked with appeared as happy, normal teenage girls away at summer camp having fun, which is the magic of a camp like this.  The camp is a place for them to feel like normal kids.  The only thing someone might have noticed, different from other camps, was the excess abundance of adults - besides the 8 PMC volunteers, the 15 kids arrived with 4 or 5 counselors with their group;  these were college age boys and girls who are immensely well-prepared for the unique challenges posed by working with kids with life-threatening illnesses.    I will definitely return to volunteer with the PMC teacher when I am able to! 

Saturday, April 2, 2016

Following dreams...

Break out the overalls and do a happy dance with me, because some blue-haired little old lady is gonna be doin' some painting this summer!  And by the way, I don't mean painting the ceiling of my shed again,  though that was kind of fun.  (My husband doesn't like to trust me with a paintbrush on our house.  I think he's afraid it will end up like my car).  But let me explain about this summer...
Do you ever see opportunities and say "I wish I could do that some day"? We all get so busy with our commitments, and work, and family, and crazy projects, and taking care of our homes,  our cars, our health, and so on, and it's easy for it all to pass by.  Well, since I retired, I realize that "some day" has arrived, and if I don't take the opportunities while I am able, it may be too late. I think the first thing I did shortly after my retirement was tell my college roommate that even though we live on opposite sides of the country and never see each other, we needed to get together somewhere crazy for a milestone birthday.  Neither of us had any real desire to go to Las Vegas, so that's where we went.  It took a little work to convince her, but we are both glad we did. 
But I'm not generally talking about vacations.  I am talking about MYSELF.  Things I want to do for ME.  To me, this is not just laying on a beach, sitting on the dock with a good book, or paddling in my kayak, though I love and do all those things.  I'm talking about genuine learning experiences.  Taking classes; meeting people you've never met, learning a new skill, or re-discovering an old passion. Assessing what I want to do with the life that I have.  For me, being creative is a large part of who I am, so it needs to play a major role in choosing what these things will be.   
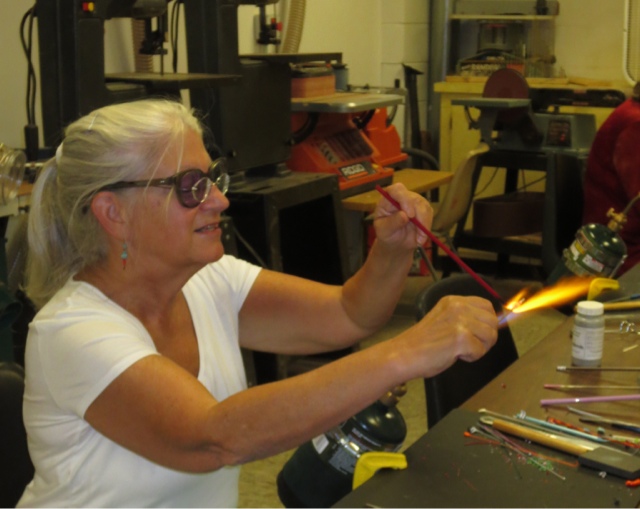
I began retirement with a bunch of classes at the Adirondack Folk School.  It is just 1/2 hour away, and it always looked interesting, but gosh, those classes aren't cheap...  So I said "what am I saving for?  DO IT!"  So... in the almost 4-years since I retired, I have woven a beautiful rug out of sock tops (fun!), I learned to use PMC (precious metal clay, which I absolutely LOVE), made lampwork beads (which was a great experience, but in the name of safety, this little klutz will not be using a torch any time soon in my own home), made a bead embroidered purse (quite the endeavor; I'm very proud of it and doubt I'll ever do anything like it again), and made a purse from a gourd (which is very cool but not real practical), and more. 
 I traveled to Santa Fe for the Crizmac/School Arts International Folk Art Extravaganza in July 2014, which I had been eyeballing each  year in School Arts magazine. I didn't know a single person who'd been on one of these travel/professional development opportunities, so it was a gamble, and it was wonderful; worth every dime.
This July, I'm taking another such gamble, and I will leave home/husband/cat for an entire week and go to the beautiful campus of Bennington College in Vermont, where I will be taking an Art New England summer workshop class where I hope to rediscover my love of oil paints (haven't used them in decades, due to time and space and life considerations), painting landscapes in the out-of-doors, weather permitting.  With all the thinking/talking I've been doing about using authentic source materials for your art, and painting from observation (see this recent post), I'm putting my money where my mouth is.  (So now I have three months to shop for all the materials I'll need; the list is extensive and I'm eager to start shopping.)  

I left college with two artistic passions: darkroom photography and oil painting.  I taught darkroom photography for 8 years, until a job cut and I no longer had a free accessible darkroom.  I painted until I got married, more than 28 years ago, and moved into a house that had wall-to-wall carpeting pretty much throughout.  Since that time, I've discovered a lot more, including batik, and acrylic paint, and papier-mache, of course!  (I think that, with a different educational background, I might have become a sculptor, like my grandfather Harry Levine.  But fates didn't lead me that way, though there's still time....)  I still love photography, but the darkroom is a thing of my past, like scuba diving.  But still, those oil paints  were never discarded, and the luminosity of their colors was something I never felt I achieved with acrylics, and I became just an occasional painter.  I'm looking to remedy that, this summer.  Wish me well!

What opportunities have you looked at longingly? Can you find a way to make room for those opportunities in your life?

By the way - if you want to learn more about my grandfather, or about any of those previous endeavors mentioned in this post, from the precious metal clay to the International Folk Art Market and everything else, they've all been posted about before on this here blog.  Just type what you want to know about in the search bar on the right side of my blog, or search for the topic of interest in the "cloud" of labels at the bottom of the blog.  Either way will take you to all sorts of stuff from previous posts over the last few years!  Happy hunting!!!

Thursday, May 8, 2014

Hollow form jewelry in precious metal clay

I know, you are probably sick of hearing about my jewelry making adventures, and would like me to post an art lesson or two or three, but I've had a lull in my DragonWing Arts art enrichment business and in the meantime I've been doing other stuff, and I want to share!
So yesterday, I took my third class in PMC (precious metal clay).  I've written about this amazing material before, here and here.  The name of the class was Hollow Forms, and I really didn't  have any preconceived notion what to expect.  I was taking the class primarily because the class I have been craving, enameling on PMC, was postponed until mid-summer, and I didn't want to wait that long. By the way, the (expensive) little package in my hand above made all the jewelry pictured in this post - two pairs of earrings and a  pendant - and there's a teensy bit left for next time.

The pair of earrings in the photos below were the first thing I made.  The texture on the silver comes from a really cool paisley rubber stamp.  Here's a closeup of the awesome texture.  The circular shapes were dried on the back of a six-well paint palette, to get the domed texture.
 Below is a side view of the earrings, so you can see the shape of them, kind of like a lentil, or a clamshell, and a photo of the pair of them.  They are on specially made ear wires, because of they way they are drilled in the middle.  I think they're pretty awesome!
 Here you can see how they actually dangle from my ear. 
Then I embarked on making this square pillow shaped earrings in the photo below, domed on the paint palette again.  I'm not sure if you can see in the photos, but the front and back squares are joined at the corners, and there is a narrow almond shape end piece on each side. 
 I think perhaps you can see side shape (and the cool texture on it) in the photo below.  Excuse my hairdo!!
The black is a patina I put on them and rubbed off, to bring out the raised squares in the texture, and also the framing effect of the side pieces.  The texture came from a piece of textured wallpaper!  You can see that I added an onyx bead at the bottom when I assembled them.  (I had drilled a hole through two of the side pieces so I could put a headpin through them.).  They are a great size for an everyday sort of earring.  Though of course, if I wore them every day, when would I wear the approximately 100 more pairs of earrings I own? 
 Perhaps this is a better view.
 
 And then I decided to use the rest of time and my clay to make a pendant, a companion for the first pair of earrings.  It's a larger version of the same shape, though this time I focused in on a fabulous wave-like texture detail of the paisley rubber stamp. 

I drilled two holes in the assembled piece, and then made two little donut shapes that I attached over the holes.  The piece is hollow inside.  I plan to run a black silk cord in one hole and out the other, to complete the pendant. 
 You can see that the pendant will go nicely with the earrings, won't it?
You can also make hollow forms with PMC by building the piece over a core that burns out. This way you can create some irregular shapes.   I have a great idea for a piece I'd like to make this way, but I didn't have the time to try it out yesterday.  

Saturday, October 12, 2013

I Love Precious Metal Clay!

I first wrote about PMC (precious metal clay) in July, (here's the post link)  when I took a class at the Adirondack Folk School.  At that time, as I said in that post, I had no idea what PMC was all about, so I went in with no preconceived plan.  This time was different.  I had some ideas I wanted to try, and so I went in with a plan.  Which is good, since PMC is real silver, and thus very expensive.

I wanted to experiment with weaving ideas. Sorry this image of the completed earrings posted sideways. 
Here's a close-up (below).  I first rolled out and textured my clay, and then cut it in strips, working quickly as the clay dries fast. I used some water on a paintbrush to slip in between the connections, and then gently pressed them together.  They do not look like exactly what I envisioned, but I still think they are really cool.  I don't know anyone else with woven silver earrings!  I dangled them on a piece of chain because, with my long hair, I kind of liked them having a little 'swing'. 
 Then, still in weaving mode, I wanted to try out my other idea.  The plan was to create a frame with drilled holes all the way around, so I could actually weave inside it, either with threads, or fine wire.  I made these curved top rectangles (maybe an inch and a half long), and in addition to the hole for the ear-wire, I put two holes in the top and bottom (for the warp), and four down each side (for the weft), measuring very carefully.   At least that's what I thought I did.  After they were fired, and I brought them home, I discovered there was, on each earring, one hole on the side that had not drilled through entirely.  This of course undid my original plan for an authentic weaving, with warp and weft.  Instead, I used fine wire and seed beads and weaved in and out in a random pattern, twisting here and there.  Here's the result - the pair, and a close-up of one earring.  By the way, the funky texture was achieved with a texture plate.
 
 Then it was time to make a ring.  You may recall that I was NOT happy with the ring I made last time, so this time I wanted to redeem myself.  Here's a few views of the result:
 
 Sorry - another sideways post - but I wanted to show you the close up of the texture.  This texture, believe it or not, came from a very subtle texture on a tiny strip of wallpaper!  I think it looks like dragon scales. 
 I'm pretty happy with the way it turned out.  A lot of people in the class inserted stones, but they were cubic zirconium and I didn't want to put cheapy stones in a real silver ring. 
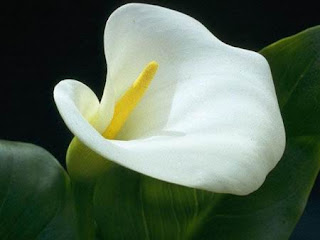
Then I wanted to make some petal earrings.  They are not yet assembled, but I'll show them to you anyhow.  Though unplanned, they ended up looking like a calla lily.  I didn't even realize, when I picked the stripey texture for the inside, how much that would look like the calla llily. 
 
  I want to dangle something down the middle (a pearl? on wire? on beaded thread?) but I have changed my mind a ton of times and need some advice.  They do not have black patina, as does everything else but the waffle weave earrings, and so they are extremely reflective.  A real calla lily has a yellow center, but I don't think that will look good with the silver.  but I just don't know what to do, as whatever I put inside will be strongly reflected by the shiny inside of the petal.  (Sorry the photos aren't focused great - I forgot to include them when I shot the other pics.) On the palm of my hand, you can get the idea of the size.
 They have a lovely texture on the outside, too.  I'll be able to do a wire wrap at the top, or an anchor bead, and then drop something through the inside.  I could decide to forget about calla lily accuracy and do 3 or 4 little pearl drops at different levels.  Opinions, please?  No crystals though - I tried them and didn't like them.

After the  lily earrings, I still had some clay left over, but we were running out of time, so I quickly rolled out some leftover clay and pressed a rubber stamp into it, and then used a circle cutter to make these quick earrings:
 The red beads did not photograph accurately.  They are actually a very dark red, and not at all the cherry red in these photos.  I added the beads when I assembled the earrings at home.  Again, I wanted the earrings to dangle.  The circles are probably about an inch in diameter.
And then - oh no, still another little hunk of clay!  And the woman seated across from me was done, and had a teeny piece left too, and gave it to me.  So, I swear, I made these little earrings below in about 2 minutes.  I rolled the clay, used some star punches for 6 stars, and then rolled again, and used a teardrop punch for 2 teardrops, and with the tiny bit of clay still left, I was able to roll and punch out two more tiny stars. I assembled them quickly with simply dabs of water from a wet paintbrush.  In the nick of time, I dried them with a heat gun, and they were ready for the final firing of the day.  As it turns out, I absolutely love these earrings for an everyday pair, the kind you slip on for a trip to the gym or the farmer's market.  They are maybe an inch or so long.
Then... the crazy irony of all that rushing about - I was cleaning up my workspace and discovered that I still had some totally unused PMC carefully tucked in it's little package.  So I will make something at home (the tools are simple) and bring it to the teacher who says she can fire it for me.  Yay! Not sure what I'll make - perhaps I don't need any more earrings right now?  I'm thinking I may make one bigger piece for either a statement brooch or a necklace, going back to the idea of incorporating woven fiber into a window. Or maybe some tube beads.  Or both...

As you can see, I am smitten with PMC, so down the road you may see me doing some more.  For those of you from NY state, if you attend the NYSATA conference in November, I'll probably have a different pair of PMC earrings swinging from my ears every time you see me (remember, I made another 4 pairs back in July, so that's a LOT of earrings).  Anyhow, if you don't recognize me from my silver hair, just look for the jewelry!

Friday, July 19, 2013

Finally, Precious Metal Clay

It's been more than a week since I took a class in precious metal clay at the Adirondack Folk School, but I'm finally going to share what I did with you.

This asymmetrical pair of earrings (above) wasn't originally intended that way.  I meant to drill one hole in each earring, for the wire, but I put two holes in one and none in the other.  When I discovered my mistake, a made a hole in the second piece, but forgot that I had made TWO holes in the first one!  So I dangled an extra crystal from the one with the extra hole, and I actually really like the asymmetry. These earring were made at the last minute from the last tidbits of PMC (precious metal clay) I had left in my pack.  I had to hurry to complete them so they could be in time for firing.  Hence, my drilling mistake.


 I tried photographing this pair on so many different pieces of fabric, so you could see the lovely amethyst color of the crystals and seed beads.  But the purple hues just keep looking blue in these photos.  Sigh.  These teardrop shapes were actually the very first pieces I made in the class.  Hence their imperfections!
 We made a ring pretty early in the class, because they needed more firing time.  So I didn't have a clear plan.  I changed my textures about 6 times, and then rushed to put something on the ring.  The little holes were a quickie thing, and if I had time I would have wiped them out and redone the spirals.  But I did not have time.  Next time I will have a plan of how I want it to look so it isn't so lumpy and inconsistent looking.  Anyhow, I'm still proud of my very first handmade silver ring, and I especially love the floral texture on the back of the band.
 What fun!  We went outside and grabbed leaves to use as textures.  I'm pretty happy with the way these turned out, though I plan to make some alterations to the strand of green seed beads.  I don't like the way they hang and I think I can make them better. 
 I think this pair with the paisley textures might be my favorite, though I may change the way they hang from the ear wire to make them a tiny bit longer.  They look like something from India to me, and I love the way the little triangles swing on the big ones. 
I need to tell you, I had absolutely NO idea what this stuff was before the class, and doubted that it was 'real' silver.  Well, I was wrong.  It is most definitely real, 99% pure. No wonder the materials fee for the class was so expensive!!  But worth every dime.  I seriously love precious metal clay!  Now that I understand the properties of the material, I have some great quirky ideas of what I'd like to do with it, but I have to wait until the fall when the teacher has more classes open.  I don't have a kiln and even if I could get someone to fire my work for me, the material is expensive and I'd rather work under the supervision of the teacher for advice when I'm not sure the best approach to one of my ideas. 

Have you ever used precious metal clay?