Showing posts with label 6th grade. Show all posts

Wednesday, February 21, 2018

Robot in Perspective - Fun with Tooling Foil!

 A couple of weeks ago, I posted a pic of this robot, on a white background (below), as part of a post HERE, along with a tutorial on using tooling foil to achieve relief.  The tutorial consists of a couple of videos.  I'm new to videos, so they are not fancy, but hopefully they are worth your time if you are new to this material, 36 gauge aluminum tooling foil.  (You can also get copper or brass tooling foil, but it is MUCH more expensive, so not so financially practical for classroom use.)
By the way, the small amount of added color was done with acrylic paint mixed with Mod Podge, after the black 'antiquing' was done with India ink and steel wool.

I knew I didn't want to simply glue him on the white board as shown above, but I was struggling to figure out what environment would be a good fit for him.  So I stuffed all his parts (head, antennas, neck, arms, shoulders, legs, and body - all together 11 pieces) in a baggie that evidently wasn't closed too well.  I brought the bag into my studio, where I promptly dropped it, spilling the pieces onto a canvas laying on the floor.  The canvas was painted with black gesso, and I had drawn lines on it with white chalk.  I saw the  robot pieces on the canvas, and an idea was born!!

I found a scrap piece of foam core, and I painted it with black gesso.  Then I used a ruler and a white colored pencil to draw a perspective room room.  I added a couple of accents of color, also with colored pencil.  And then I glued my robot into the room, using low temperature hot glue. 
I posted a pic of him on Facebook, and he's received a lot of love, and a lot of questions, so in case you are thinking about this as a possible project for your students, here's a few thoughts on how to make it work -
  • Your students should each have a baggie or envelope (with their name on it) to store their pieces. It's up to you how many pieces to make.  Arms and legs could be separated to be jointed at the knee or elbows.  Elbows, knees, hips, etc, could all be separate pieces like my shoulders are.  Make sure all pieces are cut with rounded corners to prevent cuts.
  • Because the pieces are small, keep the design of each piece simple.  
  • If you are using white colored pencil, like me, to do a perspective drawing on a black surface, make sure it is erasable in case of errors.  I liked the texture of the gessoed surface, but that might not be practical for young students.  
  • Of course the drawing doesn't need to be perspective.  That might be too challenging for some students.  How about a city?  A garden?  A mountain landscape? 
  • I glued with low temp hot glue.  Keep in mind that it low temp hot glue dries immediately, so if you are using this, the pieces have to be instantly placed once glue is applied.  With the small pieces, I suggest holding them with tweezers, quickly applying the glue, and placing them as desired.
  • I do NOT recommend high temp hot glue.  While it will also hold well, and you have place your pieces, you are gluing METAL, and it will get HOT!  Probably not a great idea for your students.
  • Other ideas for adhering, if you don't want to use hot glue: E6000 glue should work well, and some tacky glues might also hold.  Look for one that specifically says it will hold metal or other non-porous surfaces.  While I love Elmer's Glue-All, it is best for porous surfaces, like paper, wood, glue, or fabric.  It won't hold the metal foil permanently.  You can also use double stick tapes or other double-sided sticky products.

One last thought - the idea of using multiple small  pieces of tooling foil to create this robot sparked many other ideas.  For example, what about making windows and doors, and adhering them to a drawing of a house.  Or perhaps making tooling foil bugs, and adhering them to a drawing of flowers.  Or parts of a machine, or wheels of a vehicle, or leaves of a tree, or little boats to put on a drawing of a lake.  The material offers so many possibilities, so many ideas!  In the photo above, the the face features were made with a much lighter weight foil, not as effective, I think.  The students who made them were 3rd graders.  Please let me know if you have any questions!!

Wednesday, February 7, 2018

Tooling Foil Tutorial!

 I've been making samples for a workshop I'll be teaching at the upcoming NAEA convention in Seattle, in March.  The workshop is titled "Oh What a Relief - Fabulous Tooling Foil".  So I've been posting pics of my samples in Facebook art teacher groups, and have gotten a lot of questions about technique.  As a result, I'm diving into the world of videos, and have two (very low-tech but hopefully informative) videos to share with you!  But first, here are some of the samples I've been sharing:
I'm still trying to decide on an appropriate background for my silly robot above.  The piece below is a sample idea, designed to be perhaps a mat cover, or a book cover with a place to insert a photo or drawing, or even a frame for a mirror.  Funny how it matches my legs! 
Anyhow, to see how to take a piece of tooling foil (36 gauge aluminum) and create some nice relief in it, it's all in the video below!
The piece below is tooled foil that hasn't yet been treated with ink for 'antiquing'.  The black ink really brings out the details in the design.  I am  waiting to antique as demo in the workshop. 
To find out how to add all the detailed patterns and texture, and how to add the ink for antiquing, it's all in video #2!
So... the tooling is done, and the whole project has been inked.  Next step, as I explained in the video, is to remove some ink with steel wool.  Once that was done, I decided the whole piece would be enhanced with some added color.  Like I said in the video, I'm not a fan of of the look of Sharpies (or other permanent markers) on tooling foil.  So what I've done is mixed a small amount of acrylic paint and Mod Podge together, to make a semi-transparent paint.  I started with some blue.
Here's a closeup of texture that was made by tapping (from the back) with the point of my pointy wooden stick.  The ink surrounds it and looks really cool when you steel wool off the surface.  If I had done the same technique on the flat areas, from the front, the ink would have filled the little indentations making little black dots surrounded by silver color. In other words, the exact opposite!
Then I added some other colors the same way - pink on the eye and frame, a pale orange on the fins, and a mix of pink and orange on the lips. Here's the finished product!
The dragonfly below has been painted, inked, washed, re-inked, and I'm still not happy with it.  I'll be fiddling with it some more, and hopefully creating a background garden for it to be resting in, with possible some bright colored sheet foam or other collage materials.  I'll let you know how it turns out!
 

Saturday, February 28, 2015

'Fractured Faces' - the Picasso Slip 'n Slide!

I was searching through some folders a couple of days ago, and I unexpectedly uncovered the artwork which you see on for this post.  I have been blogging for about 5 years, but I've been retired for 3 of those 5 years, and I taught for 34 years before I ever even started blogging!  So that means I have 34 years of art projects and lessons that I have never shared.  So now and then, I'd like to tell you about some of them.
These lessons were completed before I started regularly photographing student work (in the days before the ease of digital photography), so most of what I have to share with you are my personal project samples, and not student work.  The images in this post are from lessons when the students were learning about Pablo Picasso.  The students were looking at his cubist portraits.  They noticed that the models often appeared like they were looking in fractured mirrors.  And the models were often viewed from multiple angles at the same time, with front views and profiles in the same image.  And the images were frequently bright and colorful and unexpected, and had a wit and humor about them.  So out of these revelations about Picasso's work, came this lesson, Picasso Portrait Slip 'n Slides, or alternatively called Fractured Faces
To start, students drew a goofy portrait, (as shown in the image above) which could, if desired, include elements of profile and front view, with exaggerated features.  Then, using a ruler, the image was divided up by several lines.

The students then colored the face using markers, and cut the image along the  ruler lines.  Students were given slightly larger pieces of paper, and the portrait was arranged on the paper like a puzzle.  Then, before gluing, the puzzle pieces were slid in one direction or another and slightly rearranged, while still retaining enough visible elements of the face.  When the students were satisfied with their compositions, they were given the go-ahead to glue them down.
Finally, the negative space in the original image, and the new negative space that had been created when the image was moved about, were all colored as well.  The image above is a sample of student work for this project that I discovered with my samples. 

Sometimes the images were filled with colorful patterns and designs, as in the images above, and sometimes the shapes were filled with areas of solid color, as in my sample pictured below. 
You may be surprised to see me posting a lesson that uses just marker, because usually I like to have my students work with materials that they are not likely to have at home.  But sometimes, it just works.  And sometimes, if many of my other classes were working with messy materials, I would have one grade level work with something non-messy to give me time to prep and clean.  So for this project, the bold colors of markers worked great.  But you could certainly vary this lesson in many ways.

For example, see the still life below, my sample.  For this project, I looked at and drew a still life arrangement of various bottles.  The drawings were 'fractured' with ruler lines before coloring.  The drawings were then colored with oil pastels, using rich patterns.  Though this wasn't cut apart as with the portraits above, it certainly could be. 
In another variation (sadly I couldn't find a sample), students drew a simple fractured image on a small piece of paper, tracing the lines thickly with a black marker.  Then, a piece of clear acetate was taped over the drawing, and the spaces between the lines were colored thickly with oil pastels.  The lines were left uncolored.  When complete, the acetate was flipped over onto a piece of black construction paper, which showed through the clear areas of the acetate re-creating the black lines.  The results are really cool!!

Today I read a conversation on on the Facebook Art Teacher page, about whether to show students teacher examples of final products, or not.  There were concerns about students copying if they saw your completed sample.  However, I feel strongly that students need to see a finished example, so that they have an understanding of where they are going.  Certainly, once it is shown, it doesn't need to be left out where it could potentially be copied.  But I think that kids need to see something completed, to understand the level of craftsmanship you expect, and to help guide them with choices they make along the way. Just my opinion, I know.

Before I end this post, I need to give a shout-out to the wonderful Patty over at Deep Space Sparkle, who recently posted a cubism project available for purchase in her online shop. It was ironic that I unexpectedly uncovered these pieces a day after she had posted about her project, and I'm exceptionally appreciative that she gave me the go-ahead for this post despite the timing.  Thank you, Patty, you rock! 
Friday, June 6, 2014

Projects for Pacon!

completed project idea ~ 'Designing Negative Space'
When I was at the NAEA convention in San Diego, in the vendor area, a gal from Pacon was looking for art bloggers willing to write up lessons incorporating a new material that they would send for you to sample.  I thought this sounded like a fun challenge, so I accepted the offer.  In return, I received their new Pacon Basic Black Drawing Paper in three forms: a package of 9"x12" sheets, a spiral sketchbook of the same size, and a large project roll.  The paper is especially designed for use with gel pens and metallic markers.
completed project idea ~  'Getting Buggy: Still Life Collage'
I used the spiral pad as a place to experiment, and I discovered that the gel pens I was using did not show up well.  Since the paper is intended for use with gel pens, I contacted the rep and she immediately popped a set of Sakura GellyRoll Moonlight Gel Pens in the mail to me, and yay, they worked fabulously on the black paper!  I definitely recommend them.  I also had success with a variety of metallic markers (also recommended for use with this paper), with Faber Castell Metallic Gel Sticks, and white acrylic ink (using a bamboo pen).  I'm not going to show you all my fun doodles, but I must say, I do love the idea of a black sketchpad!  Next I'm going to be using the sketchpad to test white charcoal pencil and some white and sepia-tone conte, and I expect they might both work well. 
completed project idea ~ 'Wacky Woven Flying Carpet'
About the black paper - it is lighter weight than construction paper, with a very smooth surface on one side and a slight tooth on the other.  Due to its light weight, I don't think I'd recommend it for wet media.  While I haven't yet tried it (but I will), I think the paper would suit well for some folding and curling techniques.  The only criticism I have of the paper is that the black is not a deep rich black, but actually more on the gray side of black.  But of course, that means that a black Sharpie shows up on it for adding subtle detail, so that's kind of cool, isn't it?

Anyhow, in typical fashion, I went overboard and I developed three lesson ideas, all using the 9"x12" paper, and I'd like to share them with you.  I haven't come up with any fabulous ideas for the larger size paper yet, since the fine points of gel pens and metallic markers lend themselves more to small sizes.  But like I said, maybe a folding/rolling/curling type of project?
My first lesson idea (pictured above, below, and at the top of the post) is the simplest: an easy project I called 'Designing Negative Space'.  With a white gel pen, I traced an ordinary object (I used a scissors) many times on a sheet of the Pacon black paper, turning it in various directions, overlapping, and even going right over the edge of the paper.  The idea would be to talk with students about balance, repetition, and movement to create good a composition.  Then I filled in all the sections of negative space, using repeating patterns and designs.  Again, I used the GellyRoll  pens for this.
 

The second project 'Getting Buggy: Still Life Collage' is my favorite, but has more steps.  I referred to the artwork of Dutch artist Rachel Ruysch (1664-1750), whose lush still life paintings always include 'creepy-crawlies' (insects, spiders, small lizards, butterflies, snails, inchworms, etc) tucked in among the flowers and on the tables. Here are a few images of her paintings:
I decided to make a colorful flower still life collage with bugs in it, to bring this to an elementary level.  The backgrounds of her paintings are usually dark, so I selected a deep blue Tru-Ray construction paper for the background (12"x18"), a piece of brown Tru-Ray for the table (6"x12"), and a piece of the 9"x12" Pacon Basic Black Drawing Paper for the vase.  (Definitely not as dark as hers!)  I folded the black paper in 1/2 like a book, and with the fold on the side drew a gentle 'S' curve from the top to the bottom.  I cut on that line and unfolded the paper to discover my vase, which I then glued on the table in my artwork and decorated with the metallic gel sticks.
I drew a bunch of insects with the gel pens (and addeed some black Sharpie detail) on the Pacon black paper, and cut around them loosely.  On assorted scraps of Tru-Ray construction paper, I drew some simple flower and leaf shapes, stacked some pieces together and cut them all out.  I then arranged them, including the bugs I had created, and glued it all together.  Finally, I used the gel markers to add details - veins on the leaves, lines on the flower petals, dots in the centers of flowers, and so on.  I enjoyed making my sample, and I think this could be a really fun lesson to do with kids!

The final project is called 'Wacky Woven Flying Carpets', and is similar to a 2nd grade paper weaving project I have posted about before on this blog.  (Hint: it is much less complicated than it looks!)  I won't give you all the process details here,  but I will mention that all the black paper in the weaving is the Basic Black Drawing Paper and was decorated with the gel pens.  My idea is that after the paper weaving and patterning techniques are all complete, the weavings would be displayed on a sky mural, and that the students could have fun creating whatever should ride on their flying carpets:  cats on carpets? (I've done that before); rattlesnakes on rugs?; flying french fries?... you get the idea!  Silly is good!!! Or, the weavings can just be backed with construction paper as I did in the 2nd image below, for use in a display about repeating pattern and design. 
If you want more information about the paper I was provided to use for these lessons, you can find links to it here: Basic Black Sketch Diary, Basic Black Drawing Paper 9"x12", and Basic Black Art Roll 24"x10'.  And if you've never visited the Pacon website before, here is where you will find assorted projects and lesson plans.  And here's a link to their Facebook page.  I'm hopeful that in the near future you will find the full details of  my three lesson ideas included on their website!  Yippee!!!!

And finally - I enjoyed coming up with ideas how to use this paper, and I want to say  THANK YOU to Jessica at Pacon for giving me the materials and the opportunity.  It was fun! 

Saturday, May 24, 2014

Color relationships and a fun optical illusion

Open up the photo above, and step WAY back and look at it.  Squinting a little will help.  How many colors are there?  No doubt you see turquoise, and red, and probably a gold-yellow and a paler yellow.  Guess what!  The two yellows are actually the identical color!  It is an illusion! None of the pieces pictured in the photo below has any more than three colors in it, even though you probably see at least four. 
I posted about this intriguing project way back in 2011, but it's a post that hasn't had a lot of views, and it's a really interesting lesson, so I thought I'd share it with you again.  This project is designed to show the effect that one color  has on another.

The materials are simple:  each student will need three sheets of  12"x18" construction paper - two dark colors and one light color.  They will also need a ruler, a pencil, a scissors, and glue.  That's it!

Watching students decide which colors are light and which ones are dark is actually pretty interesting.  I guided decisions if I didn't think their choices would work, but sometimes we were surprised at the outcome.  I recommend that the two dark colors be very different from each other - perhaps one warmer and one cooler color.  And as long as the two dark choices are darker than the light color, the illusion should work.  And if someone really wants to use white for their light, or black for a dark, don't discourage them.  You'll never know the result until you actually see it!  I had a huge selection of colors to choose from, not just the bright Tru-Rays, but the paler color pastels from cheaper brands.  (If you only have the 'good stuff', ask an elementary teacher to trade a few sheets for some pale blues, yellows, or pinks perhaps.)

Then, the papers are labeled in a corner - one dark color is labeled 'A', and one is labeled 'B'.  The light color is labeled 'C'.  I gave each student a paper clip to hold the papers together at the end of ar class, so they only need to write their name one one sheet of paper (the C paper).

Also on the C paper, students copy the following color pattern off the board.  Write it on a corner, near an edge, so it doesn't take up too much space on the paper.  Here's the pattern:
A-B-A-B-A-B-C,
B-A-B-A-B-A-C,
A-B-A-B-A-B-C,
B-A... until you run out of paper.  


A simple shape, no larger than a quarter, is cut out of the A paper and glued (we used good glue sticks) on the B paper, starting near a corner but not right on the edge.  Each time a new piece is cut and glued onto the next layer, have them cross the letter of what was cut off the written pattern.  Following the pattern is essential for the illusion to work. 

Use the ruler to find an 1/8", and draw a shape around the original shape, larger by 1/8".  Cut out the shape, glue it back onto the A paper, and cross it off the pattern.  Repeat the process. Over and over again, measuring, cutting, gluing, crossing off, measuring, cutting, gluing, using the A paper, the B paper, and occasionally the C paper as per the pattern.  Following the pattern is essential, as one time the C paper will be between two layers of color A, and the next time it will be between two layers of color B, and so on. 

The most important thing to watch is that the kids do NOT skip all over the paper cutting and gluing, or they will run out of paper too soon.  Start at a corner, and try to snug it in nice and close, each time you glue it down to cut again.  Remember, you only need a border of 1/8".  Very rarely, if a student does not pay attention to this instruction, you may need to give them an additional piece of paper in order to finish the project.  Or, sometimes, if they have a couple of parts of a paper that are too small, you can have them overlap and glue them together to create a larger piece. 

 Once they are done, have kids hold them up at a distance from other students, and then have students taking turns guessing what colors were used.  You'll be amazed.  Kids will guess as many as 7 or 8 colors on one illusion.  You can't see the full effect here on the blog; you have to try it!  The colors chosen will give halos of colors to the others, and the kids will absolutely not be able the guess the only three colors that were used.  It's really pretty amazing.

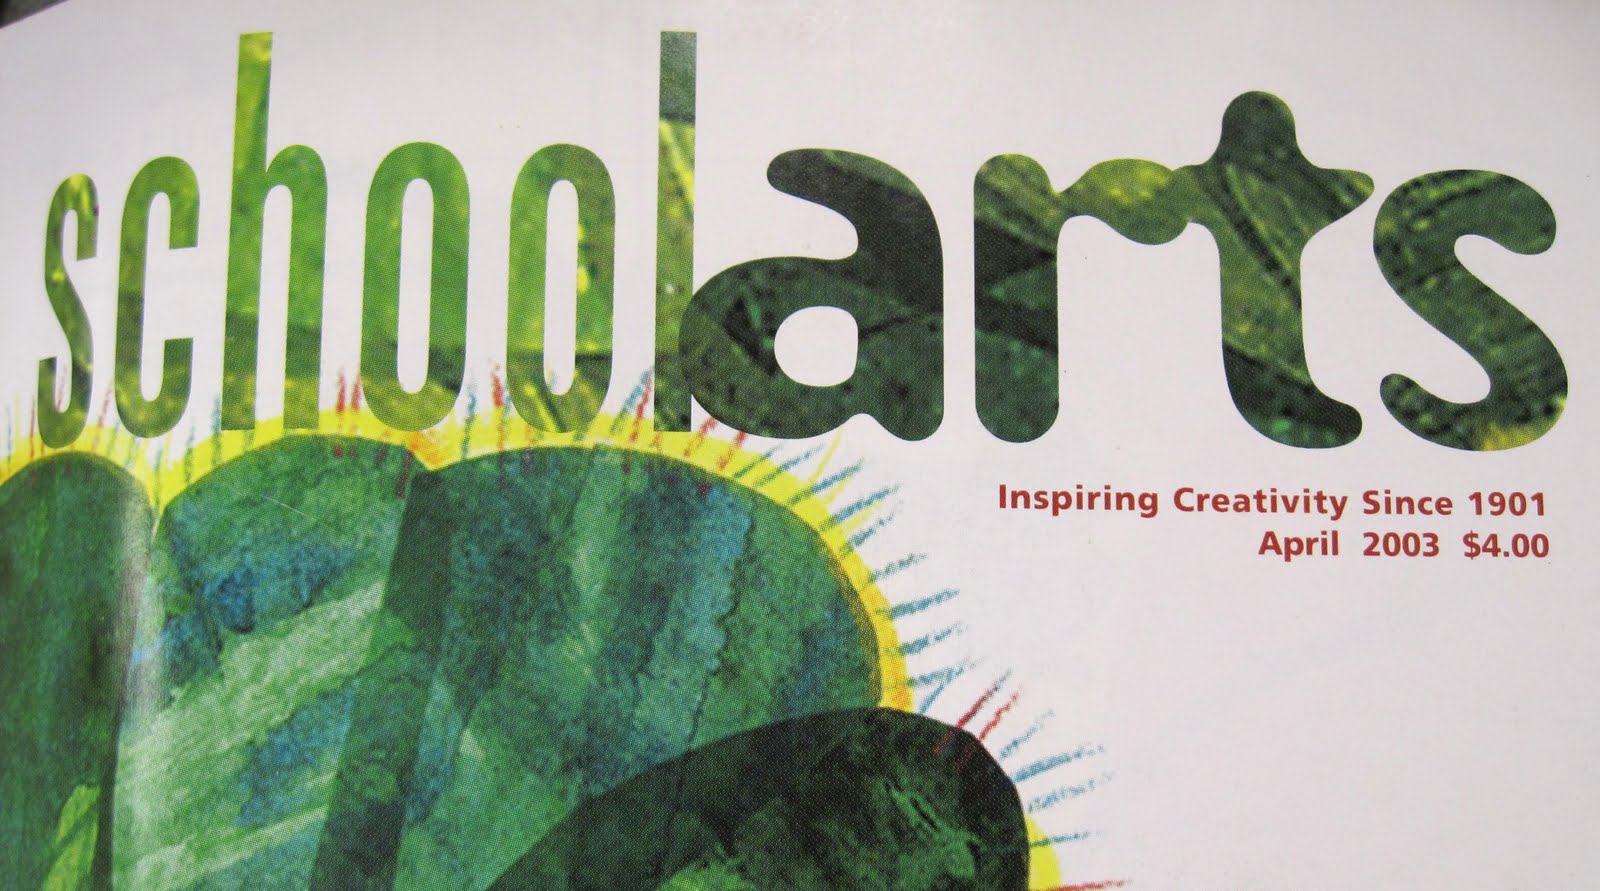
By the way, the original lesson for this was not my idea.  I found it right here, in the April 2003 issue of School Arts Magazine!
One last thing - follow-up.  Ask the kids how can they think they can use what they learn in their daily lives?   Perhaps in clothing choices?  In colors they pick to decorate their rooms?  I have a purplish carpet in my living room (it is actually subtle blue and red fibers, but visually, it is a dull purple).  Years ago, when we had a royal blue rug, the walls were painted a buttery yellow.  When we replaced the carpet, and I could not find a tweedy blue like I wanted, we ended up with the purplish rug instead.  As a result, because it is next to the yellow walls it looks gray!  I can't believe I didn't think about how that would happen when we picked the carpet!  (Of course the good side is that you cannot see the cat hair... or maybe that's the bad side?)

Anyhow, try one of these illusions yourself, and you'll want to do it with your students!  I did it with 5th graders.  You can try younger, if you think the kids could manage the pattern and the measuring, but be warned - if they make the borders much larger than 1/8", the illusion will not be as effective.  So I'd do this with students who can carefully measure and follow the pattern.  Have fun!

Friday, May 16, 2014

Funky Finger Puppets with plaster bandage

If you are a regular reader of this blog, you know that I love papier-mache, but the truth is, I also adore plaster bandage.  While there are similarities (use them both as a final 'skin' over an armature) there are many differences as well that make one material or the other better for certain projects.  For example, there's the smooth texture of papier-mache vs the rougher texture of the plaster bandage gauze.  The big bonus about plaster bandage is that it sets quickly, whereas papier-mache takes a while to dry.  So a project like this one would not have been possible with papier-mache. 
Most of the photos in this post are from one of my earliest blog posts, 4 years ago, and the rest are from a post in 2013.  I'm sharing them today as the first of several posts that will bring back some of my favorite projects, techniques, and more. 
The project is begun by casting a finger.  The only finger the kids were allowed to cast was their pointer (for obvious reason).  To cast the finger, coat it first lightly with vaseline.  Then wrap cut pieces of moistened plaster bandage for at least a couple of layers to make it strong.  (We pre-cut the plaster bandage into pieces maybe 1"x2" or 3".) Remove from finger when dry.  Most of my students were able to make two finger casts in one 40 minute class, if they followed directions.
How you set up for plaster bandage makes a HUGE difference.  We cover all tables with large sheets of paper or cheapo plastic dropcloths that can be discarded.  Sorry, this isn't my most eco-friendly project.  All materials - scissors, plaster bandage, and water bowls - are kept in one location and returned there at the end of art, so that no painting water bowls are used by mistake, or good scissors.  (I have junky scissors designated just for plaster bandage.  You don't want kids ripping the strips.)  The cut strips are placed in microwave dinner dishes, in the center of the tables.  Water is placed in containers near the students.  By the way, the warmer the water, the better/faster the plaster bandage will set!!!  By putting the bandage in the middle of the table, and the water on the sides, basically you prevent water from getting unnecessarily dripped into (and ruining) a bunch of plaster bandage, which is too expensive to waste.  Paper towels for blotting excess moisture are placed near the students.
  To the left above is snowboarder Shawn White before he cut his long red hair.
The finger casts are left to dry, and in the next class, the real work begins.  I plug in several low temp hot glue stations, and put out a heap of materials, including pipe cleaners, cereal box cardboard, and Styrofoam balls.  If a Styrofoam ball is desired for the head, it is hot glued on for a temporary hold.  Arms and legs might be added with pipe cleaners, getting glued on the back (two arms = one pipe cleaner piece).  Wings would be cut out of cardboard.  Kids are very ingenious about what to add to get the desired effect.  (For example, beads make great 'boobies' for ballerinas and cheerleaders.  I wish I had photos of them to show you!)  *Note: the Mad Hatter in the photo above left is not complete.  Somehow I never got a photo of the completed puppet.  Below are an unfinished Elvis, and the 5th grade teacher who claims that Elvis is her husband.
Once the features have been hot-glued on the finger cast, then it's time for another round of plaster bandage.  We use it like tape, attaching permanently heads, wings, arms and more.  The kids could choose to leave the pipe cleaners partly uncovered if they wanted to be able to bend them.  *Note - you cannot hot glue onto wet plaster bandage.  It has to be completely dry.

Important - plaster bandage cleanup: pour water gently from containers into sink, leaving plaster sludge settled in the bottom of the water bowls.  Do NOT pour it down the drain!  Next class, the dried plaster can be tapped out of the bowls.   All other materials are returned to starting location, and table coverings are rolling inwards from the edges and discarded.  Tables are swept as needed.  Do not sponge if you can avoid it; you'll leave a white haze on your tables! 
Next up is time to paint!  We used Nasco's Bulk-Krylic for a nice result.  Once the painting is done, then the kids can embellish, using fabric, yarn, buttons, tissue paper, wooden sticks, colored foam, glitter glue, wiggle eyes, and so much more. 
Here's the sun.  There was also a moon.
The Easter Bunny!
An Egyptian mummy case
My students always loved making these puppets, so much, in fact, that they built puppet theaters, and even once held a puppet wedding.  (Oh why didn't I take photos??)  They made book characters, movie characters, every animal imaginable, crazy creatures, and even puppets of favorite teachers!

Below is a box of some of my (many) samples, in many different stages.  There's Professor Dumbledore, a frog, an eagle, a penguin, and out of sight, a ballerina, a teddy bear, a rock 'n roll band, and more.