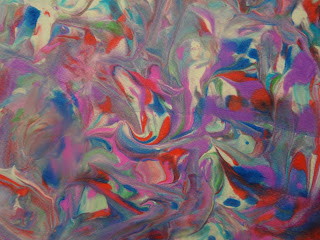
And the final piece of the four, below, is by a 2nd grader. The pieces are all displayed in embroidery hoops. I'm trying to decide whether to let the kids embellish the hoops, by gluing on beads. What do you think?
When you display the pieces in front of a window, they can look pretty awesome; don't you agree?
Then a piece of white fabric was taped over the drawing, so the Sharpie lines could be visible through the toothpaste resist. This way, there were no pencil lines on the fabric.
I mixed toothpaste and aloe hand lotion together in squeeze bottles, and the kids shook them up to mix. (We call this "the shake-shake dance".) Does is have to be aloe? My guess is "no". The process is experimental; there are many alternative resist possibilities. Anyhow, this toothpaste/lotion mix was then used to trace the drawing onto the white fabric.
The work was left to dry until the next class. It will feel rubbery when dry.
The students used tempera paint to paint their designs. They can paint right over the toothpaste/lotion lines, as the toothpaste/lotion will wash away to leave white lines when complete. Below you can see what the piece at the top of this post looked like just after painting was complete. No white lines are visible at all!
I don't have a picture of the next step to share here, but it is easy. Let the paint dry, and then put the fabric in the sink with warm running water. Begin rubbing the surface gently. The toothpaste mix will start to come off, as will excess paint. Make sure you do NOT use washable tempera, or all your color will wash away! Rinse well, and lay on the cardboard to dry.
While my usual favorite school tempera paint is Sax Versatemp, we used Blick tempera for this project, and the colors work especially well. The pigments seem to leave a good deal of color in the fabric. Try your favorite brand, but remember: NOT WASHABLE PAINT!
This process can also be done with acrylic paint, but the final product will be stiff, whereas the final product with tempera is quite soft. I have also used this process with fabric dyes to paint a shirt.
Above and below, you see my students adding additional details as desired with Sharpie markers. We then inserted them into the embroidery hoops to display, as you can see in the images at the top of this post.
I know a number of people do a similar imitation batik process using the blue Elmer's gel glue. I tried it once when we ran out of toothpaste, but we found it very difficult to wash out. I have also experimented, with some success, with using a hardening hair gel as the resist. Don't be afraid to experiment! The bonus is that your classroom will smell minty-fresh while you are using the toothpaste, and that everyone will think it is ridiculously silly to be using toothpaste for art.
I have approached this project using a different theme for the artwork each time, and have SO many more ideas. The possibilities are unlimited. You can view my other posts about this process here, here, here, here, here, and here.
One last thought - I think it would be a great idea (though I haven't done it) to contact a local dentist, especially one that specializes in children's dentistry. You might be able to get them to both donate toothpaste (I buy mine at the dollar store for this project), and display the completed artwork!


